Plate joining
Top plate
The top plate halves are first thicknessed in the thickness sander. I
generally thickness them to between .110" and .115". After the halves
are thicknessed, the edges are run over a jointer and/or planed with a
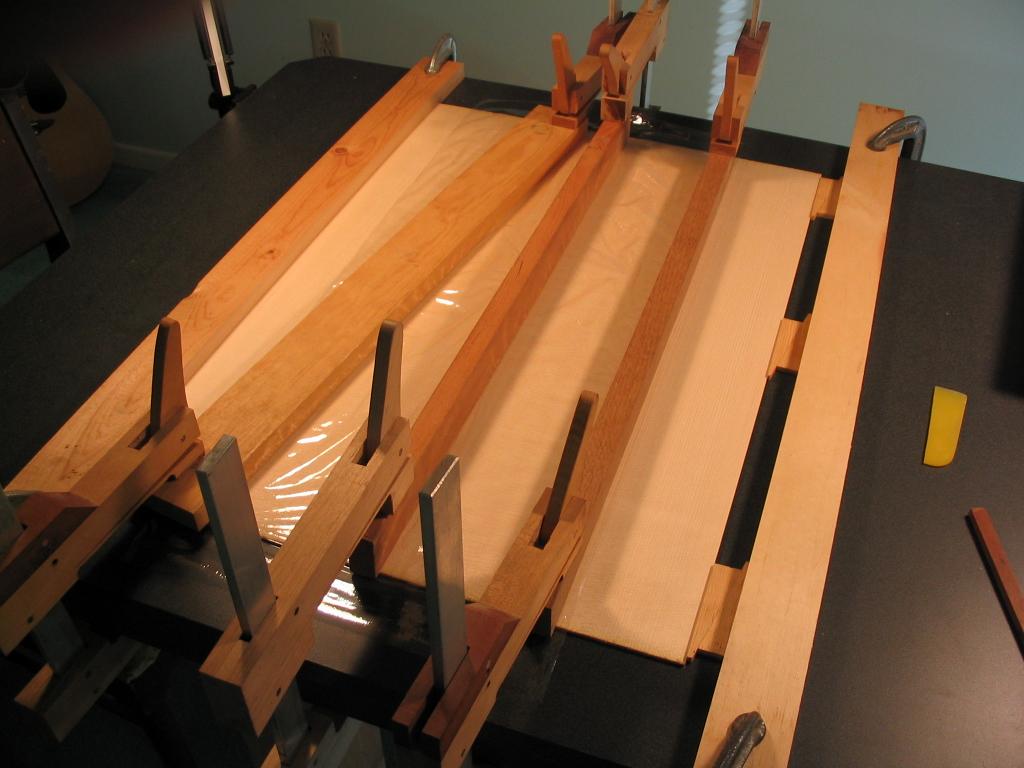
handplane to form a perfect joint. Glue is applied to the joining edge,
and the halves are then glued together. Clamping is accomplished with
pairs of wedges and two parallel boards clamped to a formica tabletop.
The halves are placed together, and the wedges are squeezed together by
hand to bring the halves together. Plastic wrap is placed over the
joint, and a caul is clamped lightly over the joint to keep the faces
aligned - this is the middle caul seen in the photo below. The wedge
pairs are then tapped together to tighten the joint. The wedges can
exert a huge amount of force, so don't tap them too much or the joint
may become glue-starved. A couple of additional cauls are seen below,
to keep the halves from bowing.
After the halves have been glued together, the top is cut to the shape of the guitar body on the bandsaw.
Back plate
The back plate is fashioned in the same way as the top plate. The only
difference is that a binding and purfling strip is glued between the
halves.
When the glue has dried, the back plate is also cut to the profile of
the guitar body. However, it is cut about 1/8" larger all around to
allow for the greater arching on the back. The expanded outline can be
drawn by putting a small washer against the body profile template and
putting the pencil inside it to trace the outline.
Previous Index Next
Comments/questions: jsevy@cs.drexel.edu