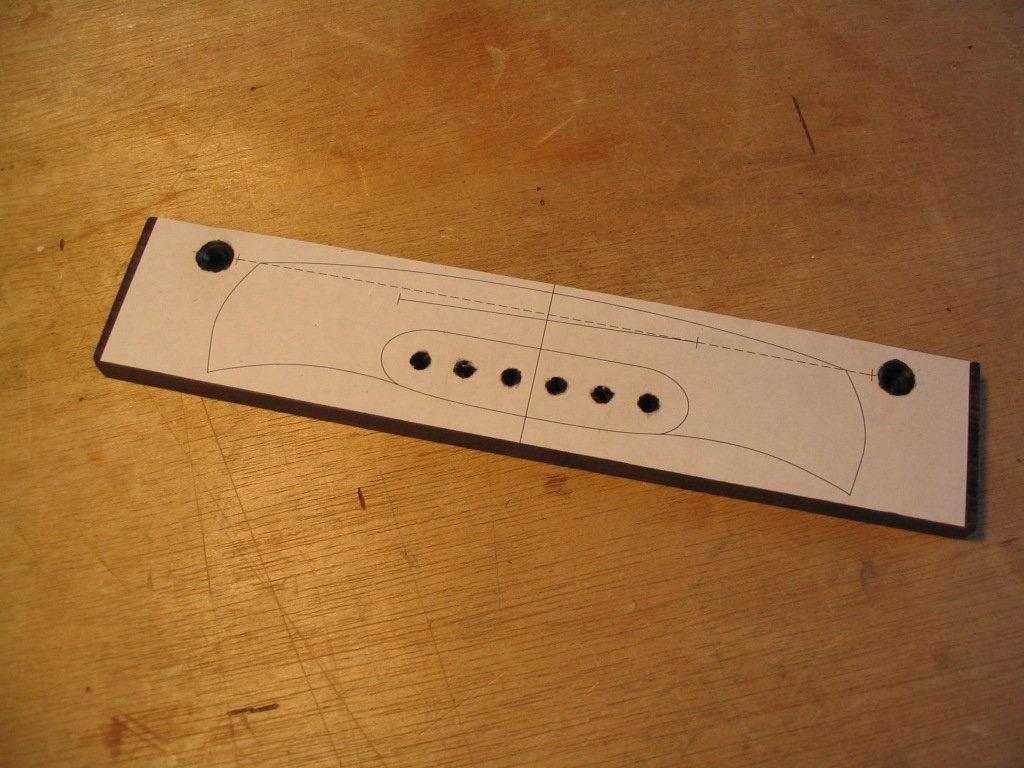
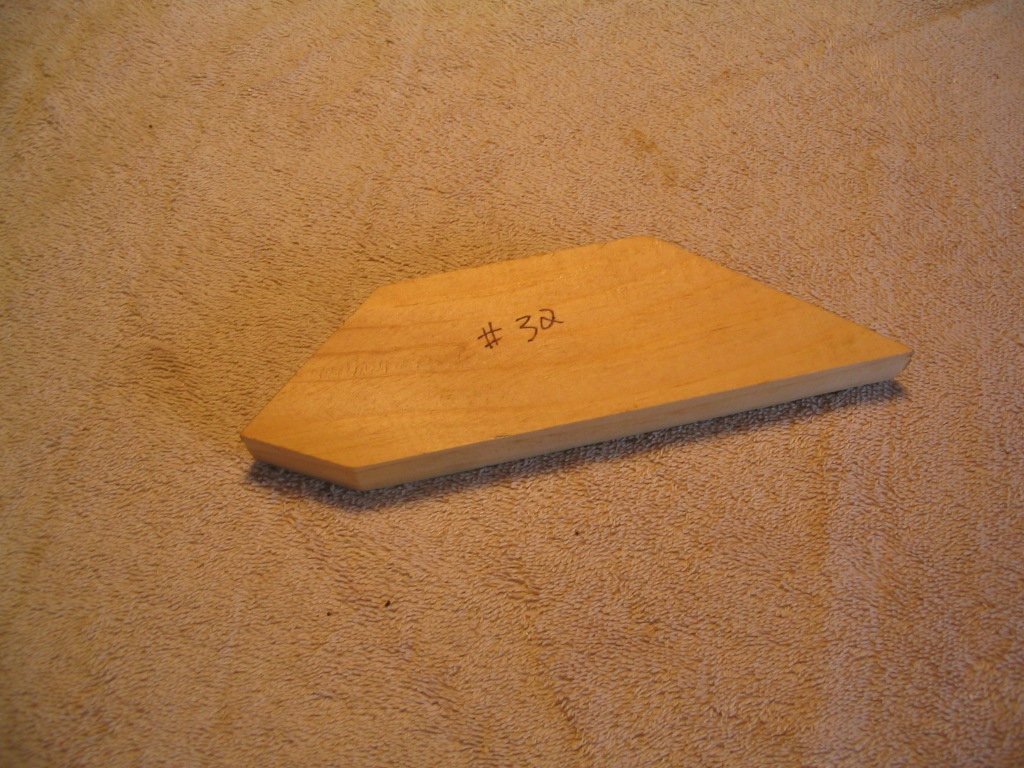
Making and attaching the bridge
The bridge is made of a hard wood, generally the same as is used
for the fretboard. I use a blank 3/8" thick, and a CAD drawing of the
bridge. The CAD drawing precisely positions the bridge pin holes, which
determine the spacing of the strings. The drawing also indicates the
position of screw holes used to attach the bridge to jigs for
subsequent machining operations. The design is printed out and
attached to the bridge blank with spray adhesive.
The bridge pin holes are drilled with a 3/16" bit, and the holes for
the screws used to secure the bridge during subsequent machining
operations are drilled and countersunk.
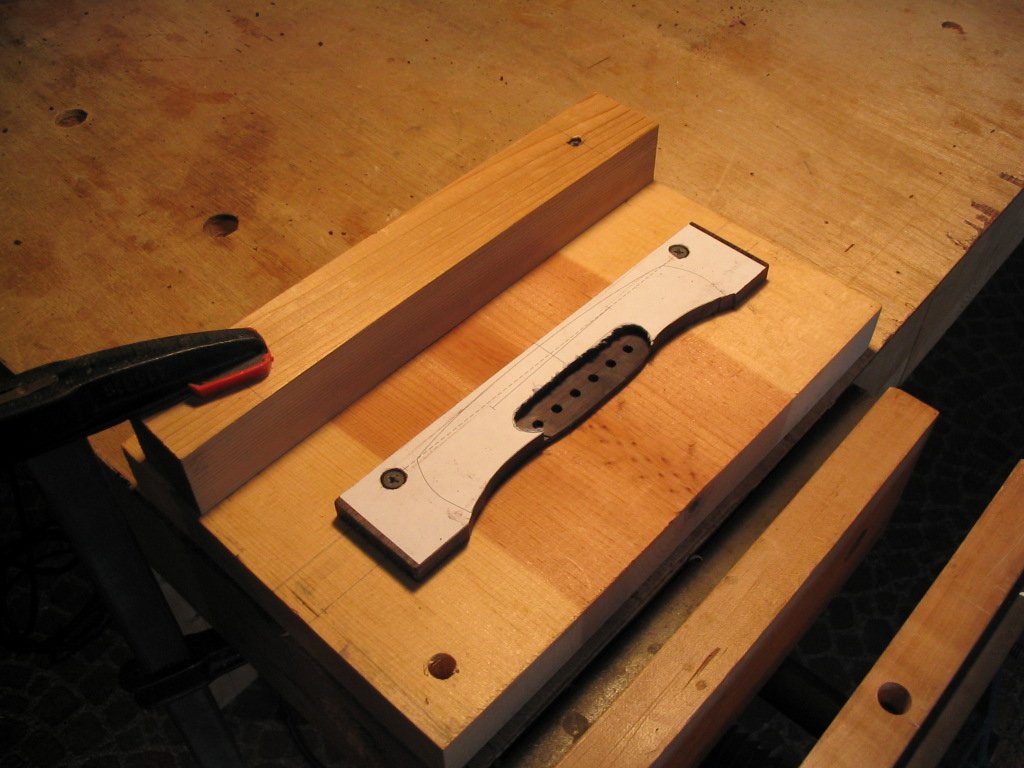
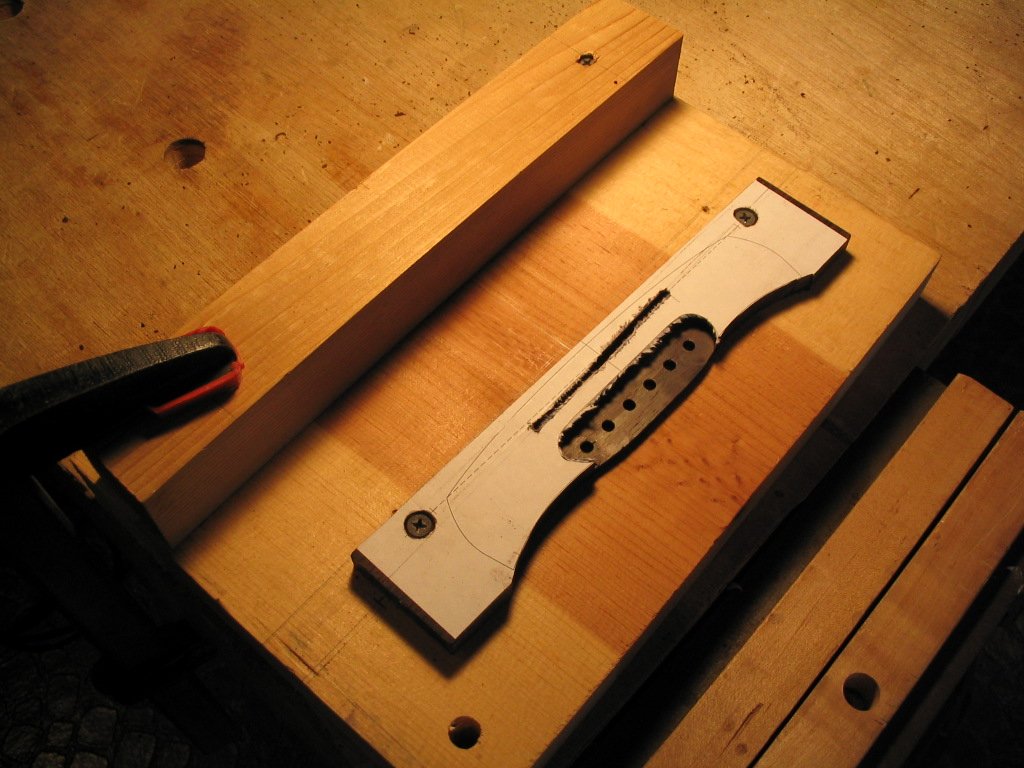
The bridge blank is then attached to a jig used to guide a router as
the shelf for the bridge pins is cut. Note that the back profile of the
bridge is cut first, as the outline is destroyed by the router cut.
The bridge is then shifted to a second pair of mounting holes so the
saddle groove can be cut with a 1/8" bit. The saddle groove is angled
to provide compensation for the strings. The saddle is set back 1/8" on
the bass side, making the bass strings slightly longer than the treble strings
to compensate for a change in intonation when the strings are pressed
against the frets.
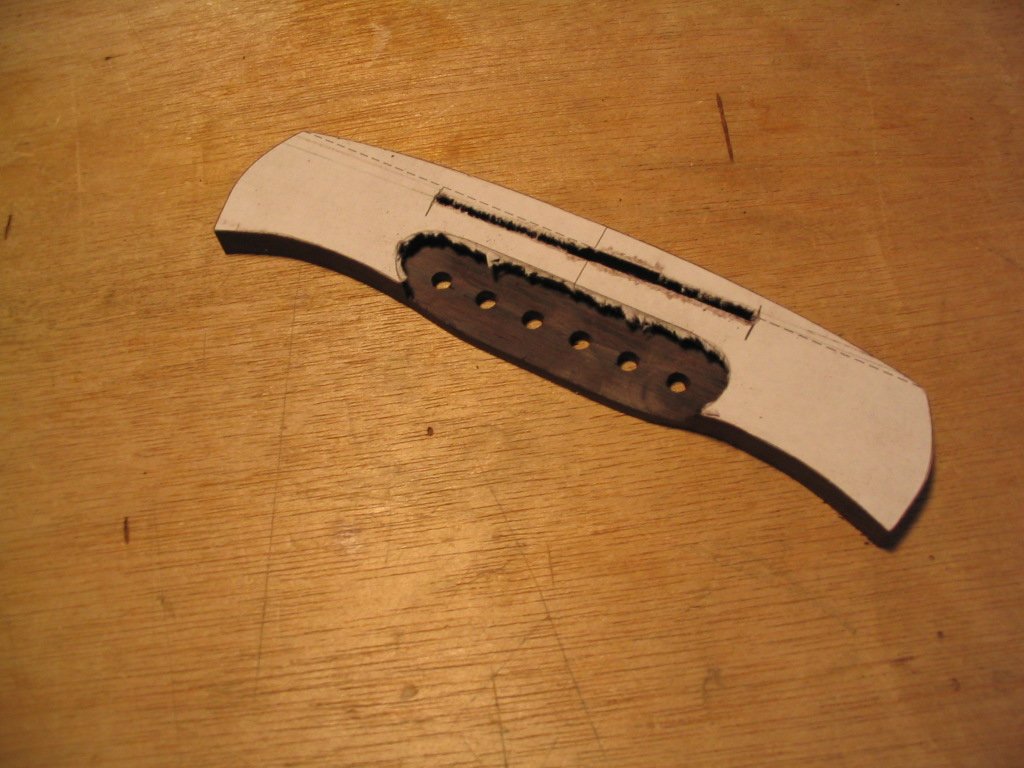
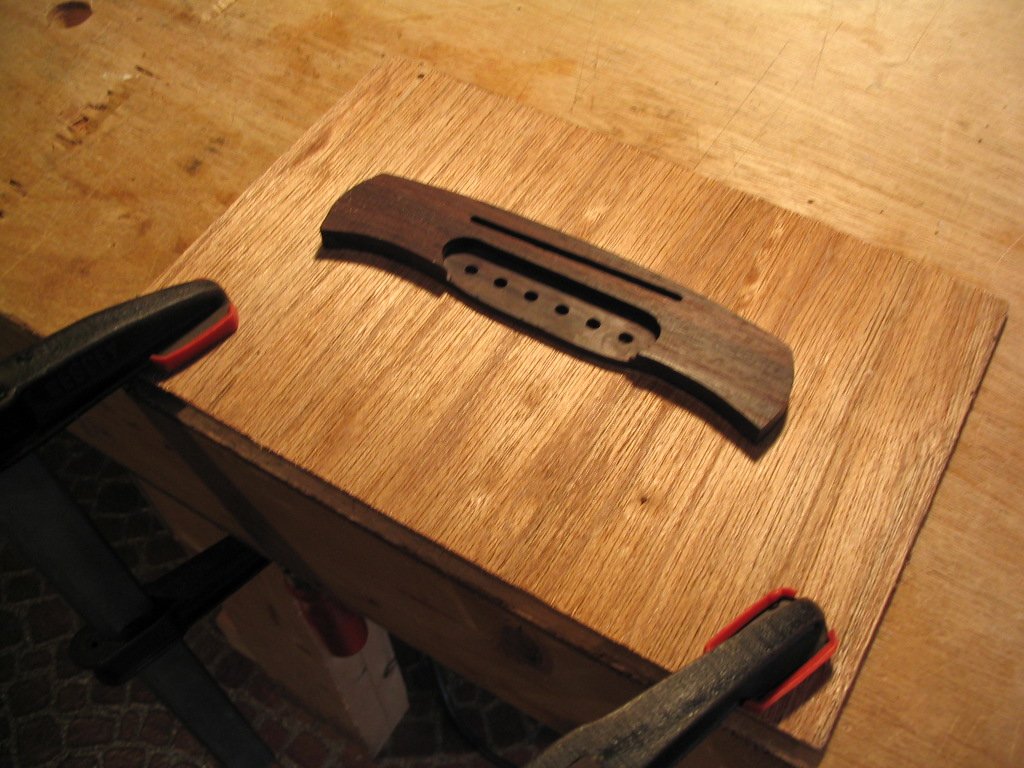
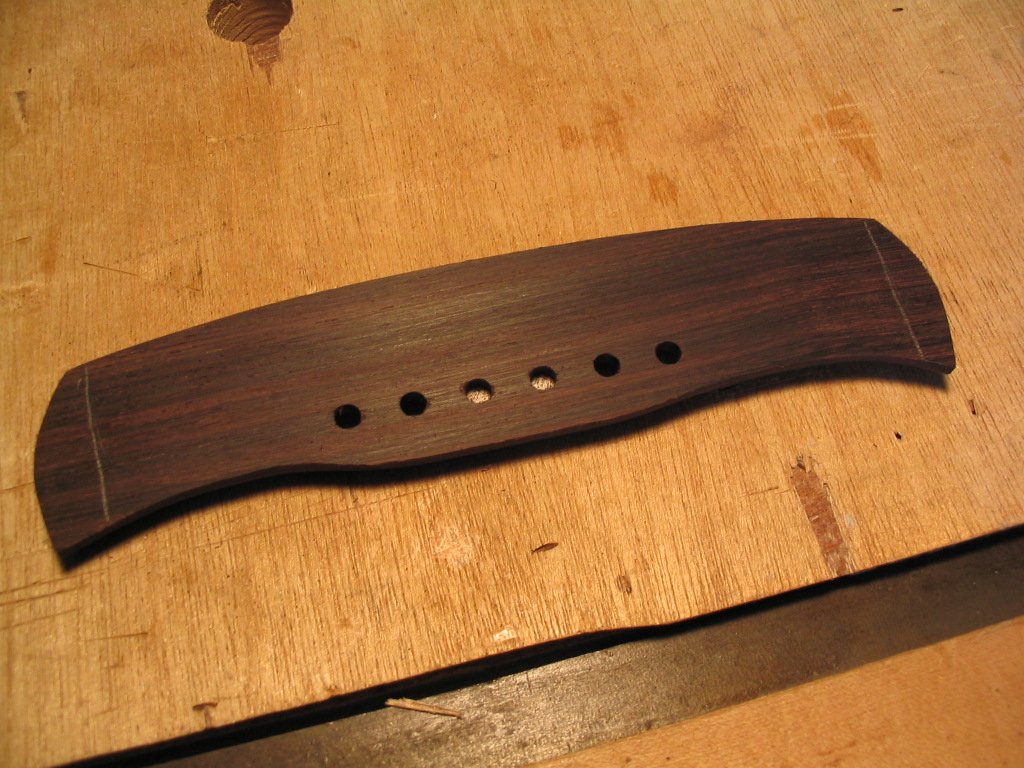
The outline of the bridge is cut and shaped with scrapers and files.
The bridge blank is then attached to a workboard with double-faced tape for carving.
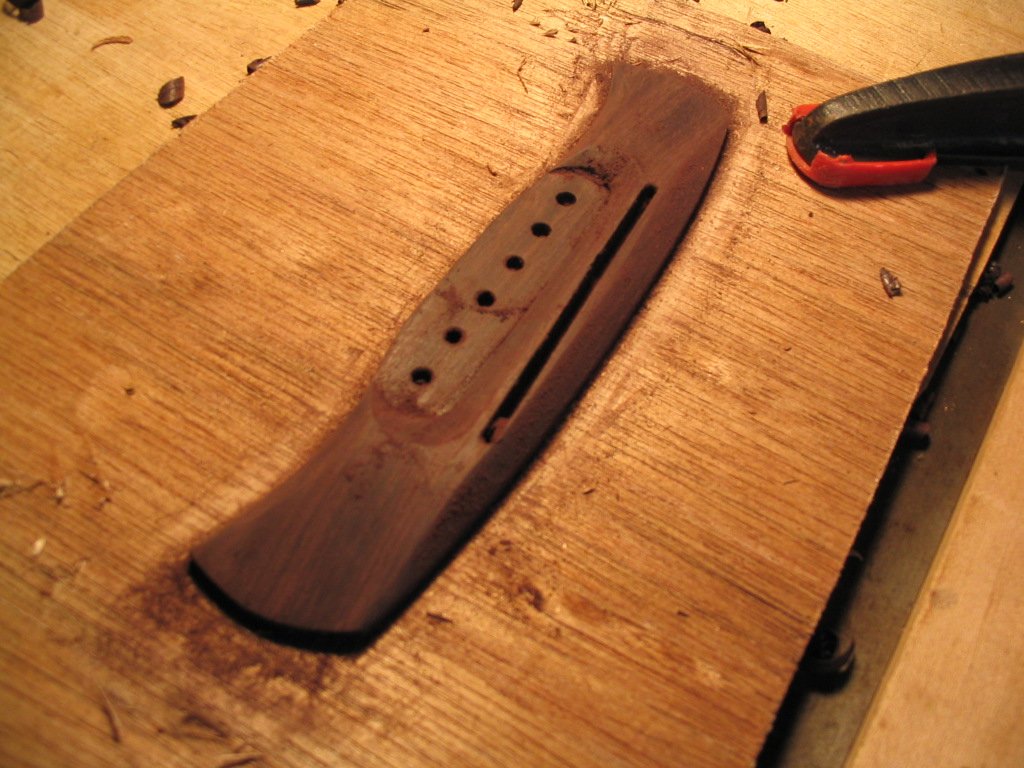
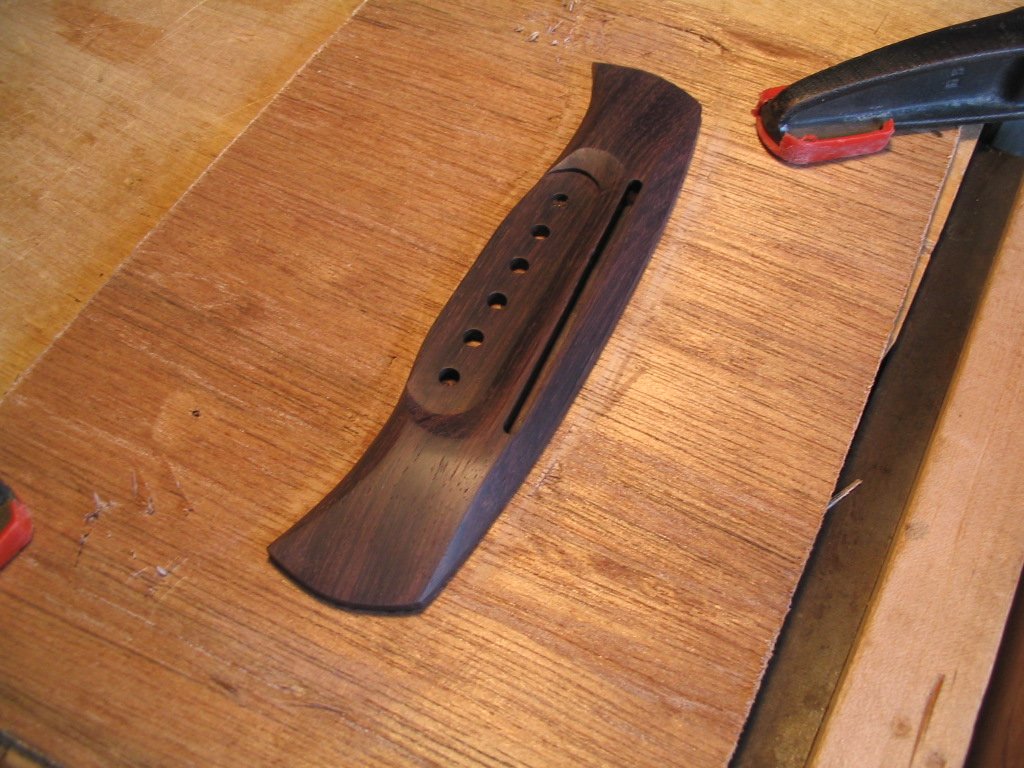
The bridge is carved with chisels, scrapers and sandpaper,
When carving and sanding is complete, the bridge is polished with fine-grade steel wool.
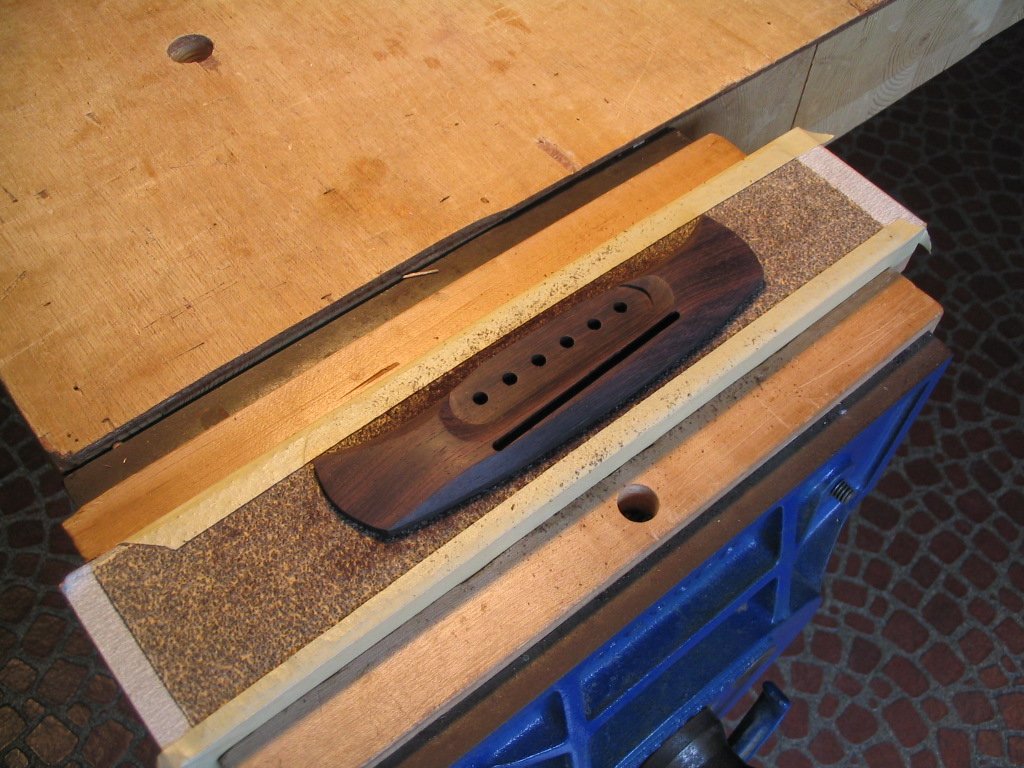
The bottom of the bridge must be made concave to fit onto the arched
guitar top. This is accomplished by attaching corase sandpaper to a
convex-curved caul whose arching matches that of the guitar top, and
sanding the bridge bottom to the desired arch.
Pencil lines on the bridge bottom are used as indicators, and are sanded off
when the arching is complete. Below, more sanding is needed.
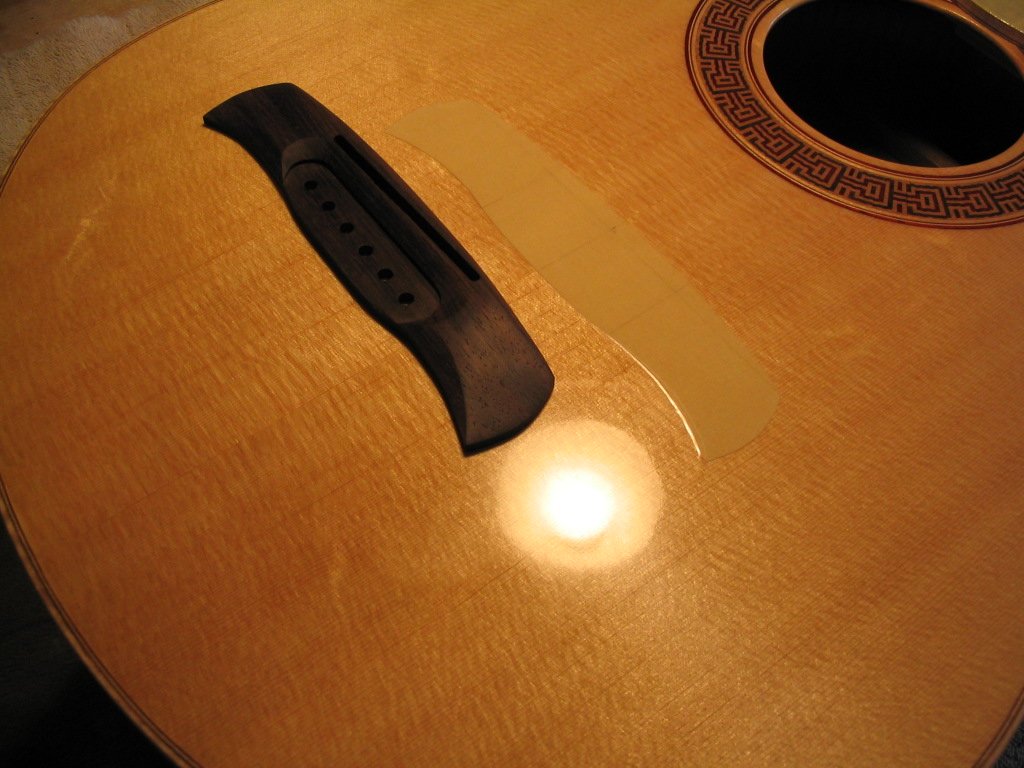
The completed bridge is then glued to the guitar top. The bridge profile was masked before finishing.
The bridge outline is cut with an Xacto knife, and the masking tape is removed to reveal clean wood for a gluing surface.
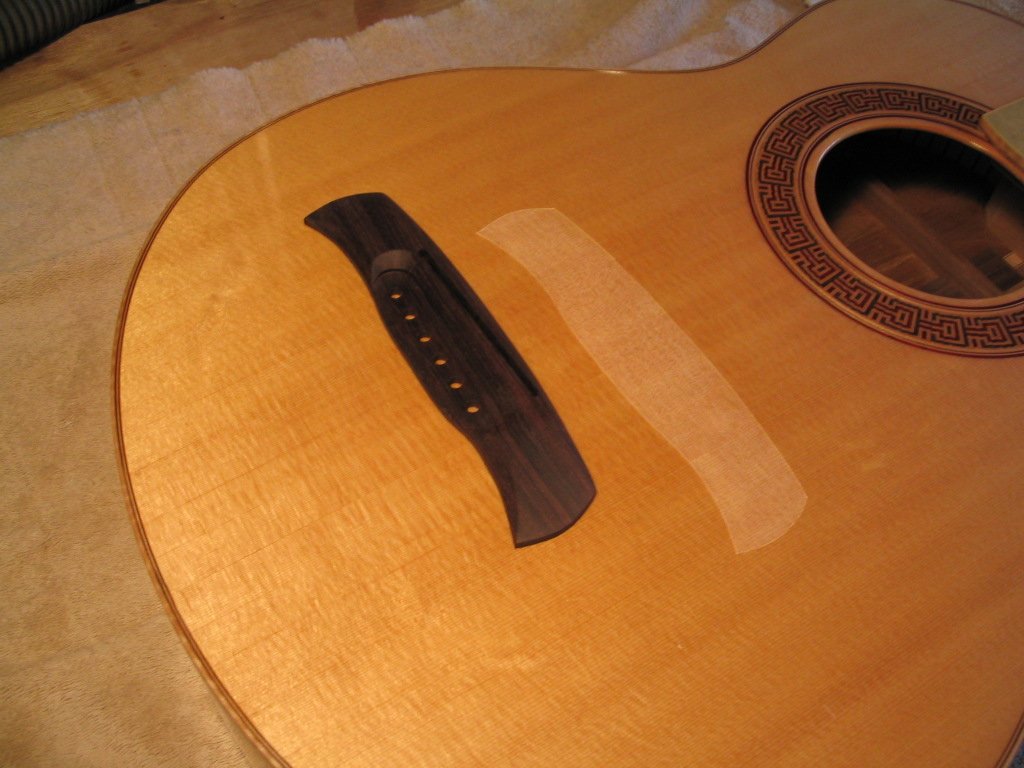
The bridge is dry-clamped in position and two of the outer bridge pin
holes are drilled through the top. Short lengths of 3/16" dowel are
placed in the holes during gluing to keep it from slipping out of
position when clamping pressure is
applied. This isn't absolutely necessary, but can make positioning the
bridge during gluing simpler. The positioning dowels are drilled out
when the glue has dried and the other pin holes are drilled through the
top.
A caul is attached to the bridge plate on the underside of the top with
small pieces of double-faced tape. The caul is the same as that used to
attach the bridge plate to the top when the braces were attached.
Recall that the surface of the caul was made convex to match the
arching of the top.
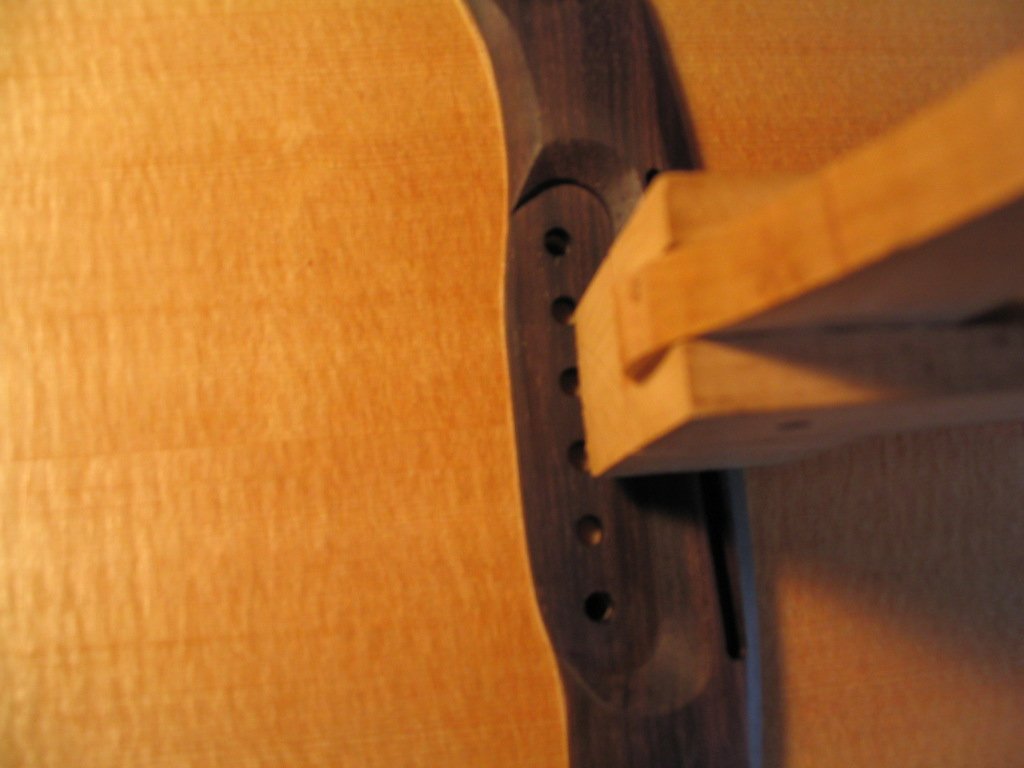
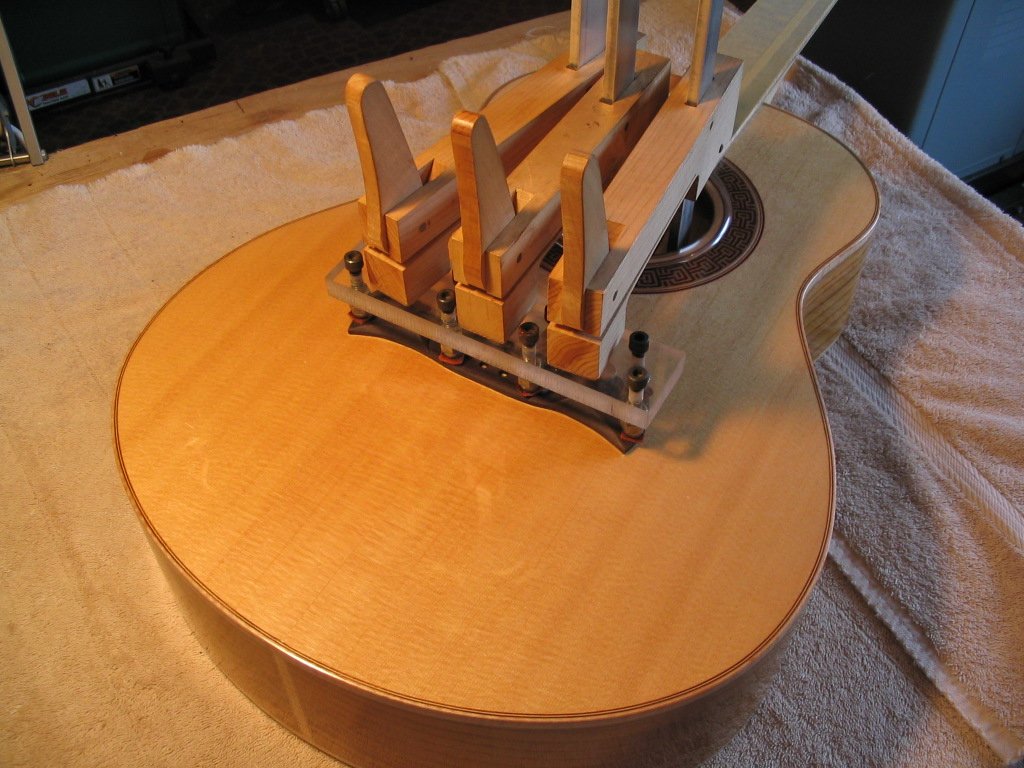
Titebond glue is applied to the bottom of the bridge, it is placed in
position, and the short lengths of dowel are placed into the predrilled
pin holes to poition the bridge. The bridge is then clamped with three
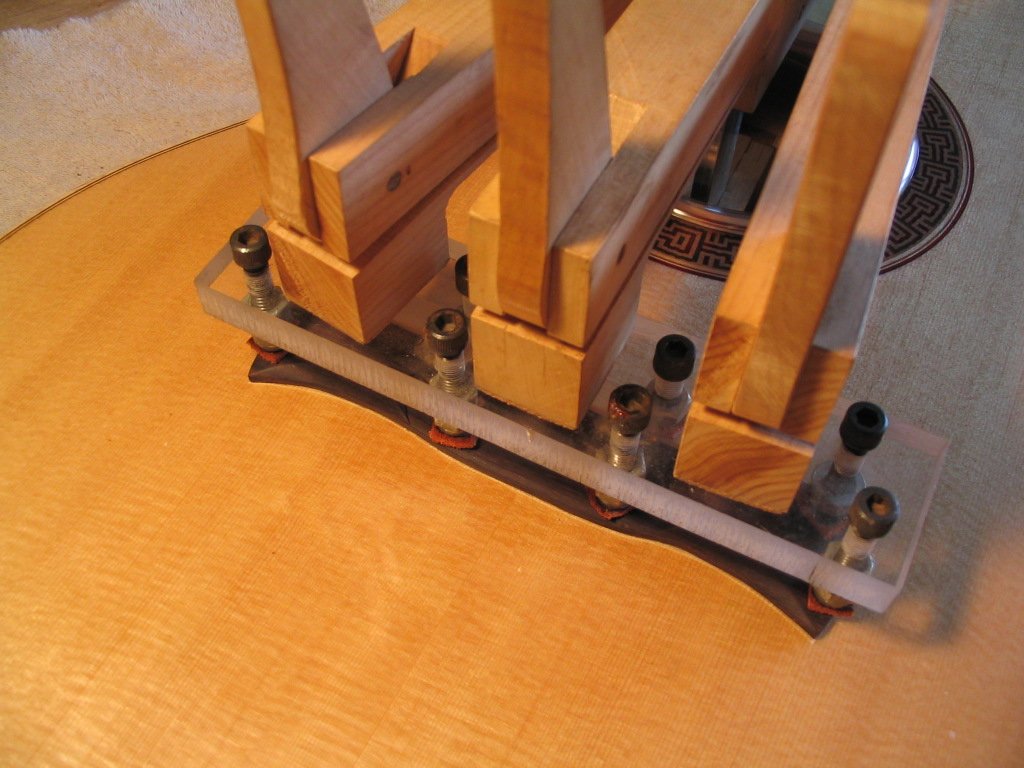
cam clamps, using a custom plexiglass caul.
A close-up of the plexiglass caul. The caul has eight hex-head
screws threaded into it; each screw has an acorn nut at the end with a
piece of leather glued over it. The screws are used to accomodate for
the irregular top surface of the bridge, so that each contacts the
bridge when clamping pressure is applied. The leather on each acorn nut
protects the bridge surface.
A small detail visible in this picture is the protector placed aroung
the soundhole, so the clamps won't bump and dent the edge of the
soundhole when they're inserted or removed. The protector is simply a
length of clear vinyl tubing, slit lengthwise.
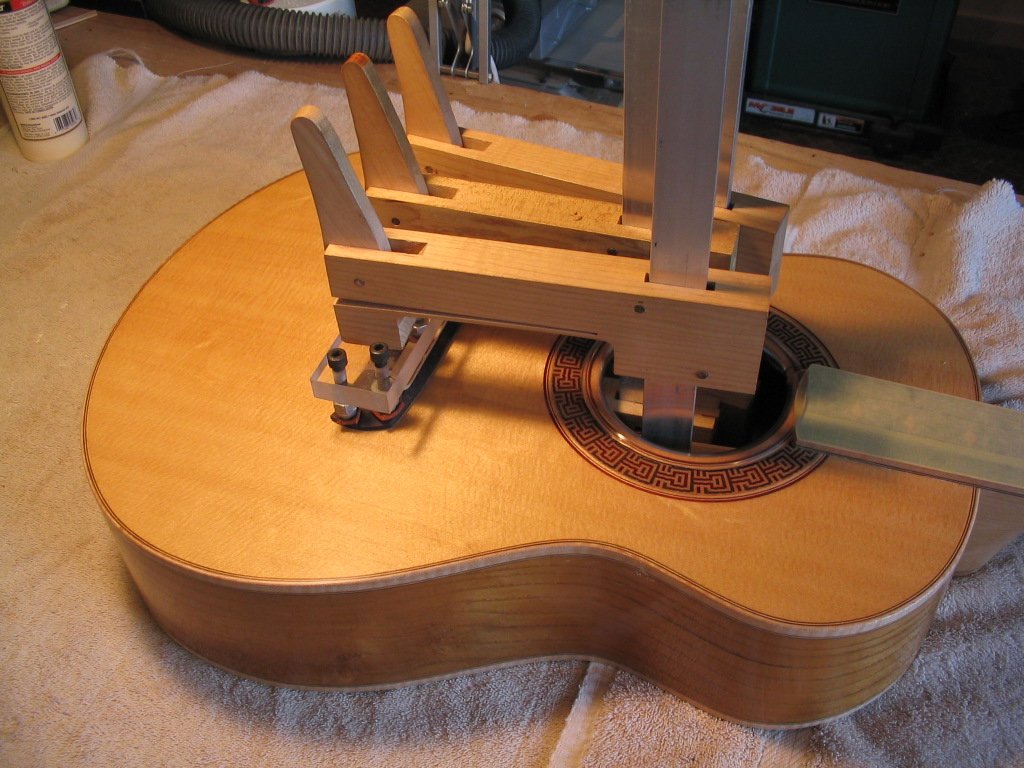
When the glue has dried, the clamps are removed. The middle clamp
is then reattached to hold the bridge caul in place while the bridge pin holes are drilled through
the top. When this is finished, the caul is removed from the bridge
plate. The pin holes will be tapered later when the pins are fitted
when the guitar is strung up for the first time.
Previous Index Next
Comments/questions: jsevy@cs.drexel.edu