Bending the sides of an acoustic guitar into the shape of the outline of the body is probably the woodworking operation that’s most unique to guitar building. While some cheaper instruments use plywood molded into the desired shape, all higher-end guitars have sides that are solid wood bent into the desired shape through the use of heat.
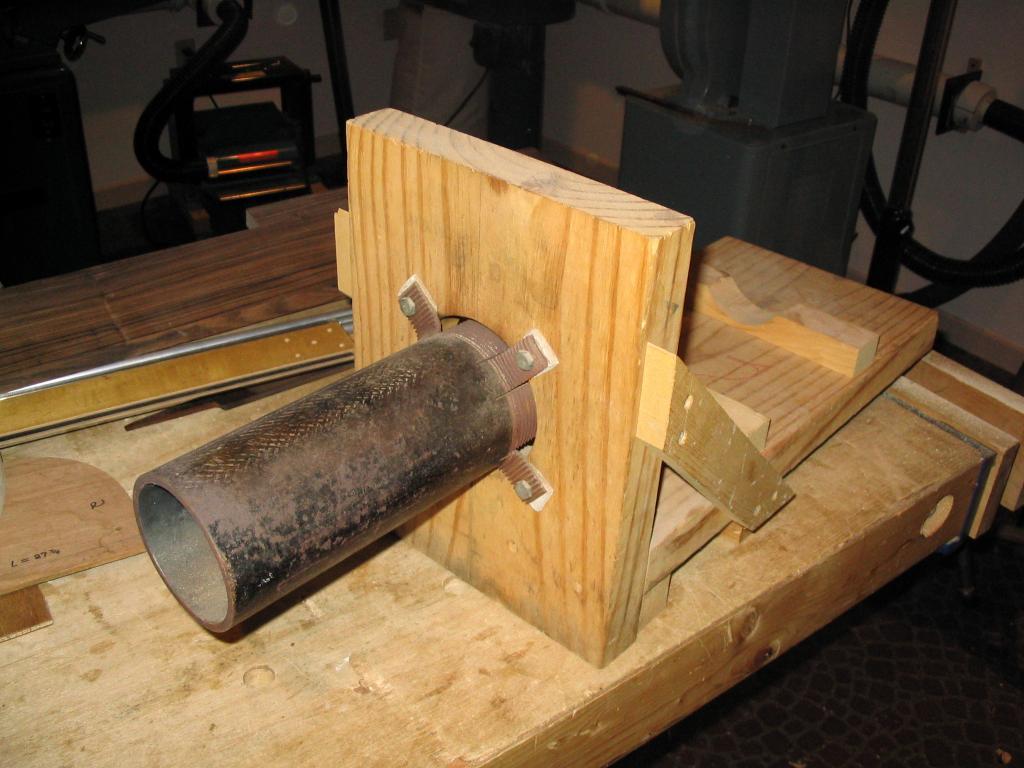
There are two basic approaches to bending the sides of a guitar. The traditional approach is “hot pipe” bending. In this method, the sides are bent by hand over a cylindrical pipe (“bending iron”) that’s heated with a propane torch or an electric heater. The illustrations below show the front and back view of my bending iron, which is a piece of 4″ iron pipe in an L-shaped wooden holder. A propane torch sits in the cradles on the wooden ledge and heats the inside of the pipe. (Not shown is an aluminum baffle that fits in the front of the pipe and keeps the torch from roasting my navel when I’m bending…) Notice the nifty asbestos washers insulating the “tabs” of the pipe where they bolt to the wooden holder.
The sides are dampened, mostly to keep them from charring, and are then pressed onto the hot pipe (leather gloves are handy, or well-callused hands). When the wood reaches the right temperature, it actually becomes plastic: it “gives”, and rather than springing back after pressure is released it holds the bend after it cools. The resins in the wood soften at a high enough temperature, allowing the fibers to slide past one another as the wood bends; when the wood cools, the resins solidify and the wood retains the bend. The sides are bent about 6″ at a time, starting at the waist, and checking the profile against a template to make sure the profile’s right. While this is an effective and fun way to bend the sides – especially in winter, with the heat from the pipe and the aroma of hot wood – it takes a good bit of experience to bend the wood to the correct profile, without any unsightly “lumps”.
I’ve since switched to a simpler, more accurate method for bending sides, using a guitar-shaped form and a silicone heating blanket. The form provides the shape and the silicone blanket provides the heat. A blanket of the correct size (36″ long by 6″ wide) can be purchased from luthierie supply houses like the Luthiers Mercantile. These blankets are thin (1/16″ thick) silicone with resistance wires embedded inside that act as heating coils, and a cord that gets plugged into an ordinary electric socket. They heat rapidly, and can generate extremely high temperatures – hot enough for wood to burn! Thus it’s important never to leave one of these unattended when it’s plugged in. In fact, to keep the temperature down, I unplug the cord periodically while bending; there are also heater control units that allow you to adjust the maximum temperature that the blanket will reach.
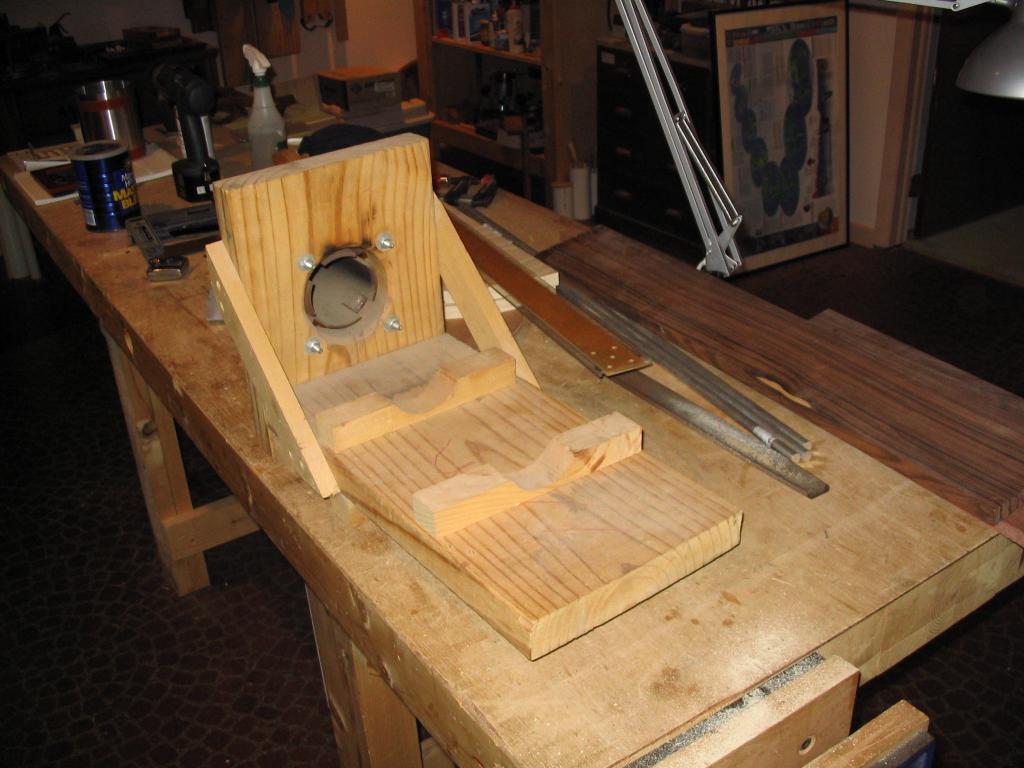
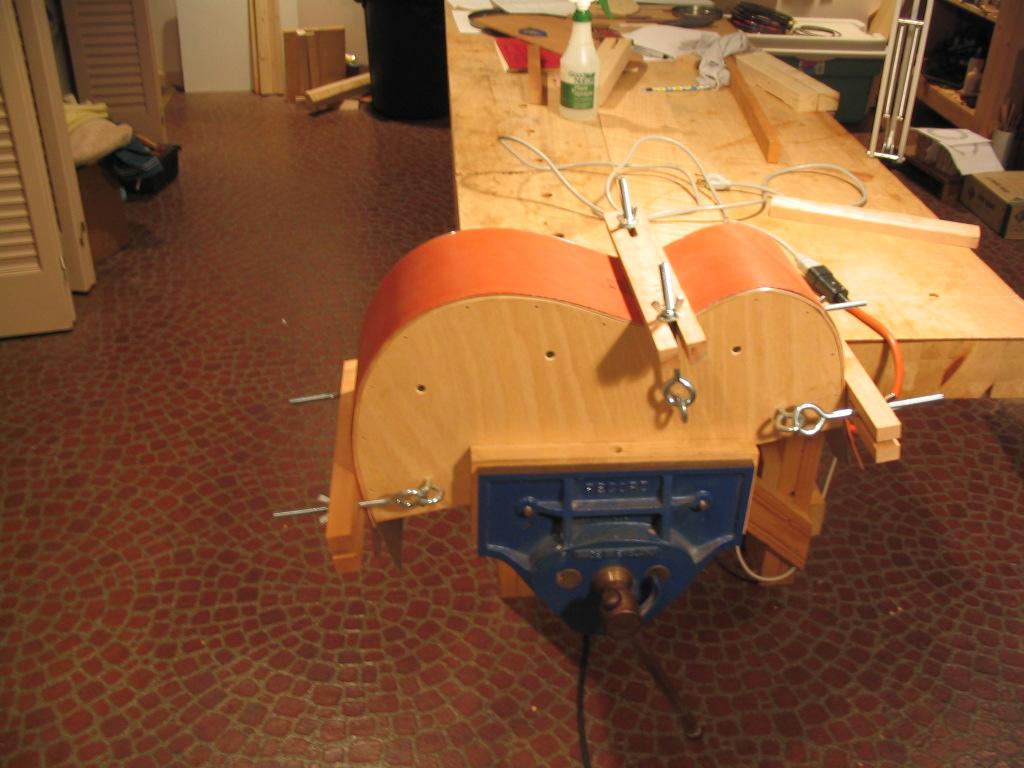
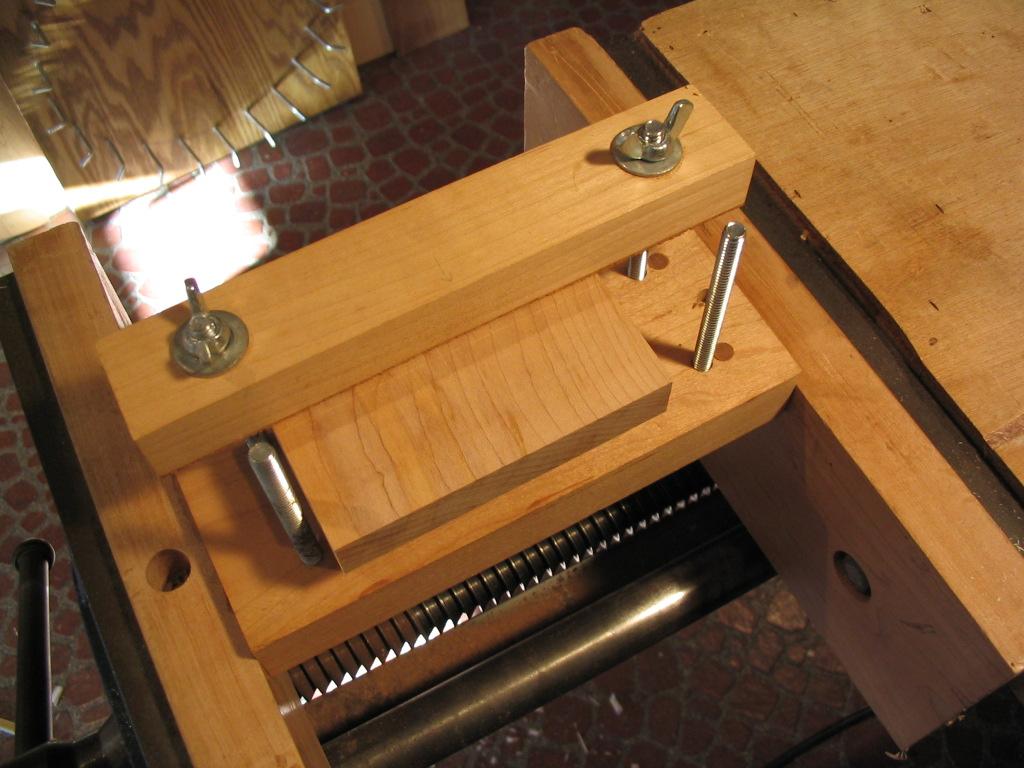
The photo below shows the bending form. This is built from two plywood sides cut to the exact profile of the inside of the side profile – i.e., it’s the body profile inset by the thickness of the sides. The sides are joined by 1/2″ aluminum rods spaced every 2″ or so along the perimeter. The purpose of the eye hooks will become apparent during the bending operation – they’re used to secure clamping cauls that hold the sides in the mold while they cool. The red silicone blanket can be seen in the background.
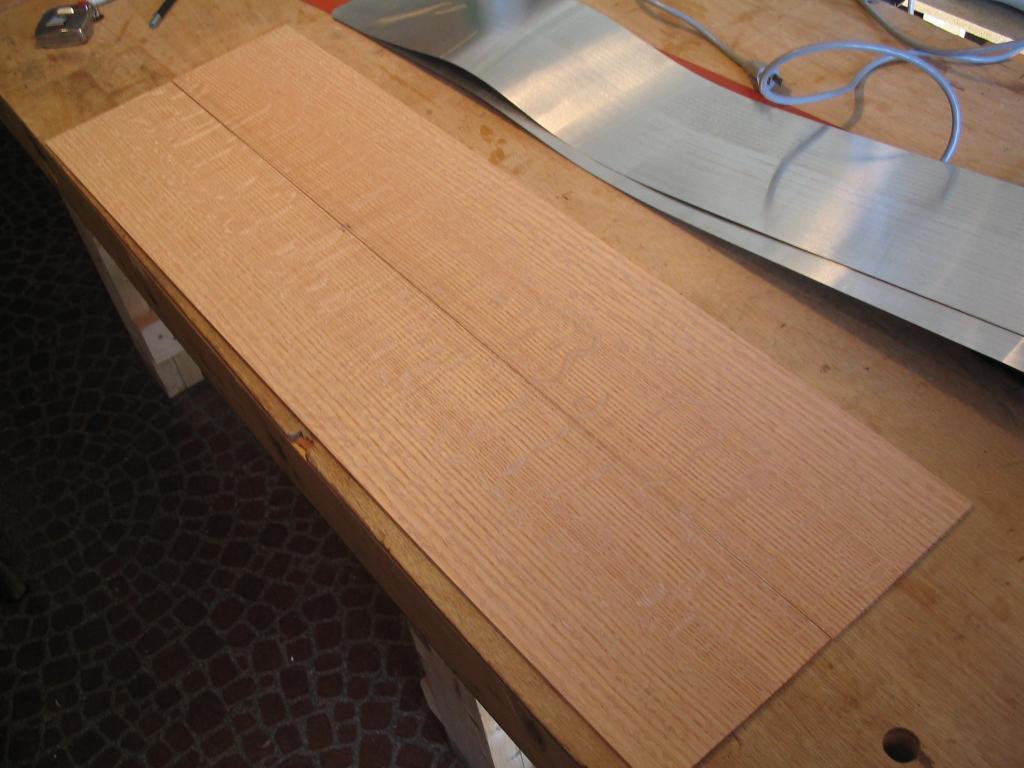
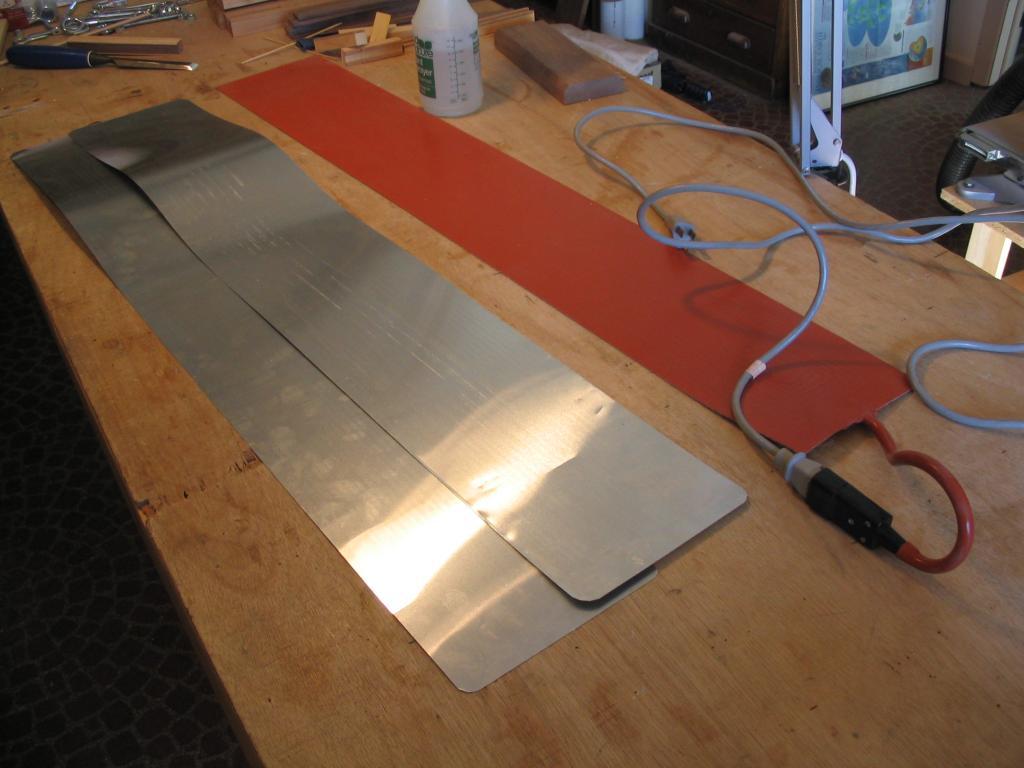
The sides before bending are shown below, next to two aluminum sheets that will sandwich each side as it’s bent. Notice that the sides have been marked at the waist to position them on the form.
The aluminum sandwiching sheets and silicone blanket are shown below.
The side to be bent is first wetted thoroughly – I put it in the shower for a few moments – and then placed between the aluminum sheets. The wetting helps to keep the wood from burning, and also forms steam to penetrate through the sides to speed the heating. The silicone blanket is placed on top, and the whole assembly is set atop the form with the waist marking positioned above the waist in the form. The waist clamping caul is placed on top, and the silicone blanket is plugged in to start the heating.
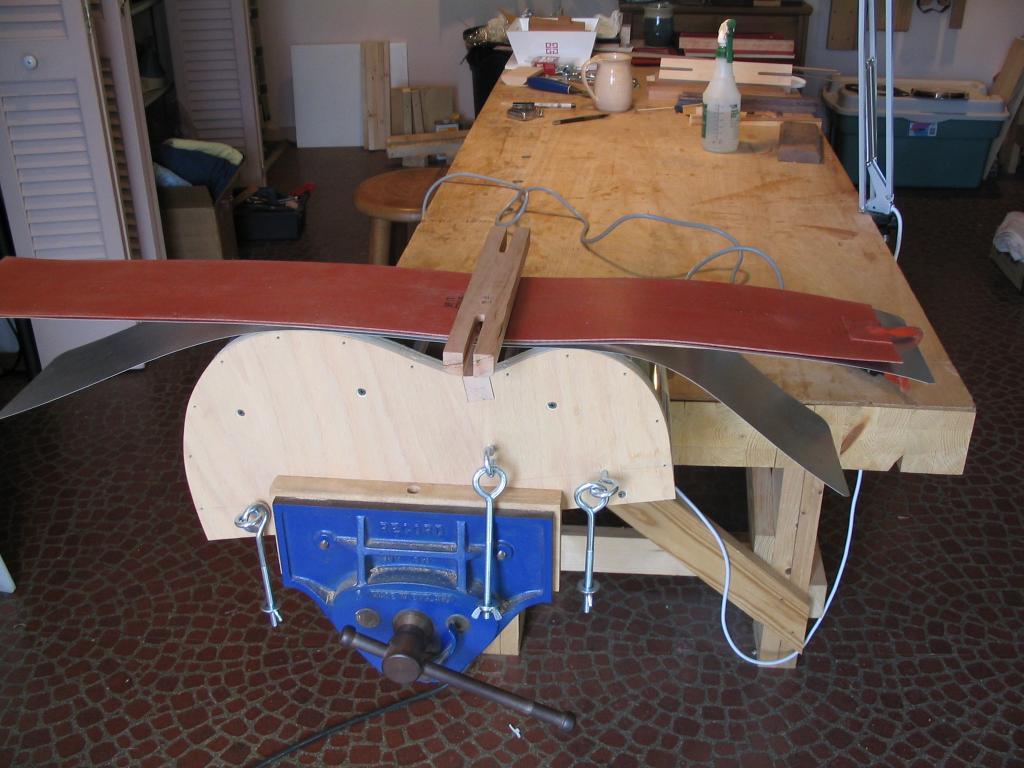
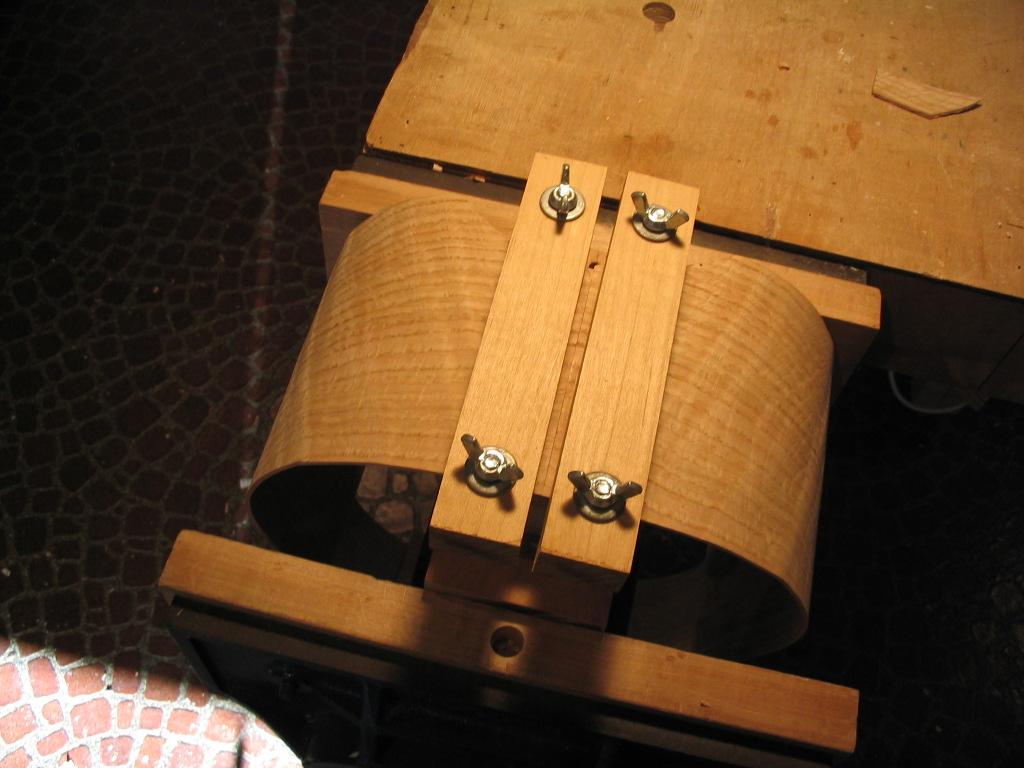
Pressure is applied to the waist caul; when the wood has heated to a high enough temperature, it will “give”, and bend down toward the form. At some point it will be possible to bring the eye hooks up and slide them into the slots in the caul. The wing nuts can then be used to snug the side down against the form.

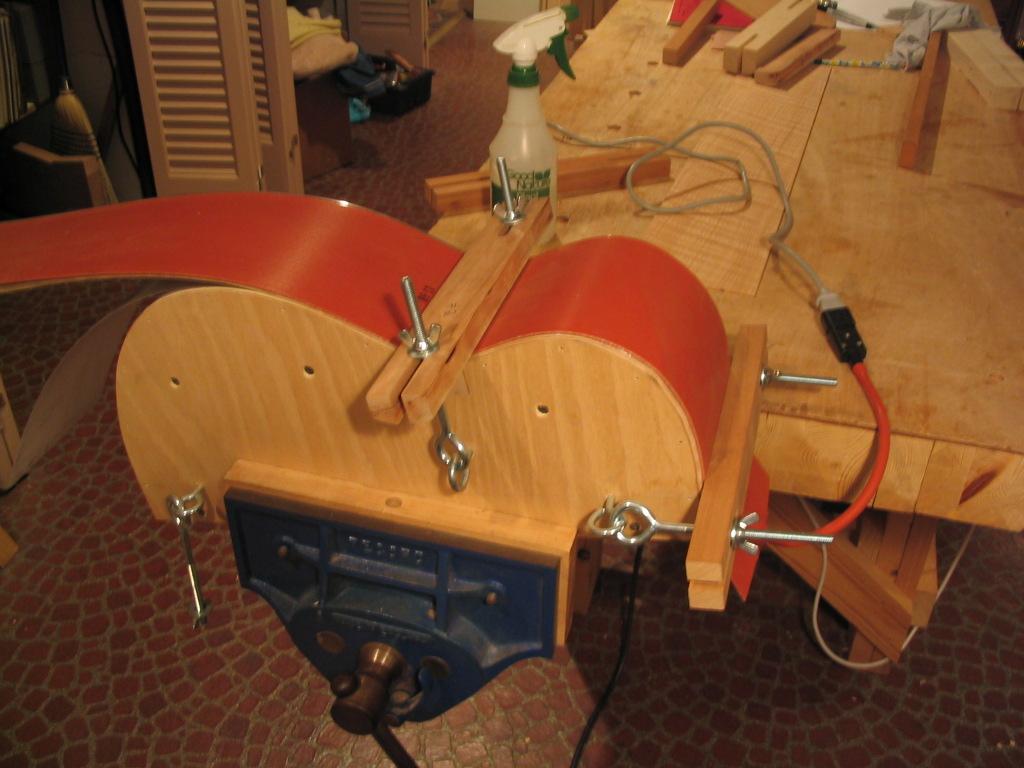
The head caul can now be used to press the upper bout down against the form. Again, the side will be felt to “give”, and slowly bend down to the form. The eye hooks can be slid into the caul’s slots, and the wing nuts can snug the side to the form.
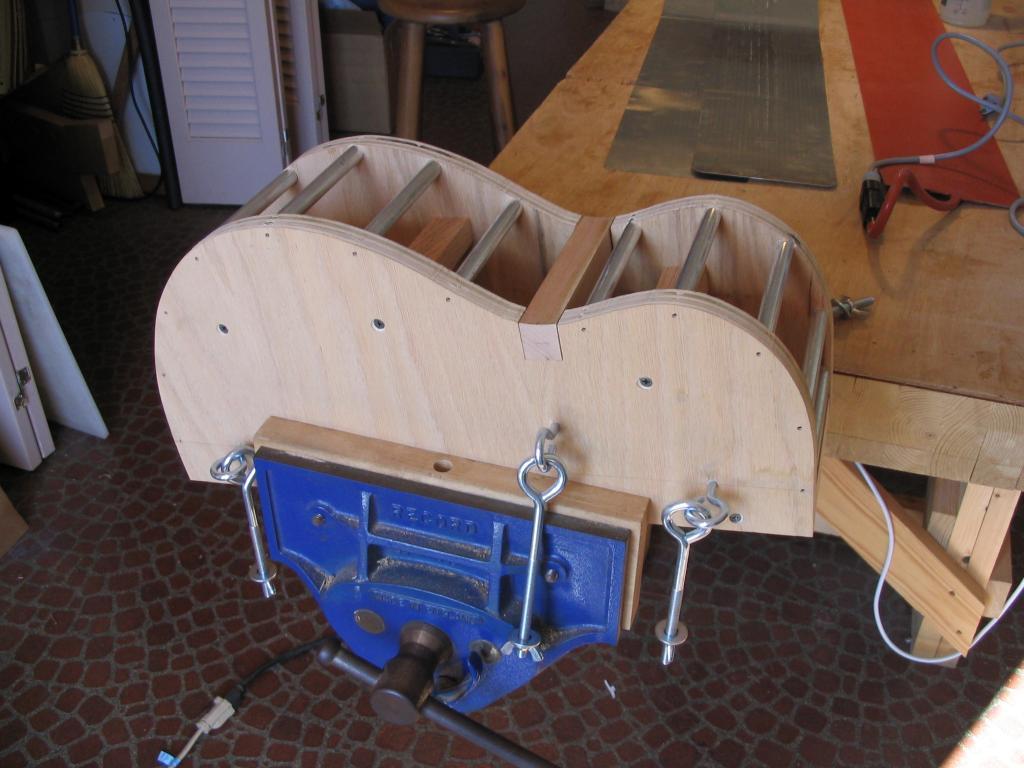
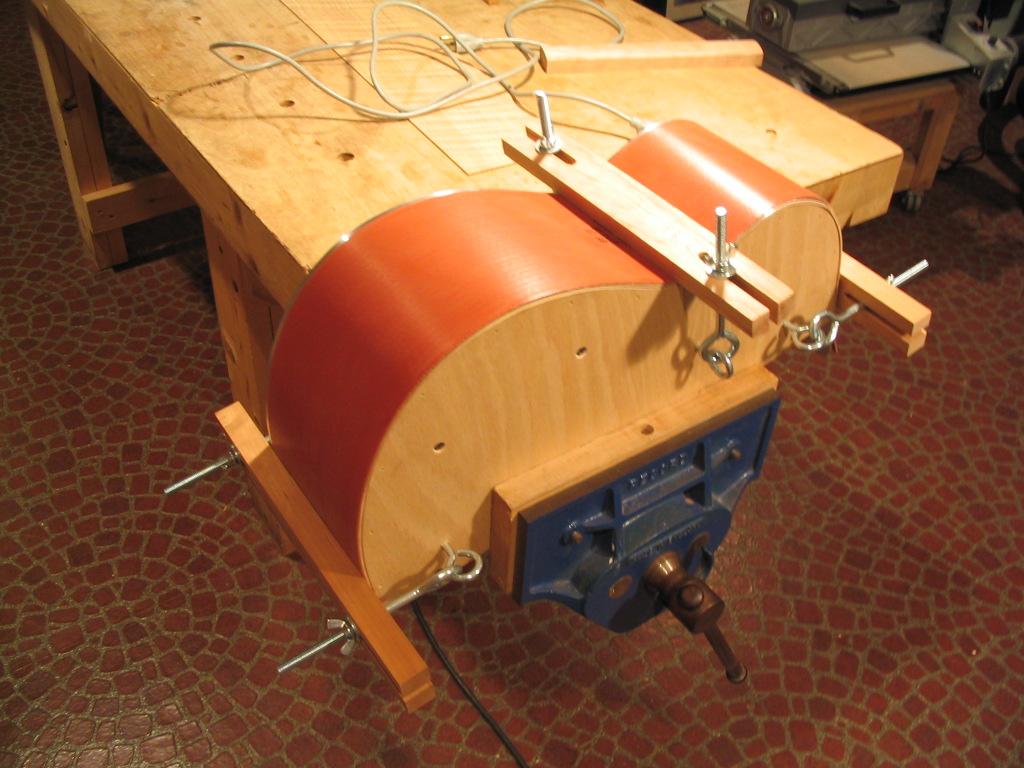
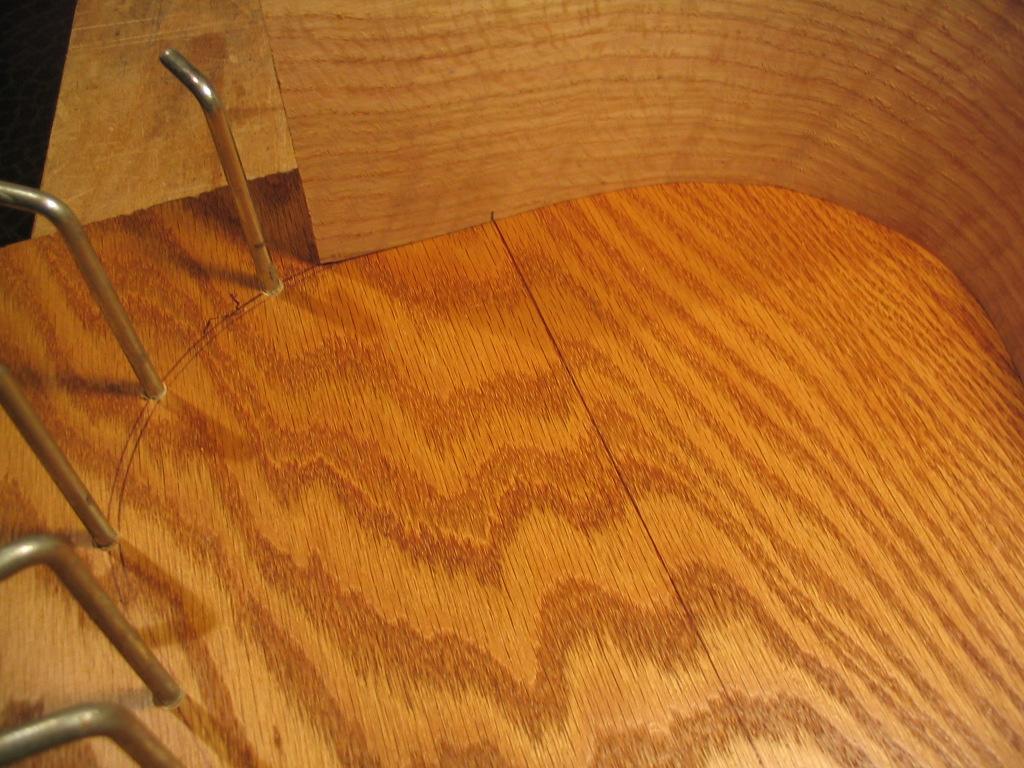
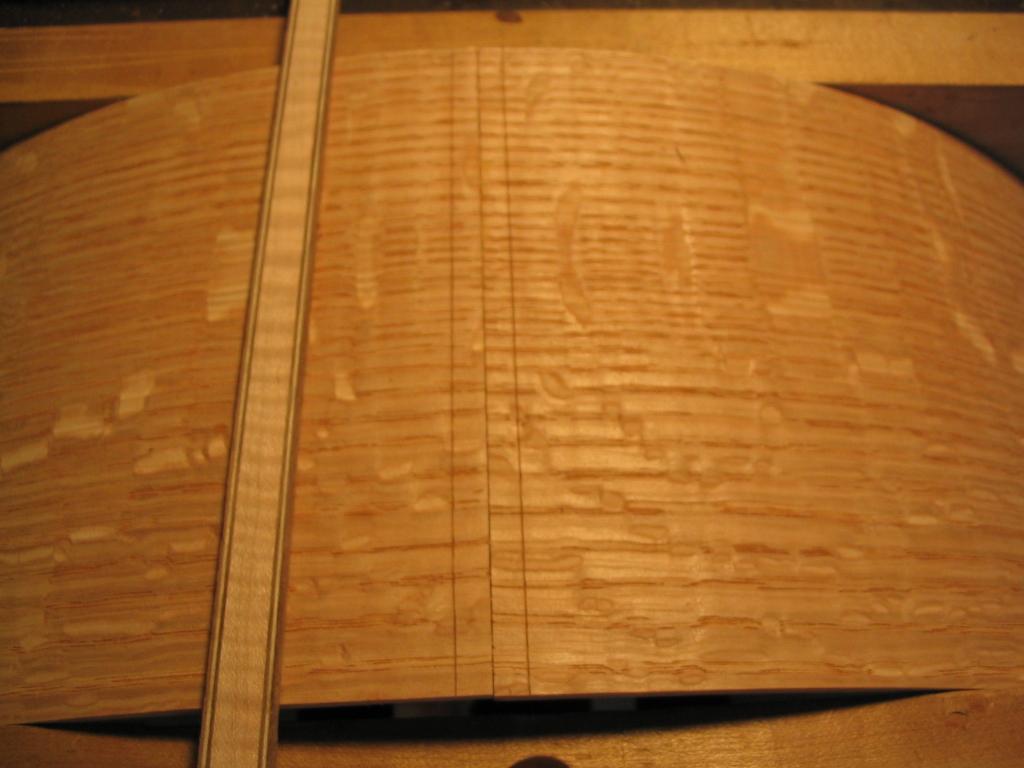
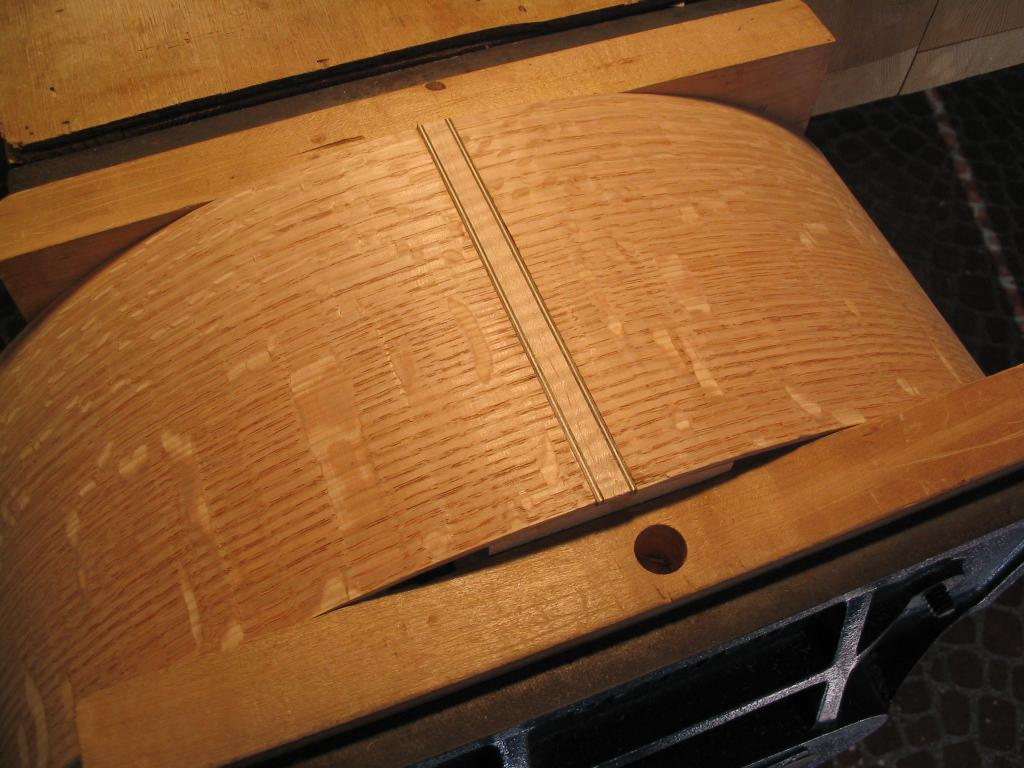
Finally, the same can be done for the lower bout. The resulting bent side can be seen below, clamped against the form. I leave the side in the form for 30 minutes or so, periodically plugging and unplugging the blanket for the first 5 minutes after clamping to keep the sides hot, to “set” the bend, and then letting the side cool for the remaining time
It will almost certainly be necessary to unplug the blanket at times during this operation; otherwise, it can get hot enough to char the sides. Also, I’ve found that the heat from the blanket can dry out the lower bout while the waist and upper bout are being bent down to the form. I use the water bottle shown to spray the side to moisten it if it has dried out.
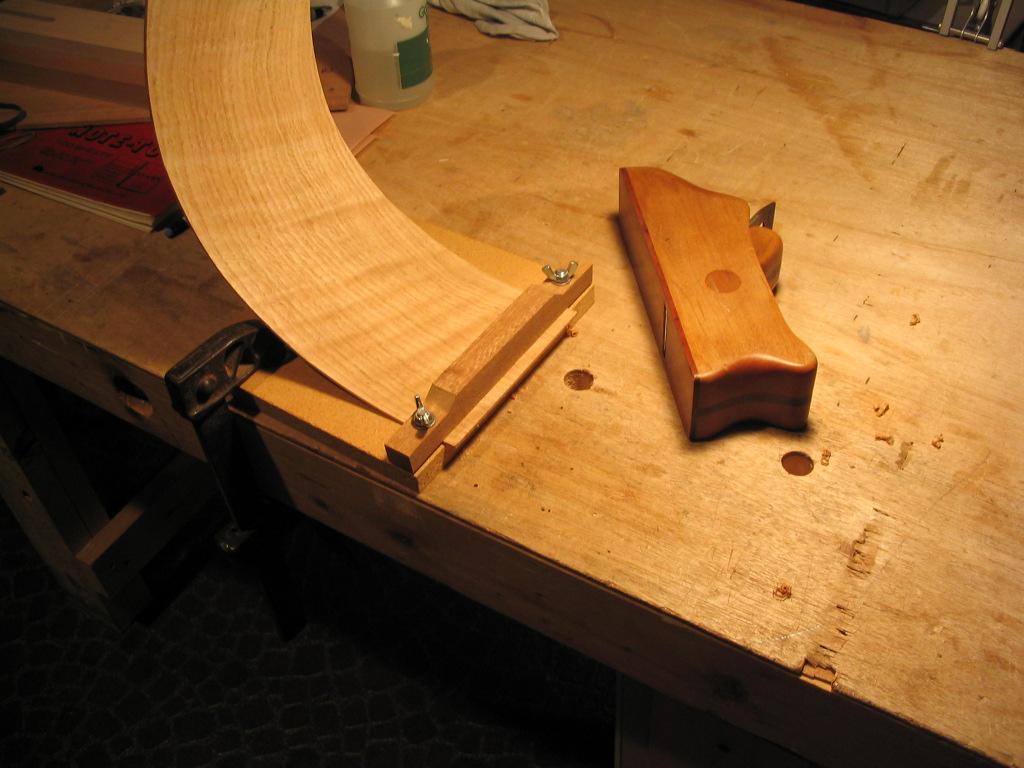
When both sides are bent, the sides can be joined to the end and neck blocks. The sides are first trimmed to the exact size at the head and tail. The sides are marked by placing them in the body gluing jig…
… cut on the bandsaw, and then trimmed with a handplane using the trimming jig shown below.
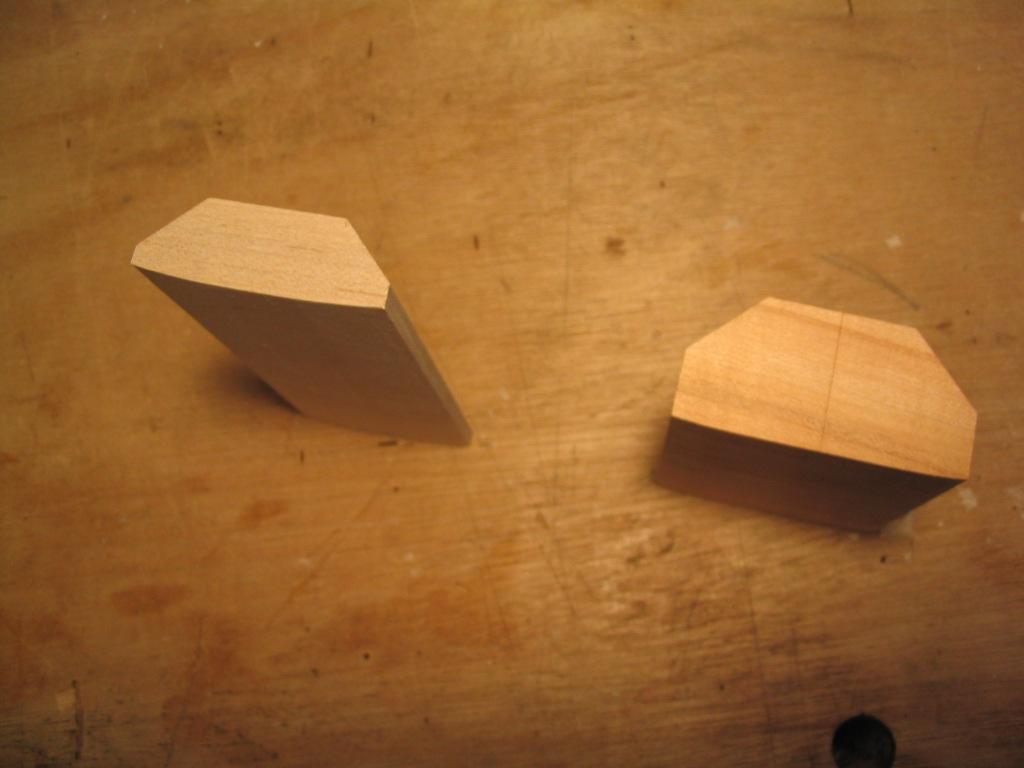
The end and neck blocks are curved on their faces to match the curvature of the sides at the neck and tail. Note that both are scribed on their centerlines on all four faces, to aid in aligning the sides when they’re glued.
The sides can then be joined to the end and neck blocks. This uses the clamping jigs shown below, which consist of support blocks with a pair of clamping cauls secured with carriage bolts.

The end or neck block is placed on the support block (which is clamped in a vise), glue is applied, and each side is secured with a clamping caul, clamping it to the end/neck block.
When the sides have been joined to the end and neck blocks, the end binding strip can be inlaid. The tail is scribed to fit the binding strip, and the groove is cut.
The strip is then glued in place…

…and when dry, is scraped flush with the sides.
Previous: Bracing the top |
Next: Joining the top to the sides |