Most acoustic guitars are made from just a few woods – spruce, and sometimes cedar or redwood, for the top (face), and rosewood, mahogany or maple for the back and sides. While these are wonderful woods both acoustically and aesthetically – which is why they’ve become the standard woods for guitar construction – there are lots of other interesting woods out there that will make very nice sounding and beautiful guitars, at least if you’re accepting of an “alternative” tone and aesthetic.
I became interested in building with alternative tonewoods as a way to expand my lutherie horizons. I’d built a number of instruments using standard tonewoods sourced from from lutherie suppliers, who provide top-quality raw materials, but I had always looked longingly at logs I’d seen in the forest or by the side of the road where I live in Pennsylvania. The thought of going from tree to instrument always intrigued me, rather than relying on suppliers to provide me with pre-cut perfect plates to use. Somehow the thought of starting with a chainsaw and finishing with a scraper was really appealing – kind of completing the journey from tree to guitar by filling in the missing first steps.
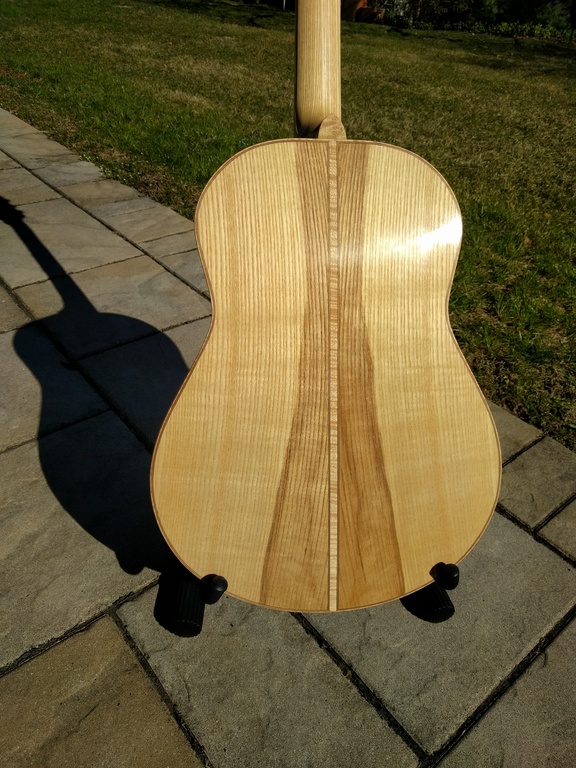
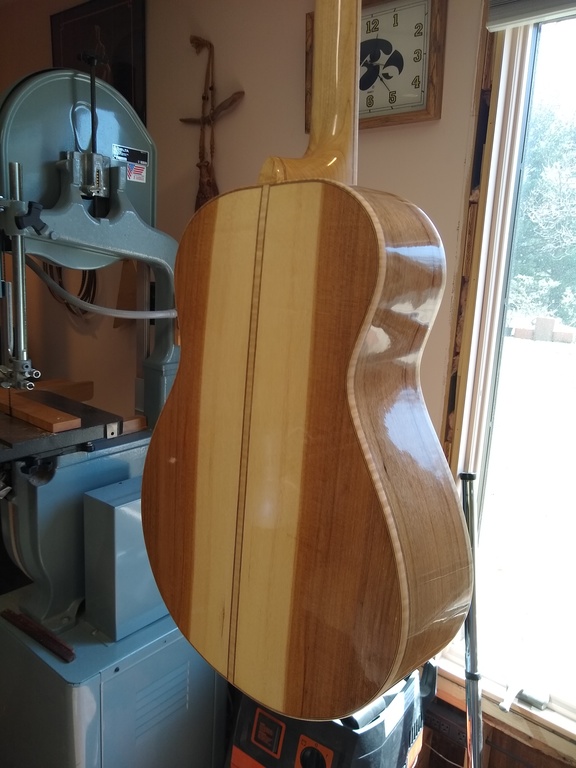
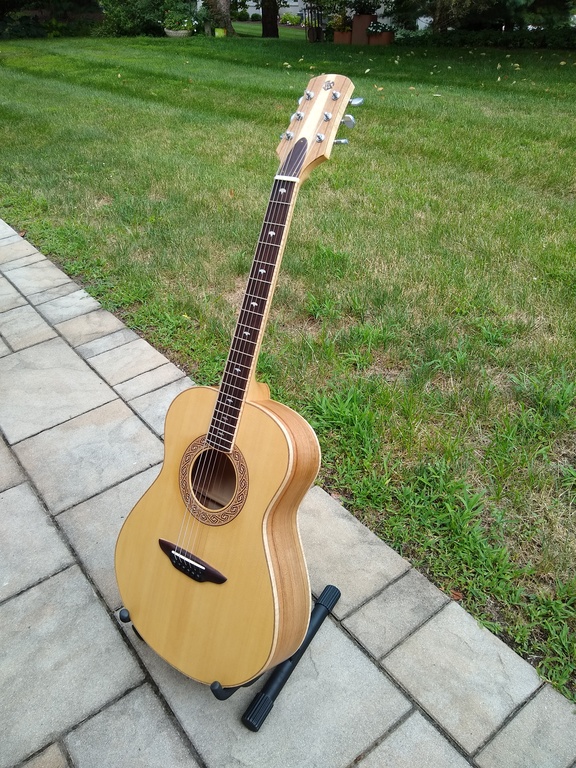
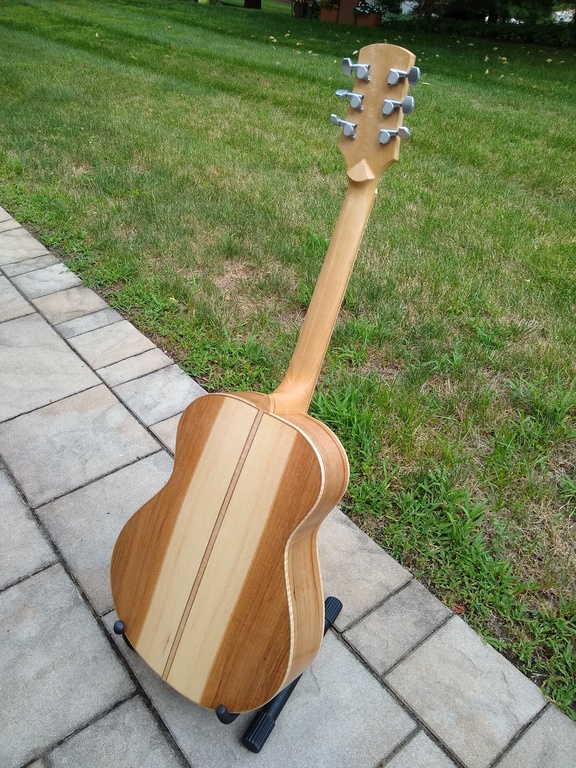
What I found in the process, both by personal experience and communication with other builders, is that many, if not most, woods can be used for guitar backs and sides and make fine-sounding and nice-looking – and unique – instruments. The photos below show some of the guitars I’ve made from wood I’ve harvested and processed into tonewoods. I’ve harvested and used ash, oak, hackberry, sycamore, hickory, walnut, and others, and made nice-sounding instruments from each of these.
Sourcing Wood
Going from log to tonewood is straightforward. It starts with finding a good log. My initial source of logs was a local quarry that accepted logs as fill (along with broken concrete, which is why I was there in the first place). Unfortunately, they’ve stopped accepting logs. I’ve also gotten wood from Pennsylvania state forests, which sell firewood permits. However, this is usually limited to wood that’s already down, so it tends to be wood that’s been dead for a while and thus dried out, or smaller-diameter stuff. However, they sometimes have areas open that were recently logged and have larger-diameter cutoffs from the logging operation.
My current main source is a local sawmill, which generally has a large pile of logs that were cutoffs or unsuitable for milling for one reason or another. The one thing you need to be careful of is that sometimes the reason the logs are in the discard pile is that they contain embedded metal, and this will ruin your chainsaw chain (and day) in a jiffy. But the sawmill staff usually check for embedded metal with a metal detector and mark the spot in spray paint to let the sawyers know where to buck the log, so an attentive eye can save a lot of trouble.
Slabbing Wood
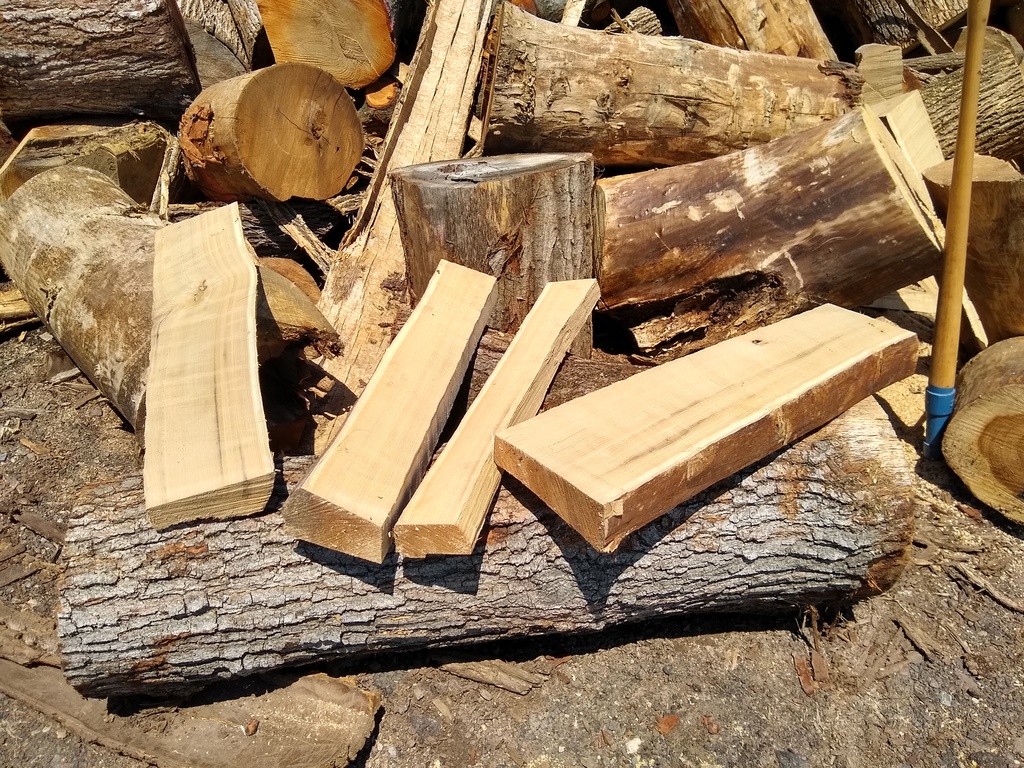
I generally like to use quartersawn stock for the back and sides. This dictates the sizes of logs that will work. Since the dimensions of the rough side planks are about 36″ long by 5″ wide, I’m looking for a log segment that’s 3 feet long by at least a foot in diameter. The needed diameter is affected by the presence of sapwood – woods with a wide and distinct sapwood layer will need to be larger, unless the sapwood is to be part of the design. For backs, which are made from bookmatched halves, each half is about 24″ long by 8″ wide, so the appropriate log can be shorter, but needs to be significantly larger in diameter – roughly 2 feet. In general I’m looking for logs that are a couple feet in diameter – big stuff. The picture below illustrates the orientation of the back plates in the log, and thus why the log needs to be so big in diameter.
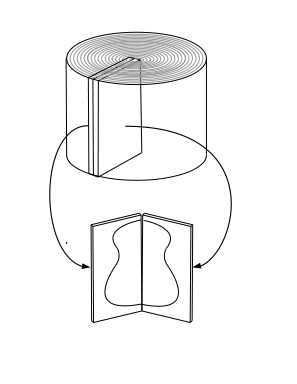
Once a suitable log segment is available, it needs to be slabbed into rough planks for resawing. Since the backs and sides are to be from quartersawn stock, it might seem to make sense to quarter the log, but I take a slightly different approach. I first halve the log, and then cut the center slab out of each half. This creates a thick plank (maybe 4-6″ thick) which is effectively quartersawn – the growth rings will be almost perpendicular to the faces. In fact, when this plank is resawn, the very middle slices will be exactly quartersawn, with the growth ring orientation deviating more from perpendicular toward the outside slices.

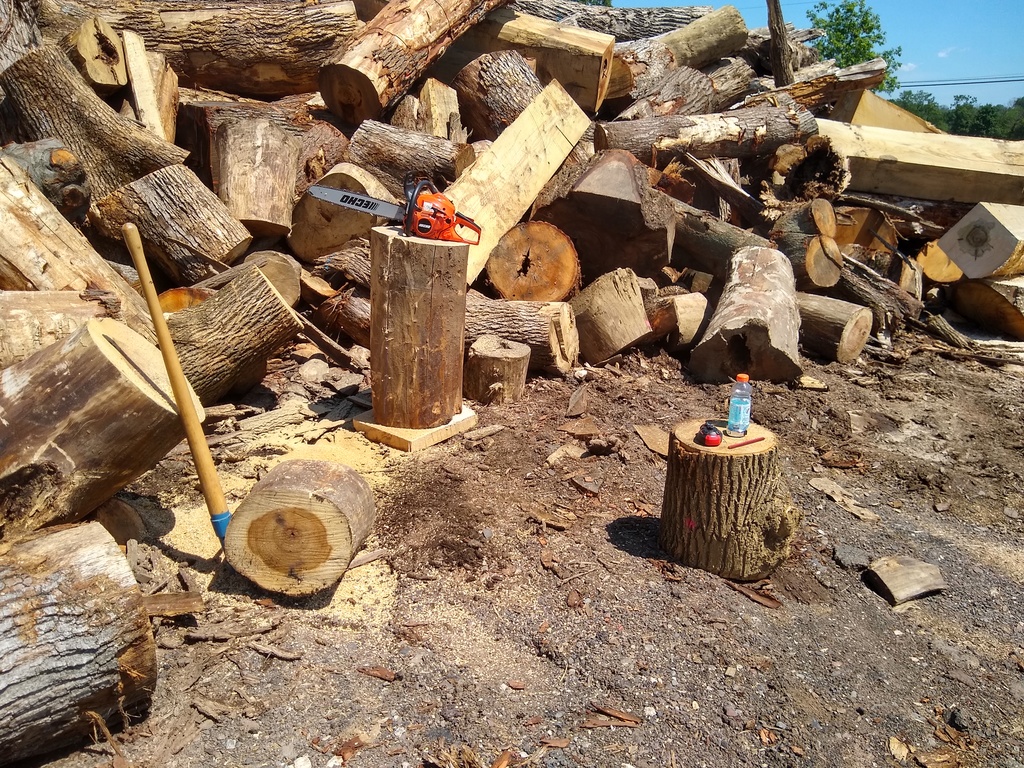
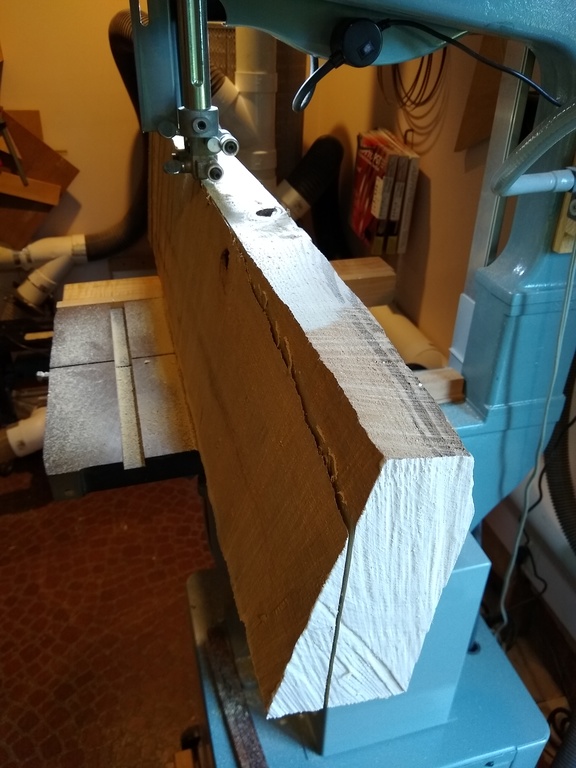
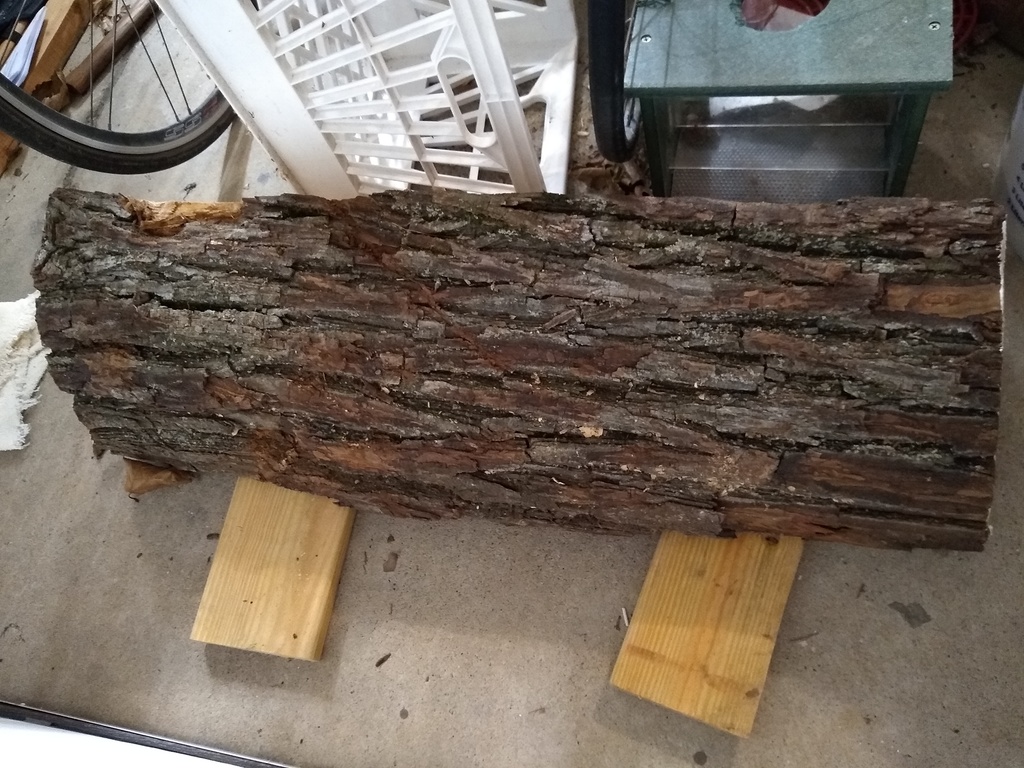
I tend to do the slabbing freehand, using chalk lines as a guide. I usually stand the log segment on end, and cut vertically down the log; this can be seen in the photograph below. To keep the saw chain out of the dirt, which will dull it almost immediately, I first cut a disk from the end of a log to use as a work platform. If it’s made of a different wood than the one you’re slabbing, you can tell when the saw moves from the stock into the platform by the change in color of the sawdust.

If the log is bigger in diameter than the length of my chainsaw bar, I’ll sometimes halve the log while it’s horizontal, using a plunge cut from the top and rolling the log over to finish the cut from the other side, and then stand the halves up to cut out the middle slab. This can be seen for the big beech log below.
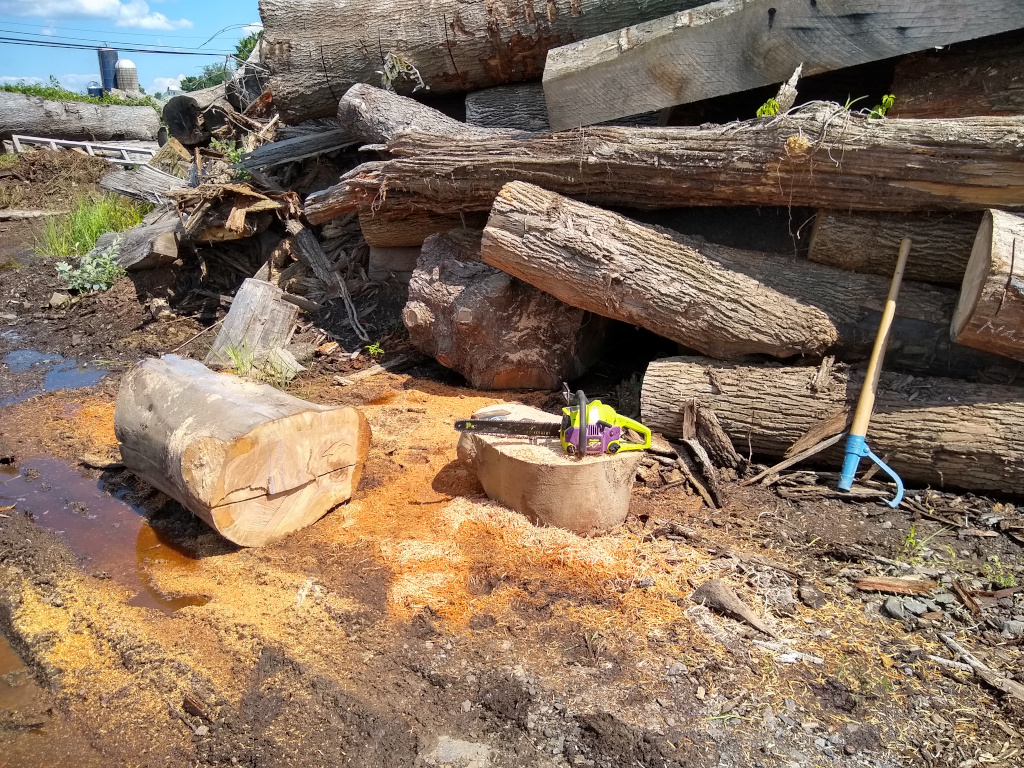
Logs are heavy, and green logs especially so. It’s thus very useful to have some tools available to wrestle with them. My favorite is a cant hook, leaning on the right in the picture above. This provides a lot of extra leverage for cranking logs into position or onto their ends onto the work platform.
Processing the Slabs
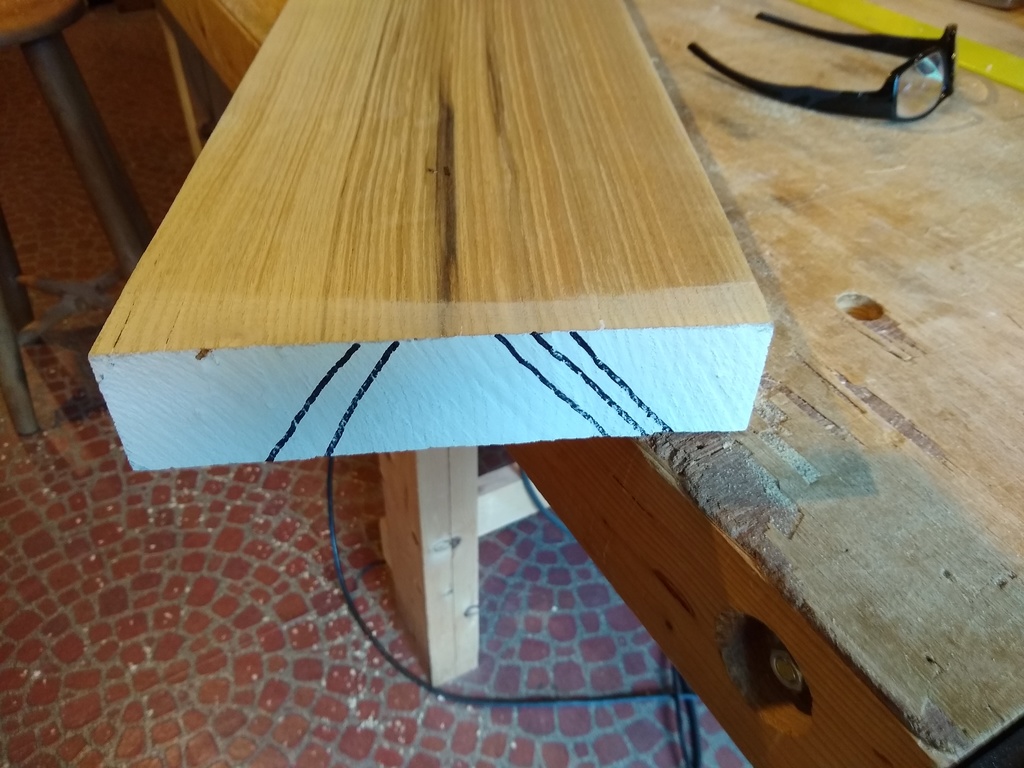
Once the logs have been slabbed, it’s important to seal the ends to keep them from drying out too quickly and causing the wood to split. I use a couple of coats of latex paint. A light color makes it easier to see the growth ring orientation.

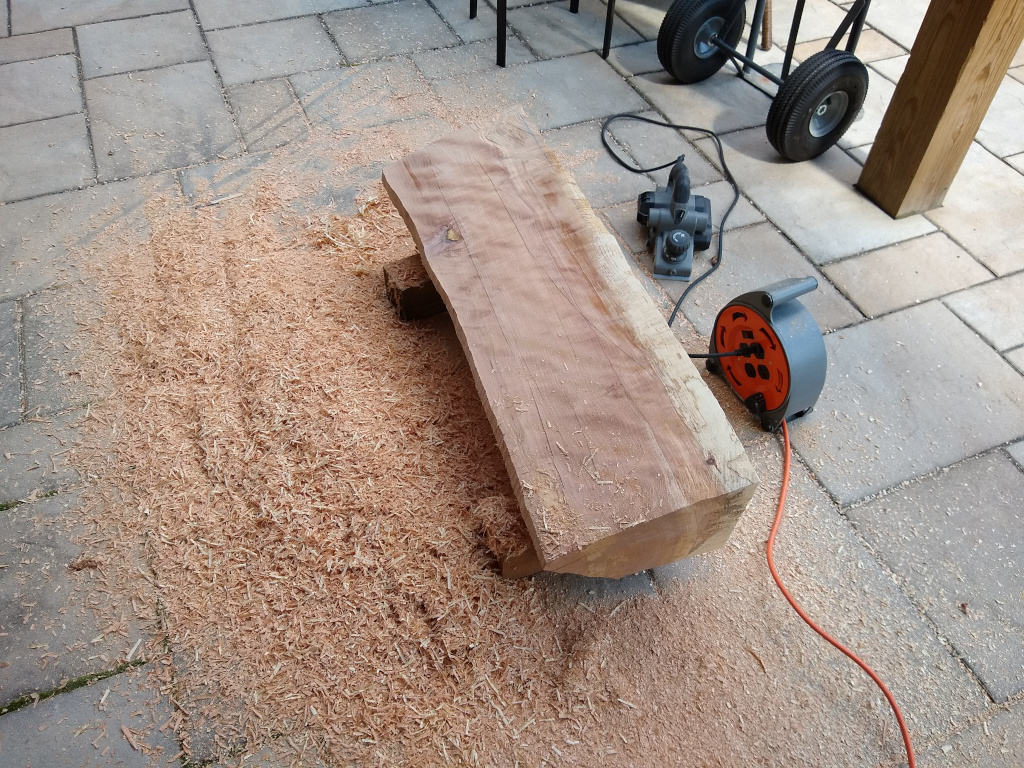
To resaw, the rough slabs need to be turned into flattened and squared planks. The first step is to flatten one of the faces. I use a hand-held power planer and straightedge to do this. Since the slabs have been cut freehand, the faces are usually not very flat right off the saw, so a lot of spot surfacing and trial-and-error will likely be needed.
Once one face is reasonably flat, the adjoining side edges can be cut straight and parallel and perpendicular to the first face. The first edge can be marked with a chalk line, cut freehand on the bandsaw, and jointed using the initially flattened face against the jointer fence to make the edge square to the face. The opposite edge can then be cut parallel using the bandsaw fence and jointed.
The final roughing step to turn the raw slab into a plank for resawing is to get the last face parallel to the first face that was hand-flattened with the power planer. If the slab is of reasonable size, this cut can be made on the bandsaw in the same way that the plates will be sliced off for the backs and sides.
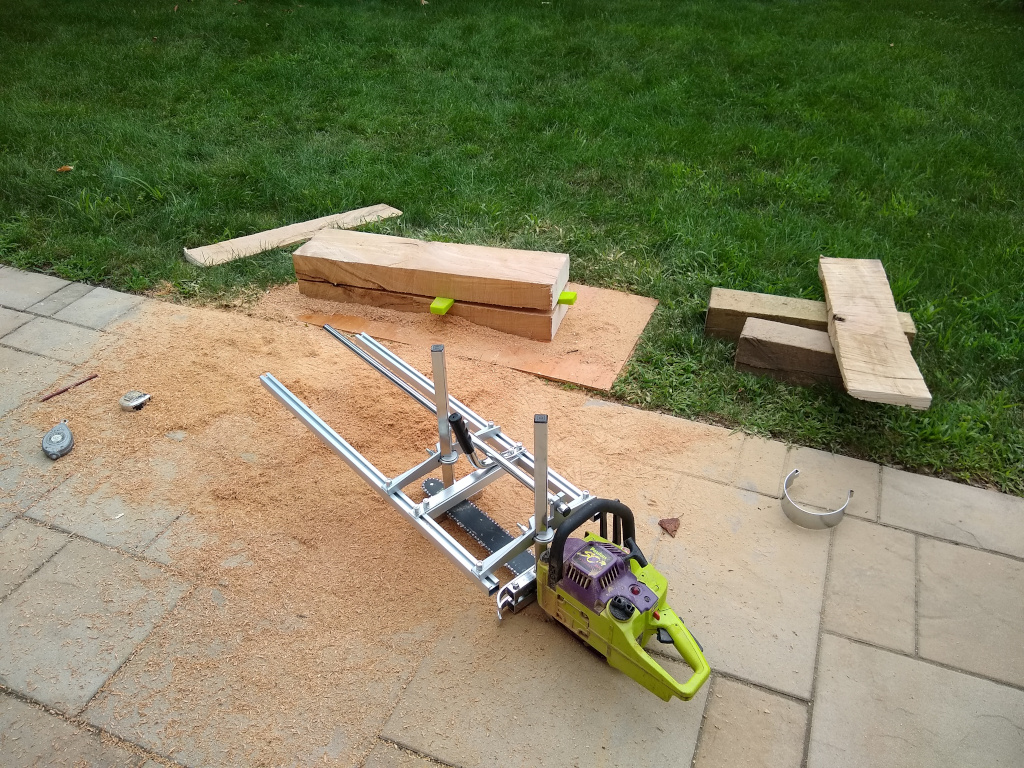
If the slab is particularly big, and too large to wrestle onto the bandsaw, a chainsaw mill jig can be used to cut the slab into boards with (roughly) parallel faces, as illustrated below.
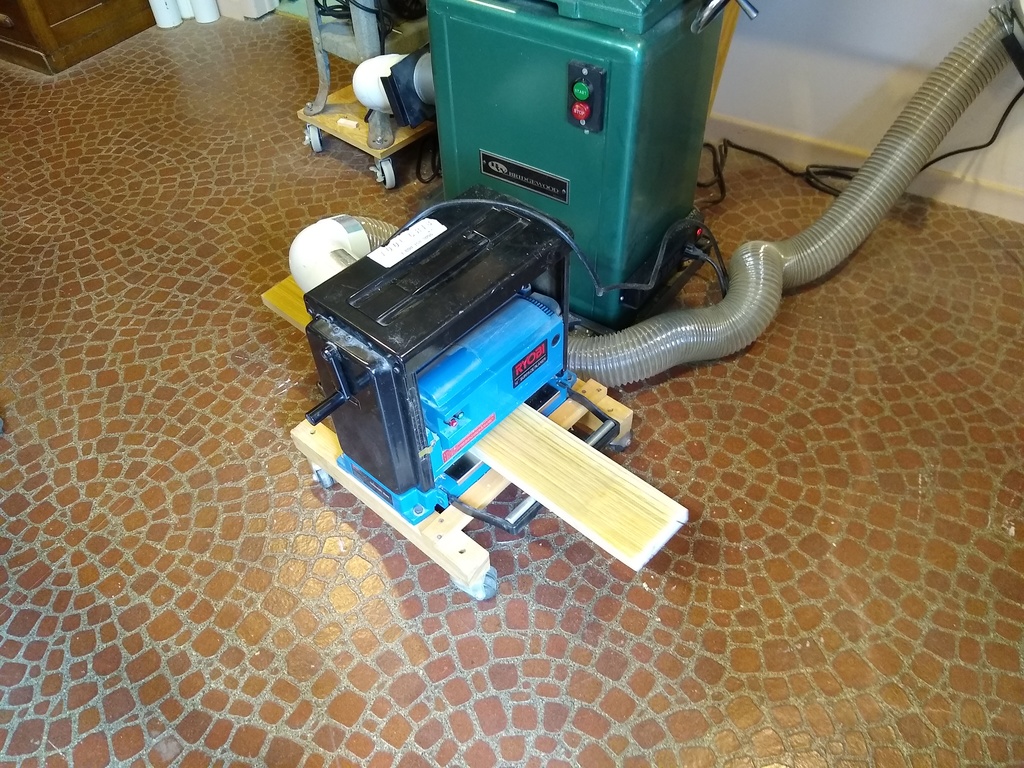
The resulting rough board can now be run through a jointer and planer to create the final smooth plank for resawing.
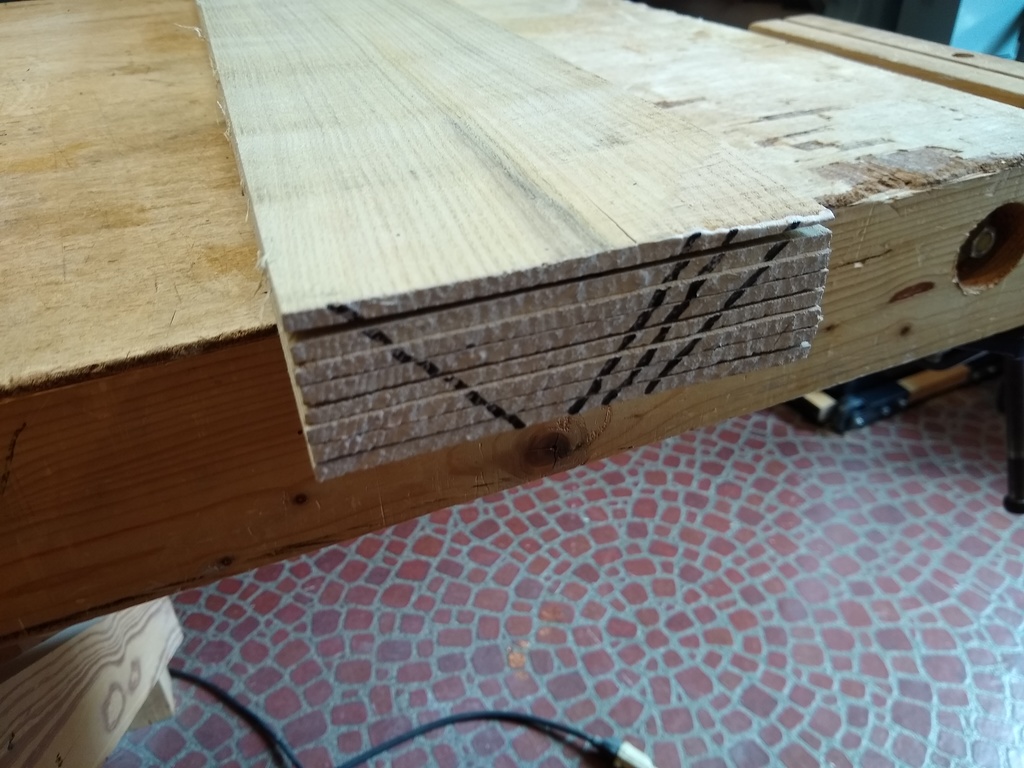
The final step is to mark the end of the plank so that the slices can be kept in order after sawing, since adjacent slices will generally give the best book match.
Resawing
From this point, resawing into thin slices for the backs and sides progresses pretty much like any resawing operation, with a few twists due to the fact that the plank being resawn is green. The main complication is the sap within the plank. It tends to act as a glue and make the sawdust clump and cling to the blade, causing the blade to bind and bow and wander in the cut. To prevent this, I use a blade lubricant/wax called BladeKote, applying it to the blade at the start and reapplying after each cut. This eliminates a lot of frustration and helps produce straight cuts and uniform slices. The sap content in the plank can also make it somewhat sticky and not slide smoothly on the bandsaw table and fence, so I apply BladeKote to these surfaces too. I also use a shop vac to clean the sawdust off the bandsaw after each cut.
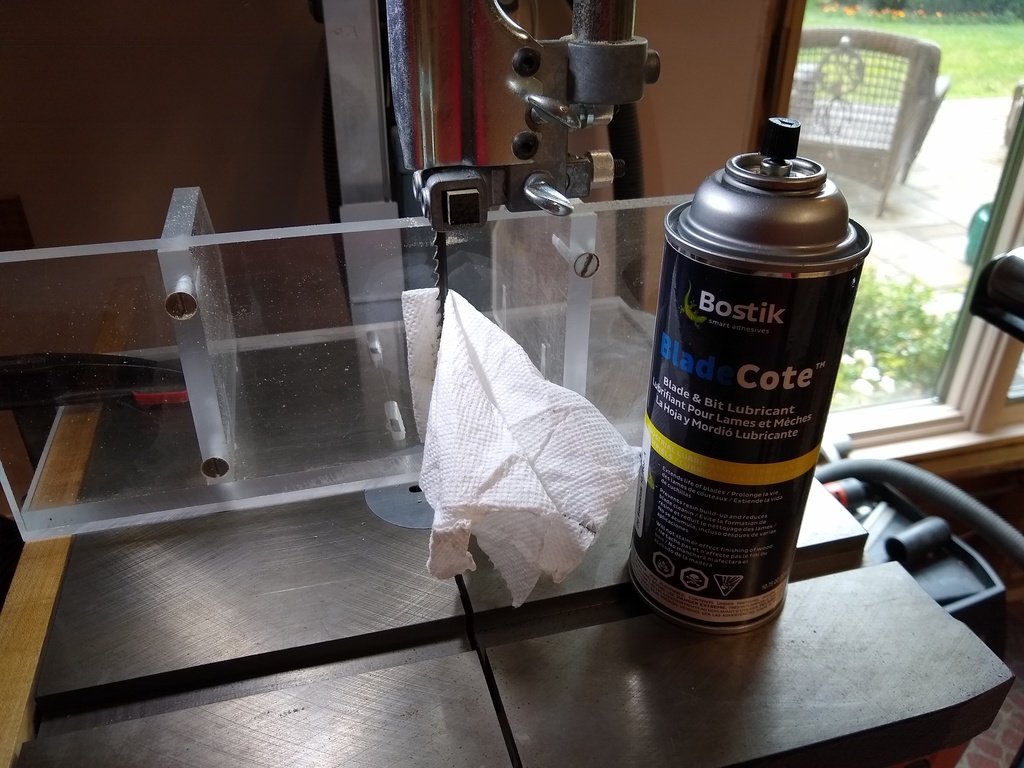
Additionally, the sap and wet sawdust tend to clog and even corrode the bearing and guide blocks under the saw table. It’s thus important to check and clean these frequently, especially the thrust bearing. I’ve had a bearing completely seize up, which leads to unpredictable blade drift that makes it seem like the blade has gone dull.
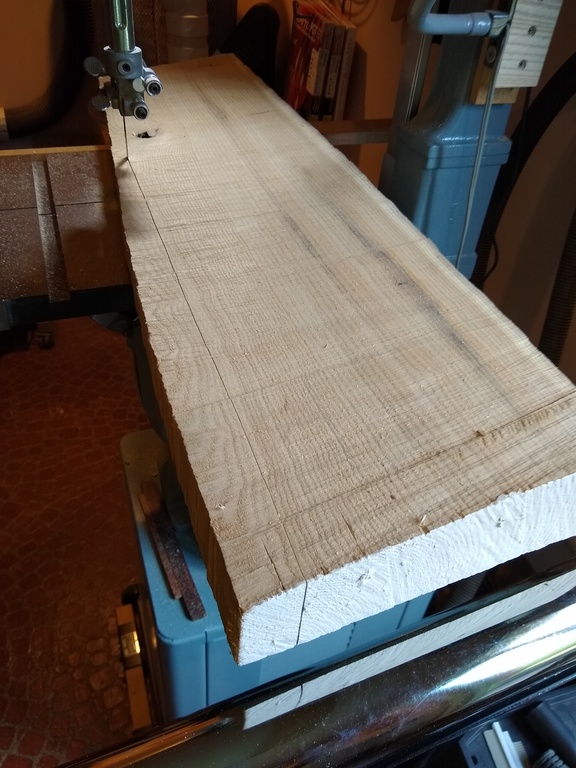
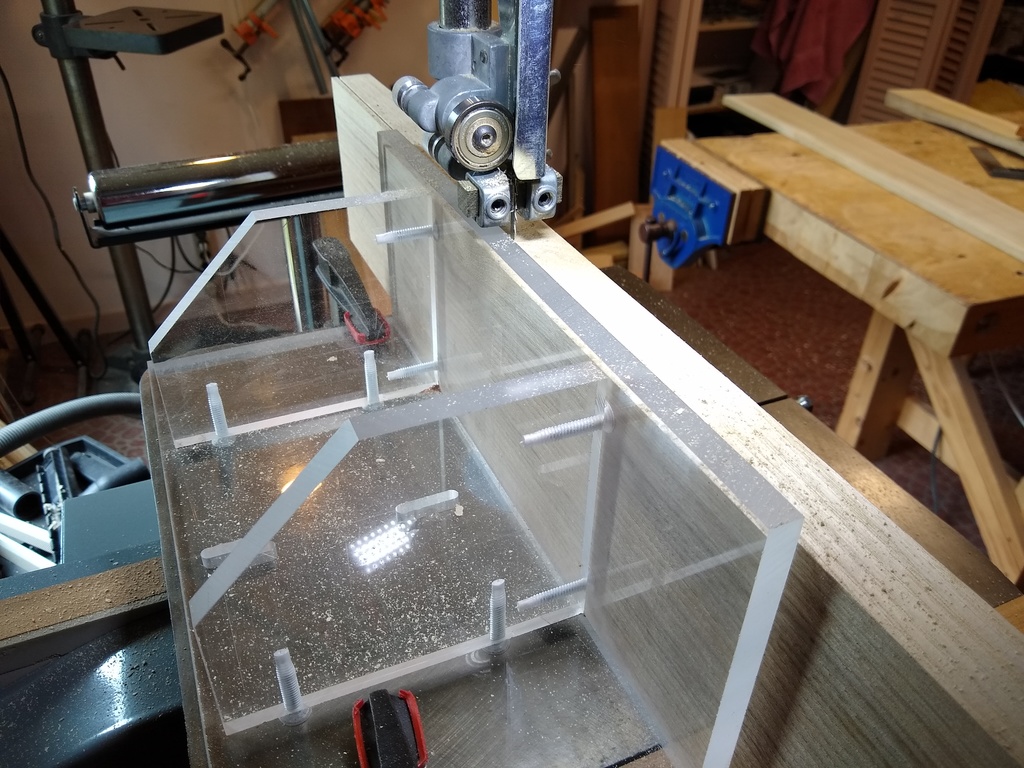
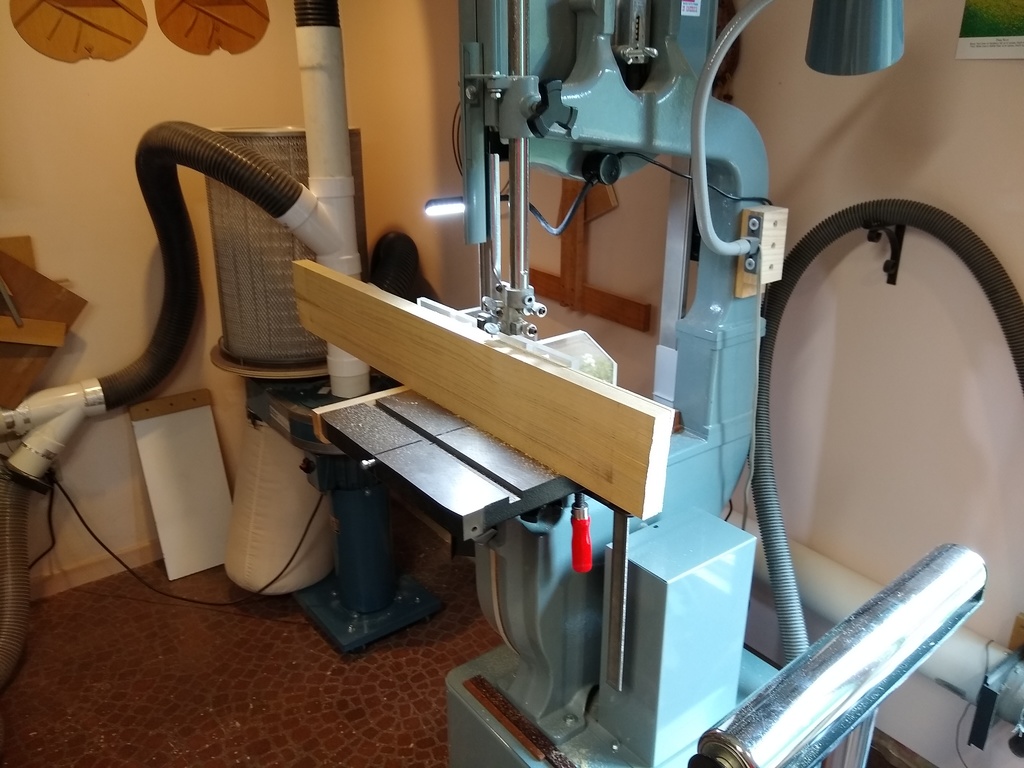
The pictures below show the resawing operation, using a tall fence to guide the stock through the blade.
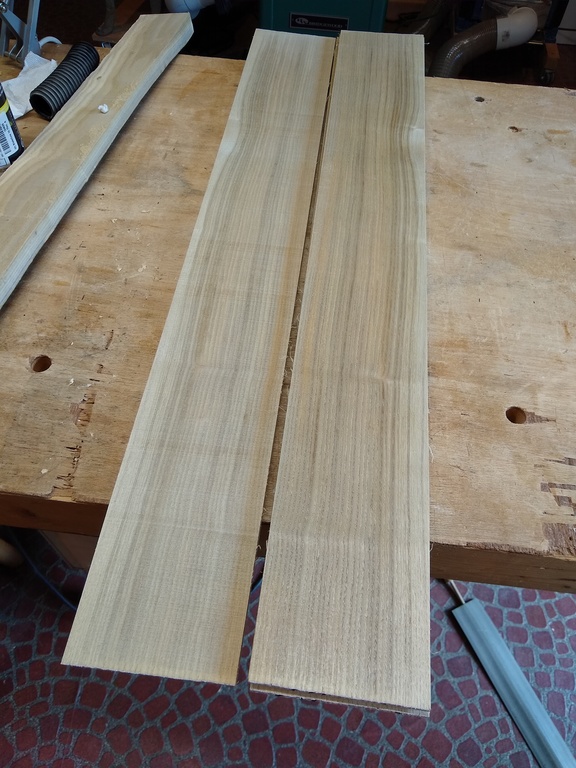
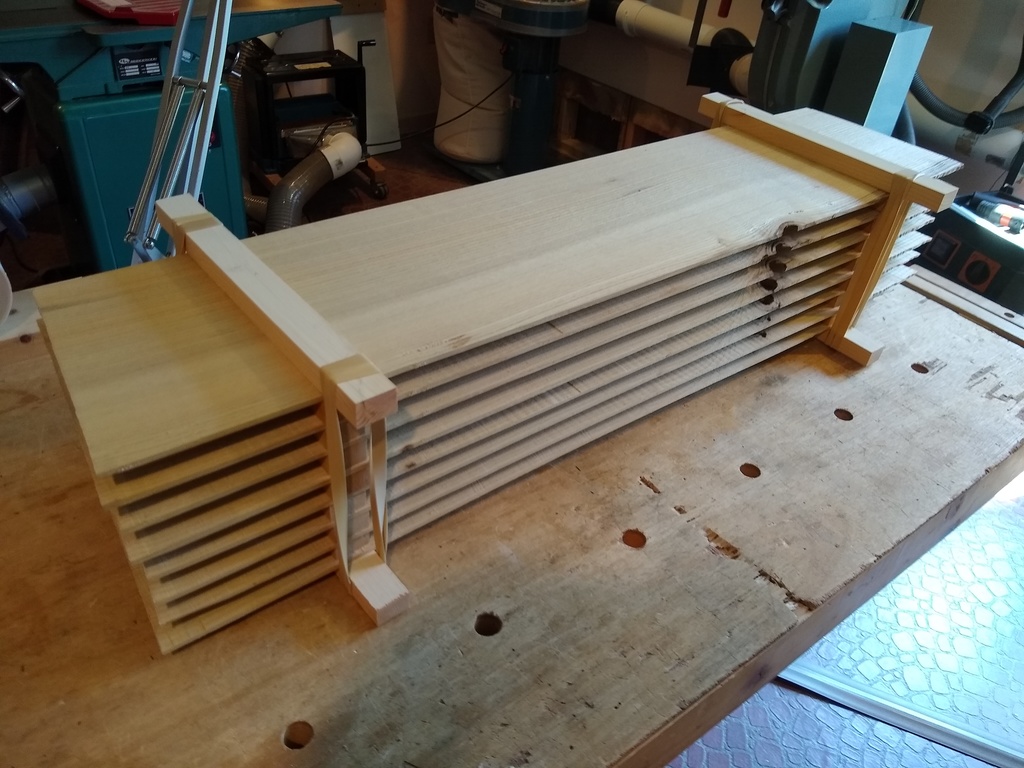
The photos below show a slice as it comes off the saw, and the final stack of resawn sides. Note how the alignment marks that were made on the end of the plank before it was resawn help keep the slices in order after sawing.
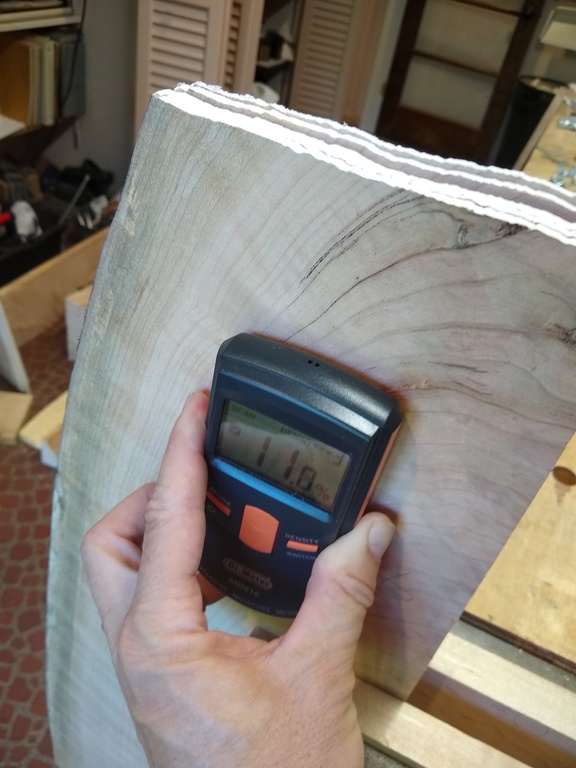
Once the plank has been completely sliced up, the back or side slices should be stickered for drying. I generally use 3/16″ thick slices, and by the old rule-of-thumb that the air-drying time for lumber is about 1 year per inch of thickness, the back and side sets should be ready to use in about 3 months. However, it’s always a good idea to use a moisture meter to check the dryness, and the newer pin-less meters make this easy. One thing to be aware of is that these meters will give misleading readings if the stock being measured is less than about 3/4″ thick, so you’ll need to stack up 4 or 5 plates to get an accurate reading.
Conclusion
Sourcing your own tonewoods for guitar construction is both enjoyable and rewarding. You get to spend time outside, you get up-close and personal with the raw materials of lutherie, you get a (potentially large) supply of materials, and you get access to wood species that are hard or impossible to source commercially. Of course, there are challenges and dangers associated with this – you’re using a chainsaw, which is inherently dangerous, and working around big logs whose weight demands a lot of respect. And the yield isn’t necessarily what you’d expect given the volume of wood in a log: trees are surprisingly full of knots and cracks and bug tunnels and all manner of defects that render the wood less than perfect for lutherie. But for me at least, the satisfaction outweighs the challenges, and folks are always intrigued to hear that you started with a log when building the guitar they’re playing.
Additional Lutherie Resources