Frequently Asked Questions
What do I need to run the app?
You’ll need an Android tablet of size 7″ or bigger running Android 3.0 (Honeycomb) or greater.
Can I run the app on my handset?
Not unless it has a screen size of 7″ or bigger – the interface takes too much space.
How do I close the app?
Just go to the main page and hit the back button, or select “Quit” from the menu.
I hit the back button before remembering I hadn’t saved my design!! Will I lose it?
No worries. When you quit or hit the back button, the app saves info to allow you to start right where you left off. Just start the app back up, continue designing, and finally select “Save” from the menu when you have a design you want to keep permanently.
User Guide
Startup
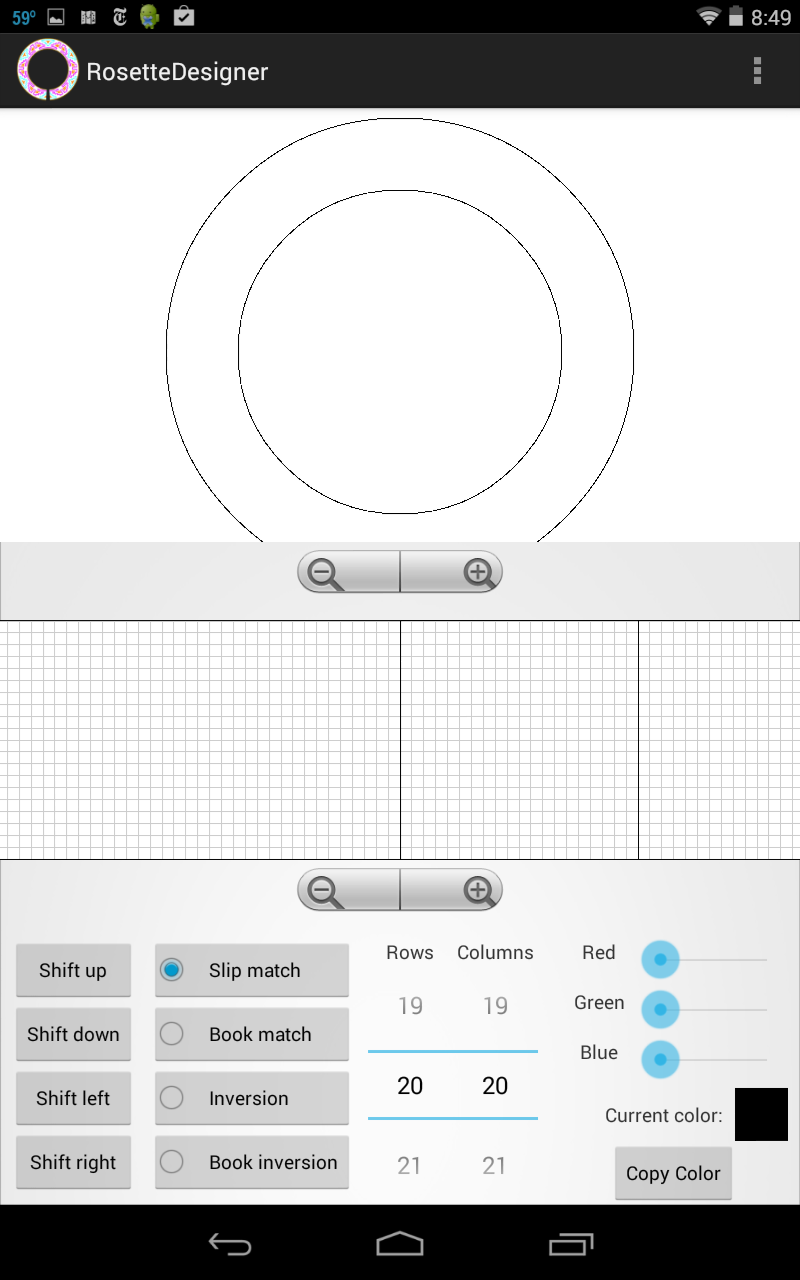
On startup, a blank design is shown with the default rosette parameters (20 rows and 20 columns). There are 3 main panes: the button pane at the bottom, the tile strip in the middle, and the rosette view at the top. The main drawing pane is the tile strip in the middle; the rosette pane just displays the design in the tile strip “in the round”.
The “fundamental tile” is outlined in black in the tile strip; this is the tile that is repeated to fill out the strip. Note that the fundamental tile might be directly shifted or flipped first to generate the pattern, depending on the symmetry settings described below.
Drawing
Select a color using the red-green-blue slider bars; the drawing color will be shown in the “Current color” box. Then drag a finger across the tile strip; the tile elements below the finger trace will be colored in the corresponding color, and the design will be filled out along the tile strip and simultaneously displayed in the round in the rosette pane above. You can make either the tile strip or the rosette display bigger or smaller using the “zoom” buttons beneath each.

Erasing
To erase, just start on one of the tile elements which already has the current color; it will be erased back to the background color, as will any of the other elements as you drag your finger across them.

Buttons
The button bar at the bottom of the main screen provides functions for working with the design.
Shifts
The shift buttons allow the design to be shifted up, down, left or right. The left and right shifts are useful for aligning the design in the “fundamental tile” outlined in black on the tile strip. The up and down shifts are useful particularly when you decide to add rows to provide borders on the top and bottom.
Symmetry
The symmetry buttons determine how the fundamental tile will be replicated to fill out the rosette. The slip match stetting just translates the fundamental tile to the left and right. The book match setting reflects the fundamental tile across a vertical line as in the opening of a book. The inversion setting flips the fundamental tile across a horizontal line while repeating, and the book inversion combines the book match and inversion settings, flipping across both horizontal and vertical.
Rows and Columns
The row and column settings let you choose the number of rows and columns in the fundamental tile. The size (height or width) of each row and column can be set in the Rosette Parameters dialog box accessible through the main menu.
Color Selection and Copying
The drawing color can be selected by adjusting the sliders for red, green and blue; the current color is displayed in the “Current color” box below.
You’ll often want to reuse a color already in your design. To do this, click the “Copy color” button below the color selection bars, and then click on the tile element in the tile strip that has the desired color. This will set the current color to that color.
Menus
The main menu contains entries for creating, saving and modifying rosettes.
New
Creates a new (empty) design, prompting you to save the current design if needed.
Open
Prompts to select a file to open that contains a rosette design, prompting you first to save the current design if needed. If a file is selected that doesn’t contain a valid design description, an error message will be displayed.
Save, Save as
Save the design to a file in the tablet’s storage. You can choose any location and name that you like. Note that the file generated contains an XML description of the rosette design, which is a hierarchical text description. You can view the generated XML in any text viewer, and even edit it directly if you like (but you’ll need to know what you’re doing, or you could end up with an invalid description that Rosette Designer won’t be able to read).
Save as PDF
Save the design in the standard Portable Document Format for printing or viewing in any PDF file viewer (Acroread, e.g.). This brings up a dialog box asking which elements of the design you’d like displayed in the document; you can include the rosette, the tile strip, and additionally an expanded map of the fundamental tile showing clearly which element color is in each row and column. The latter is especially useful to a luthier in constructing a rosette from the design.
Save as PNG
Save the rosette as a Portable Network Graphics image file. This can be viewed with any image viewer application, including web browsers.
Rosette Parameters
Brings up a dialog box that allows you to specify the inner radius of the rosette, and the width and height of the fundamental tile and/or the rows and columns. Note that editing the tile width or height will automatically adjust the row and column width and height, since these are connected through the number of rows and columns.

About, Quit
These show app information and quit the app, as you’d pretty much expect.