Introduction
A rosette is a decorative strip that surrounds the soundhole on an acoustic guitar. Many different designs are used, from simple rings of veneer to inlays of shell and other materials. This chapter describes the construction of mosaic rosettes.
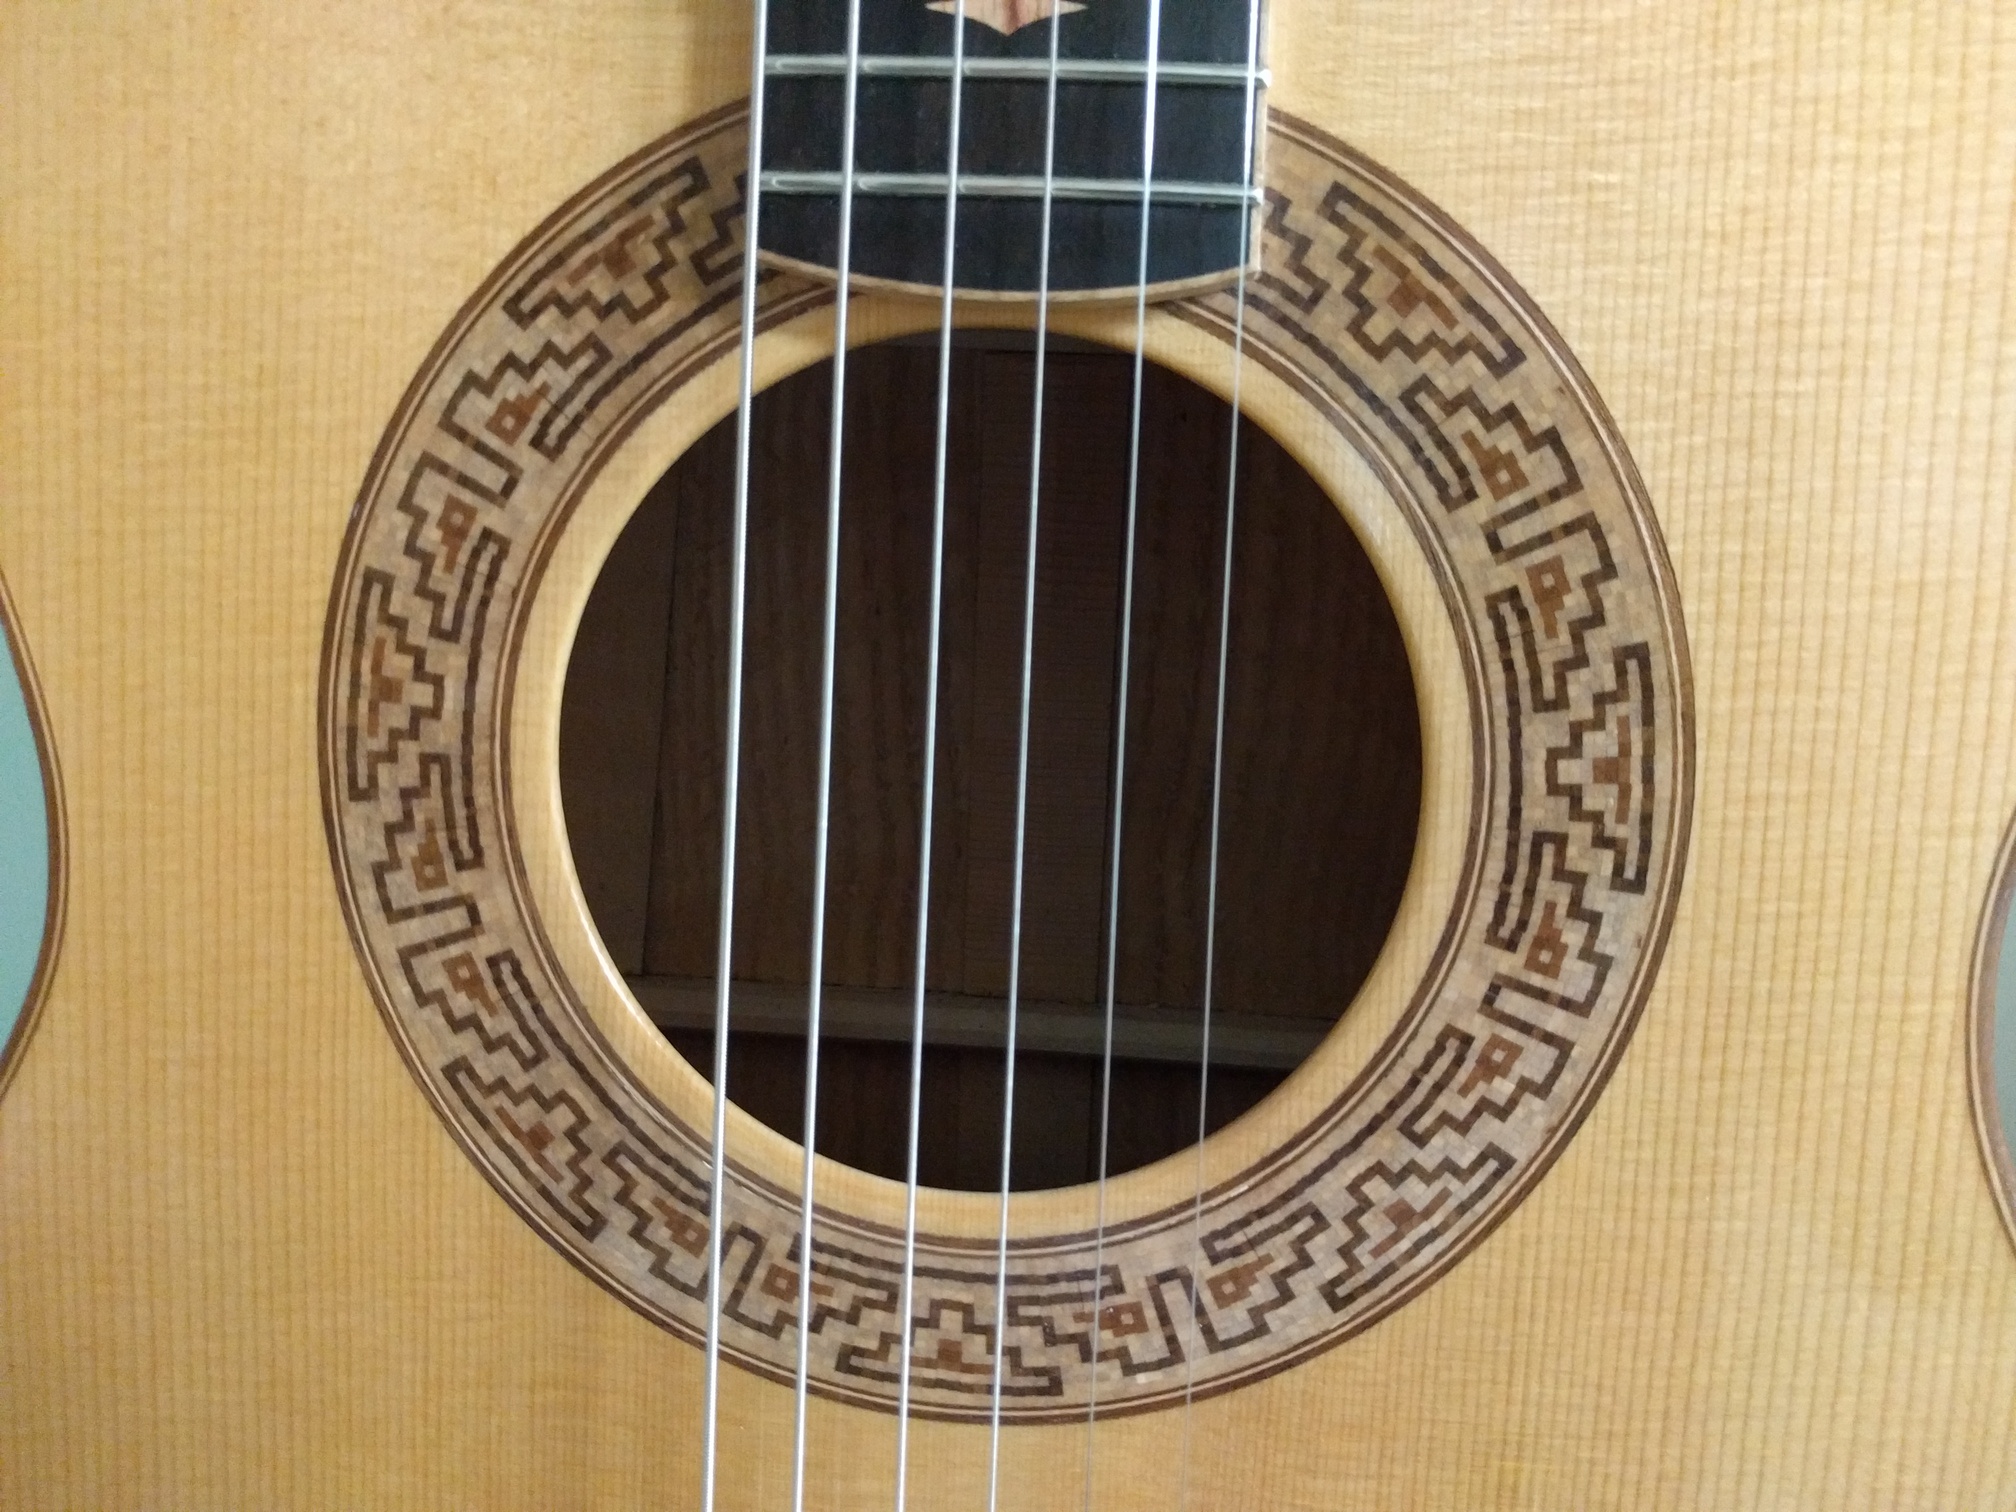
A mosaic rosette consists of tiny squares of wood that create a circular mosaic design around the soundhole of a guitar. The design usually has some form of symmetry, consisting of a single “tile” that’s repeated (a slip match) or flipped as it’s repeated (a book match, as in the mosaic pictured above). In either case, the mosaic can be made by creating a “log” whose cross-section is a single tile; tiles can then be sliced off the log, and glued side by side to form the circular rosette. Where each tile consists of small squares (really cubes) of wood, the log consists of long strips or “straws” of wood. The log will actually be built up as columns glued together. Construction of the tile log is covered in detail in the following sections, but the overall approach is as follows:
- Design the rosette, determining the design of the fundamental tile
- Construct column logs, for each of which a strip sliced off will form a column of the tile log
- Slice columns from the column logs
- Taper columns so the tile log will be tapered
- Glue columns together to form the tile log
- Slice tiles from tile log
- Glue tiles together to form a circular rosette
- Glue binding strips on the inner and radii of the rosette
Designing a rosette
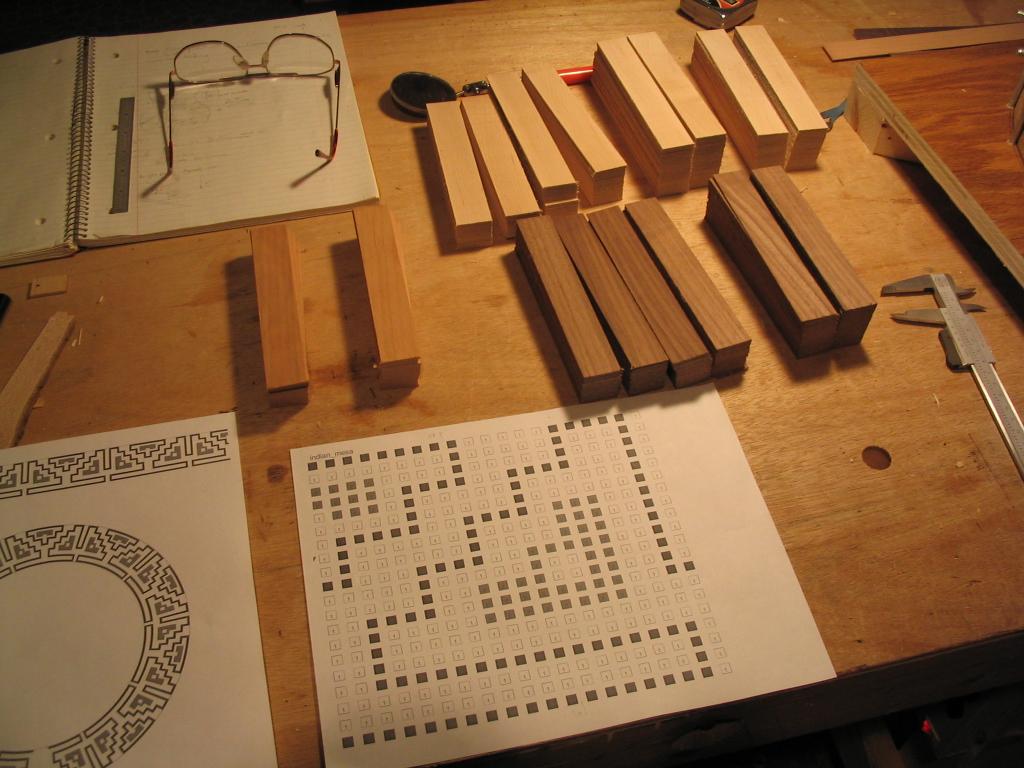
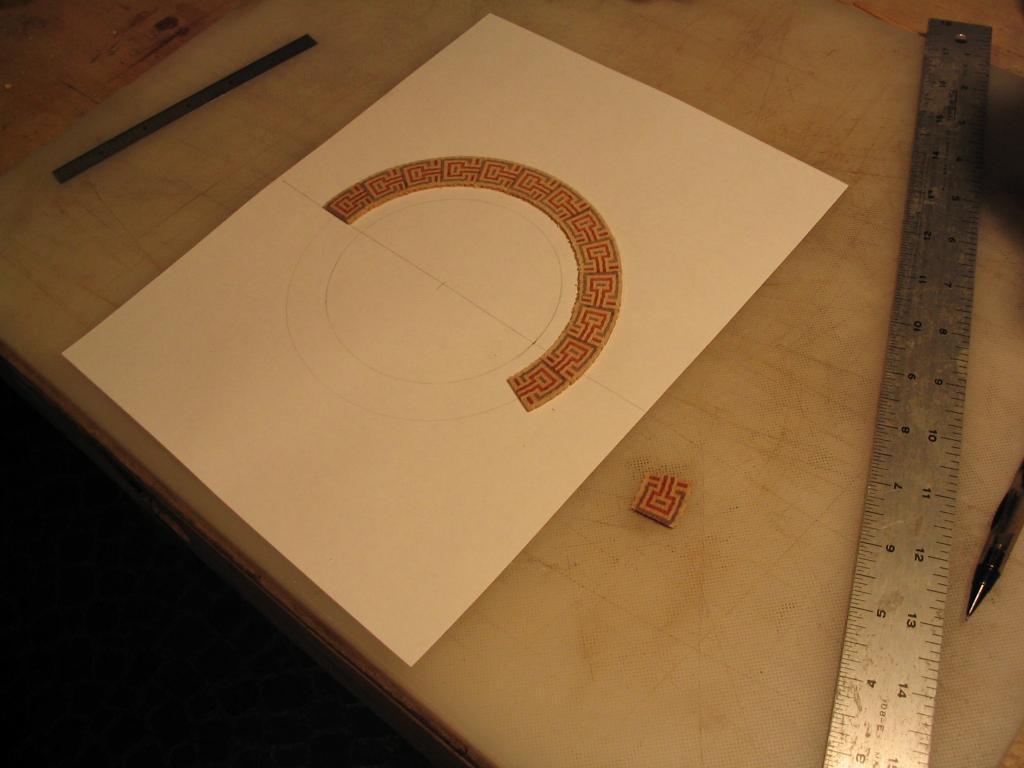
To design a rosette, it’s necessary to design the fundamental repeating tile that will generate the design. This can be done with graph paper, coloring in squares to get a design that’s appealing, or can be done with software that acts like the graph paper and makes it easy to alter and experiment with rosette designs. One such program is Rosette Designer, a browser-based web application provided on this website that simplifies design and experimentation and provides data needed to build the rosette. Squares are colored in the rosette, which automatically produces a repeating design. Various symmetries can be used, including the slip match and book match. A screenshot of the application is below.
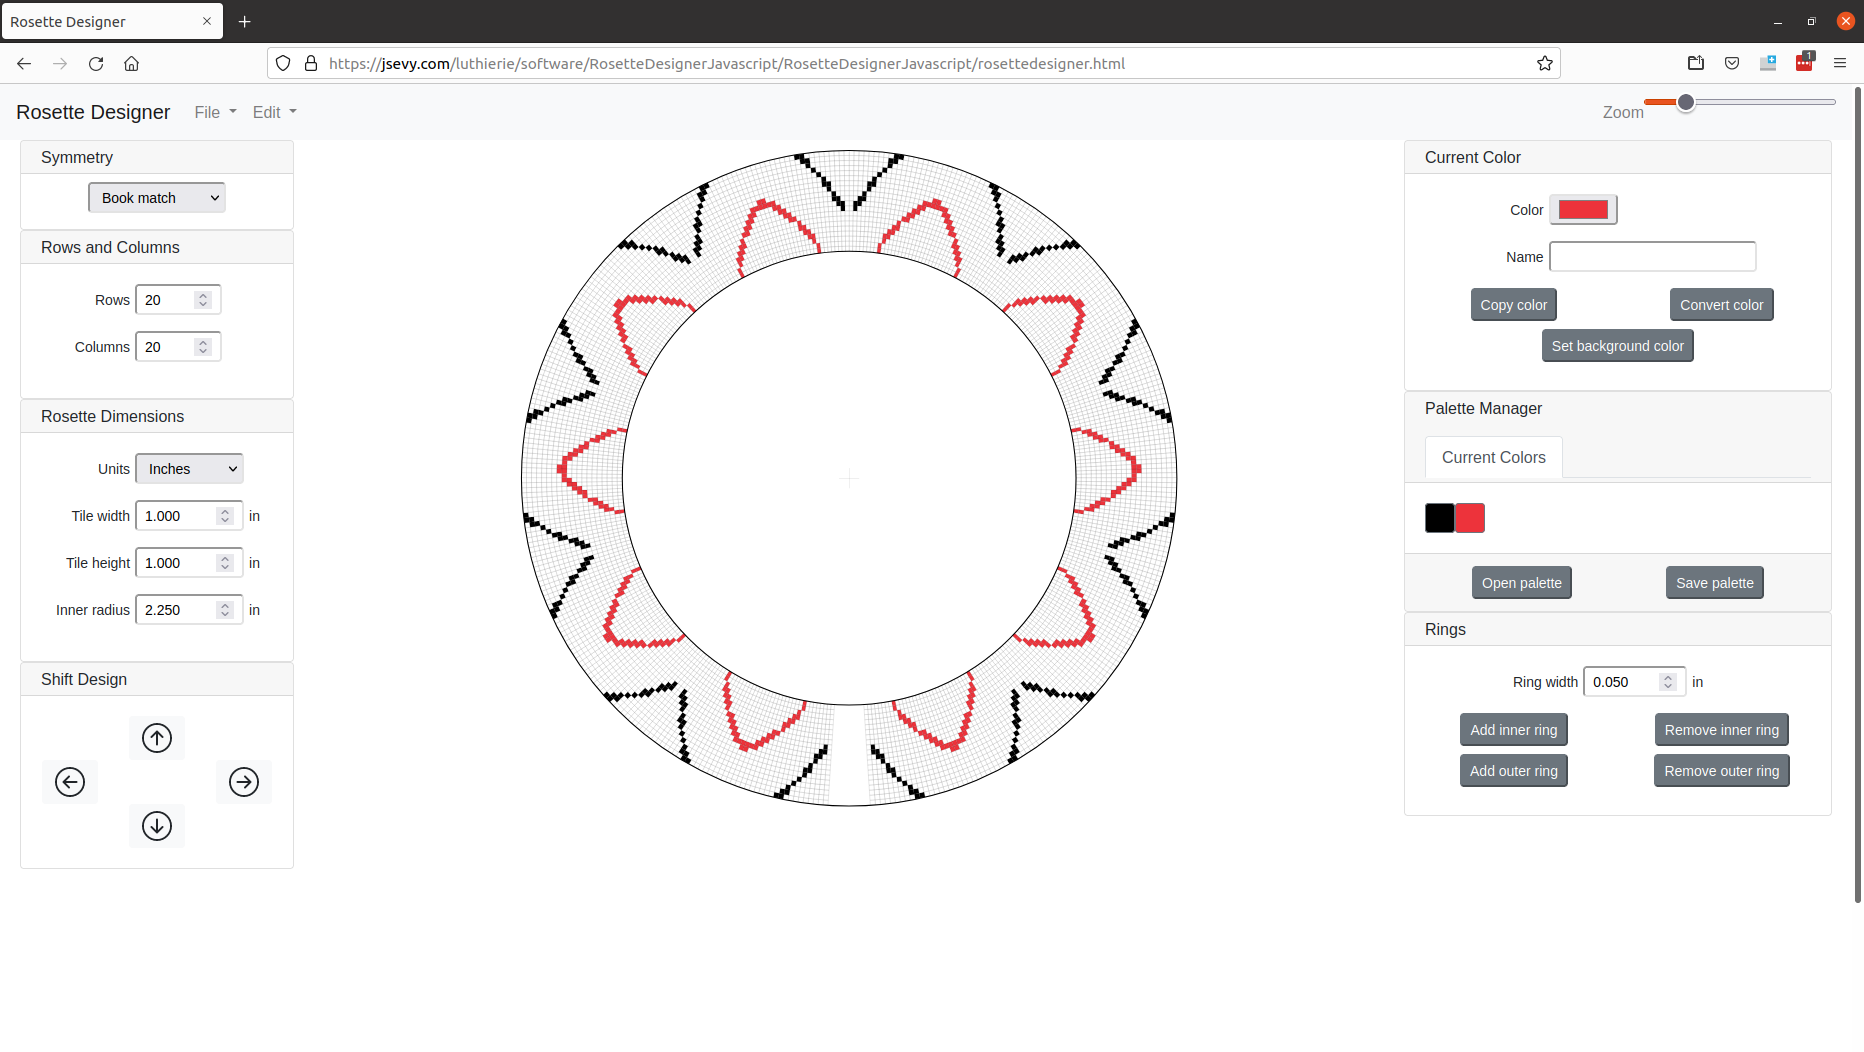
When the design is as desired, it can be printed, along with an expanded “tile map” that shows the elements in the tile as separate squares, to make it easier to build the rosette. These are shown below.
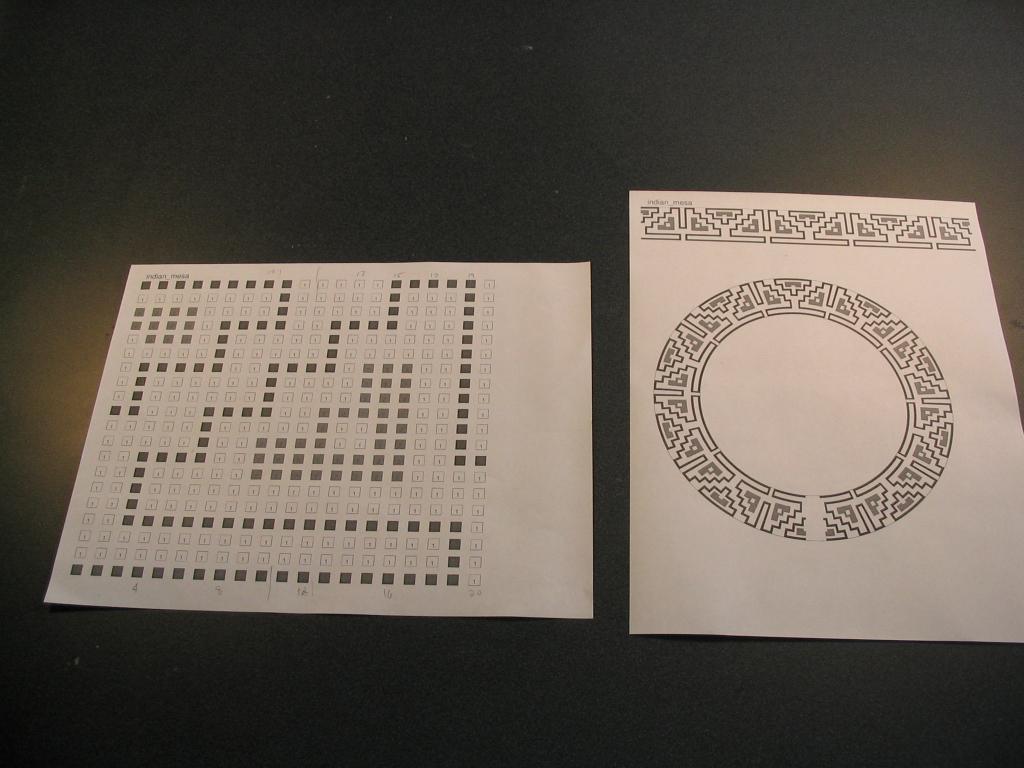
The tile map shows that the rosette design can be viewed as a set of columns of colored squares. If the columns are tapered from top to bottom, then the tile will be tapered, becoming a trapezoid rather than a rectangle, so that when the tiles are glued together they’ll form a ring.
Construct column logs
The column logs are used to produce the columns in the tile log. Each column log is a laminate of thin layers of wood of the colors needed to make up a single column in the rosette. Thus there will be one column log per column in the design.
The first step in making the column logs involves creating the thin laminates of different woods. The thickness of the laminates is determined by the desired height of the tile, i.e., by the desired width of the mosaic rosette. If a design has 12 rows, i.e., each column has 12 squares, and the desired tile height is .600″, then each laminate should be .050″ thick. It’s worth mentioning that accuracy in the thicknesses of the laminates is important to ensure that all of the column logs have the same height after the laminates are glued up, and that adjacent columns’ rows line up correctly. I generally shoot for an accuracy of approximately .001″ in the thicknesses. This can be achieved by running all of the laminates through the thickness sander several times (and the same number of times) at the final thickness setting, so any differences will be minimized.
The laminates are made by slicing thin strips off of the edge of a plank, and then running them through a thickness sander to sand them to the desired thickness, as shown below. The lengths of the laminates determines the length of the final tile log; the width determines how many columns can be sliced off each log, i.e., how many tile logs can be made from the set of column logs. I generally use laminates that are 6″ long and 3/4″ to 1″ wide. The planks from which the laminates are sliced should be of the correct size (e.g., 6″ long by 1″ thick) to produce the desired size laminate.

You’ll need one laminate for each square in the design, of the appropriate color, of course. So if a design has 12 rows and 20 columns, you’ll need a total of 240 lamina, which might be 24 cherry, 80 walnut, and 136 maple strips. When sawing and thickness sanding is finished, you’ll have piles of thin laminates in the different colors needed to form the column logs.
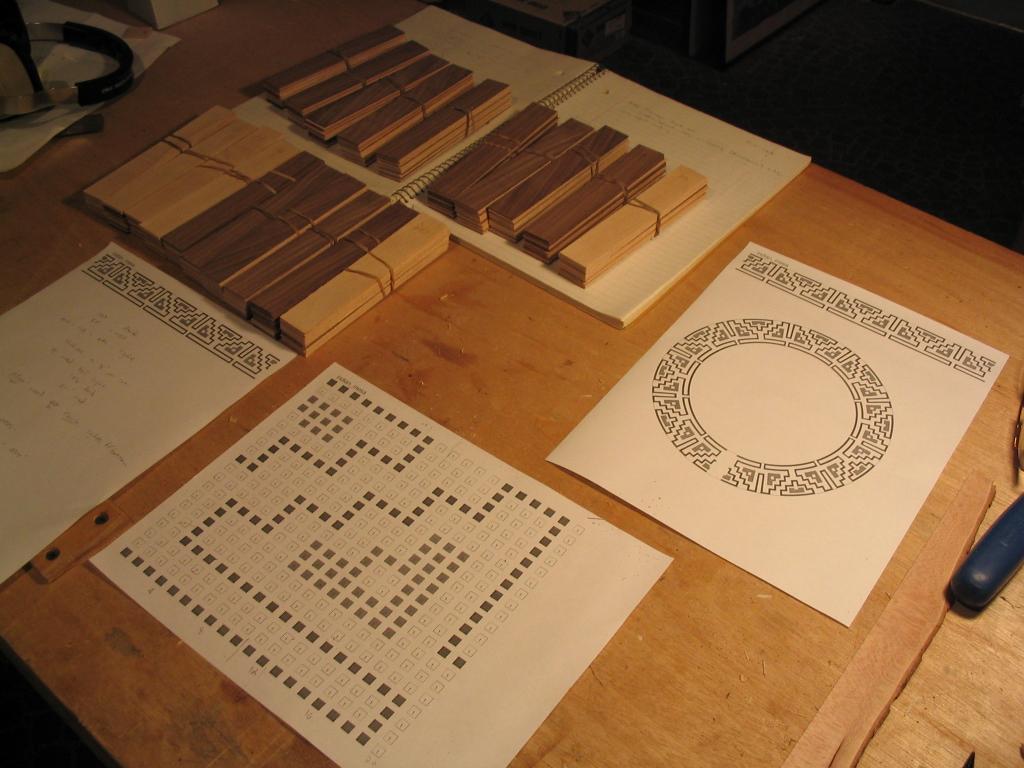
The column logs are now assembled, picking the correct sequence of colors for the laminates in each column. The logs are shown here prior to glue-up, one log per column, with each having the appropriate color sequence to match the color squares in the corresponding column. It’s worth double-checking that the laminates in each log are in the correct order, as it’s frustrating to find that a log has its colors out of place after gluing, requiring a new log to be made.
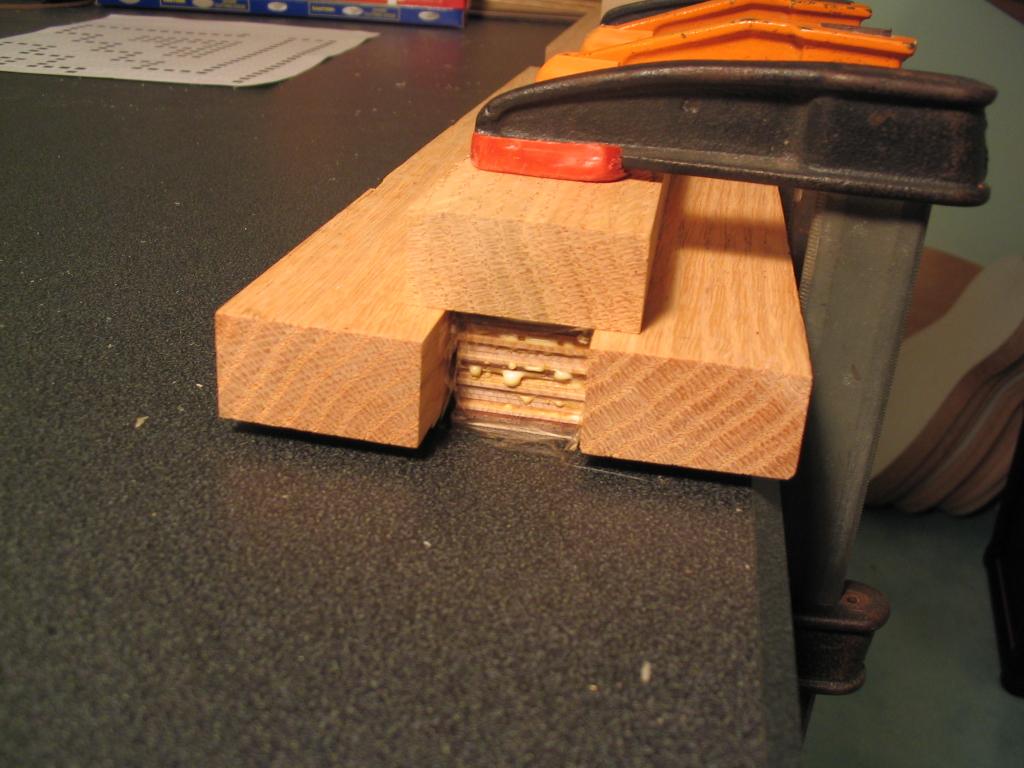
The column logs can now be glued up. One of the most important things is for the glued-up column logs to have exactly the same thickness. If the thickness of the logs varies, then the columns will be of different heights, and the rows in adjacent columns won’t match up, leading to discontinuities in the design. To make sure the column logs have the same glued-up thickness, cauls are made in the final thickness of the logs, and used on either side when clamping to keep the thicknesses uniform. The thichness of the cauls should allow approximately .002″ for each glue layer. Thus if a column log has 12 laminates of thickness .050″, then the caul thickness should be 12 * .050″ + 11 * .002″ = .622″. Note that in the image below, the cauls on either side have shims on the bottom that aren’t visible to bring them to the correct height. Also note that the column log has been wrapped in plastic wrap to keep the glue off the cauls.
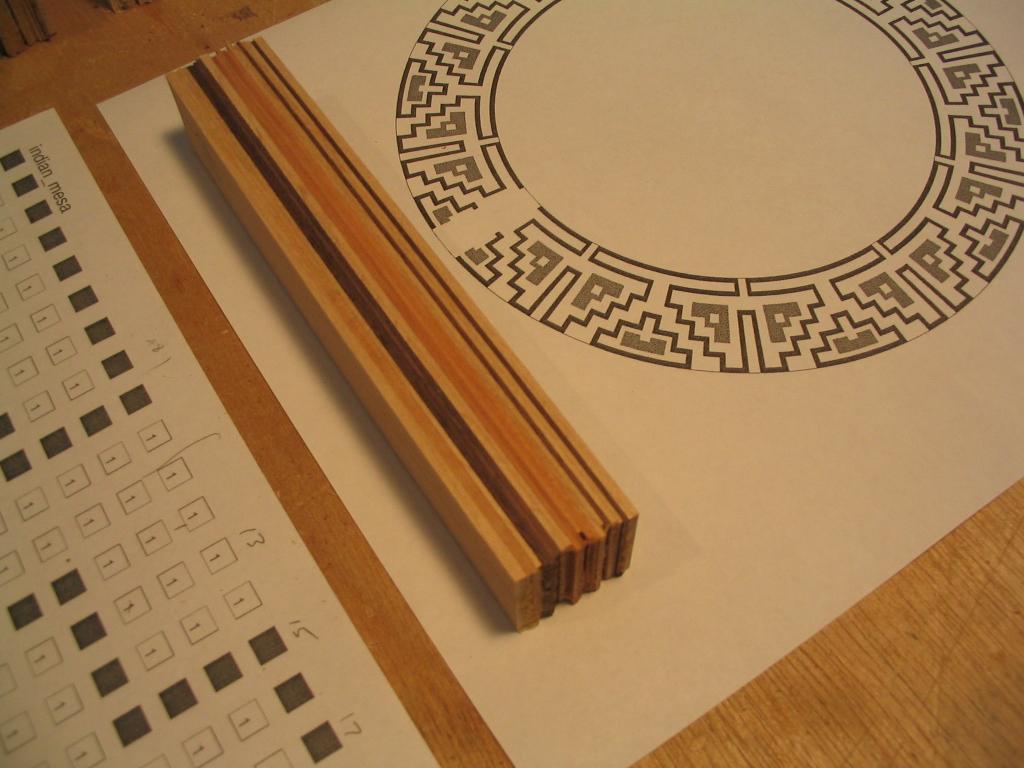
When the column logs have been glued up, their edges are squared up. The edge of each log should show the sequence of colors in the corresponding column.

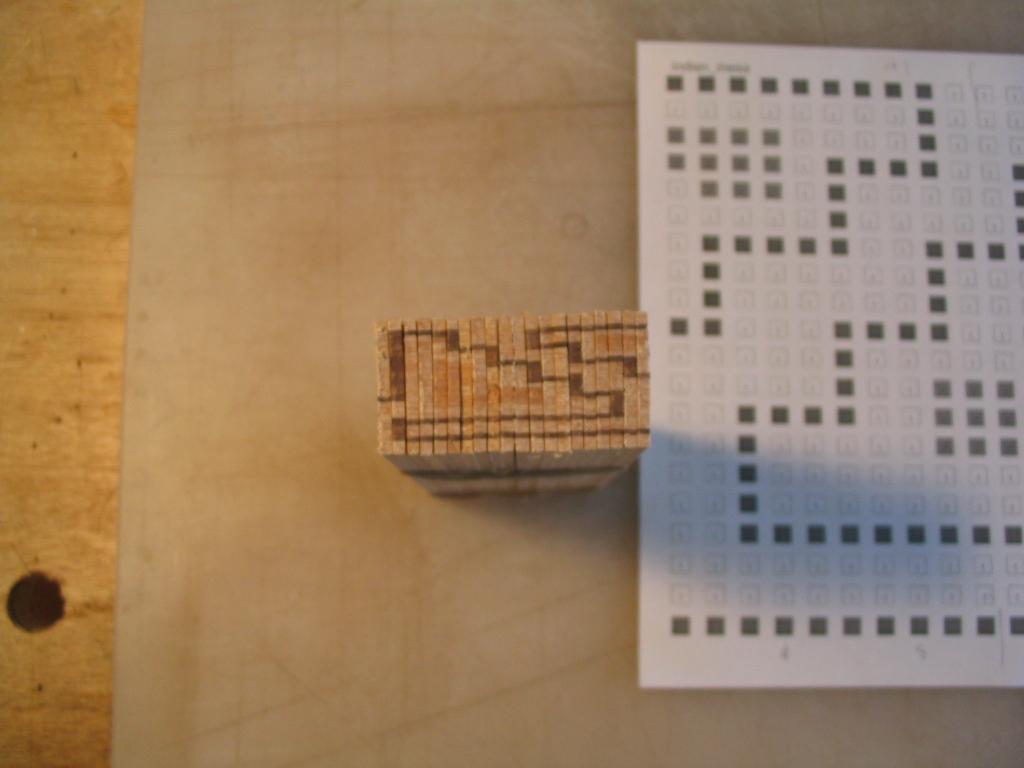
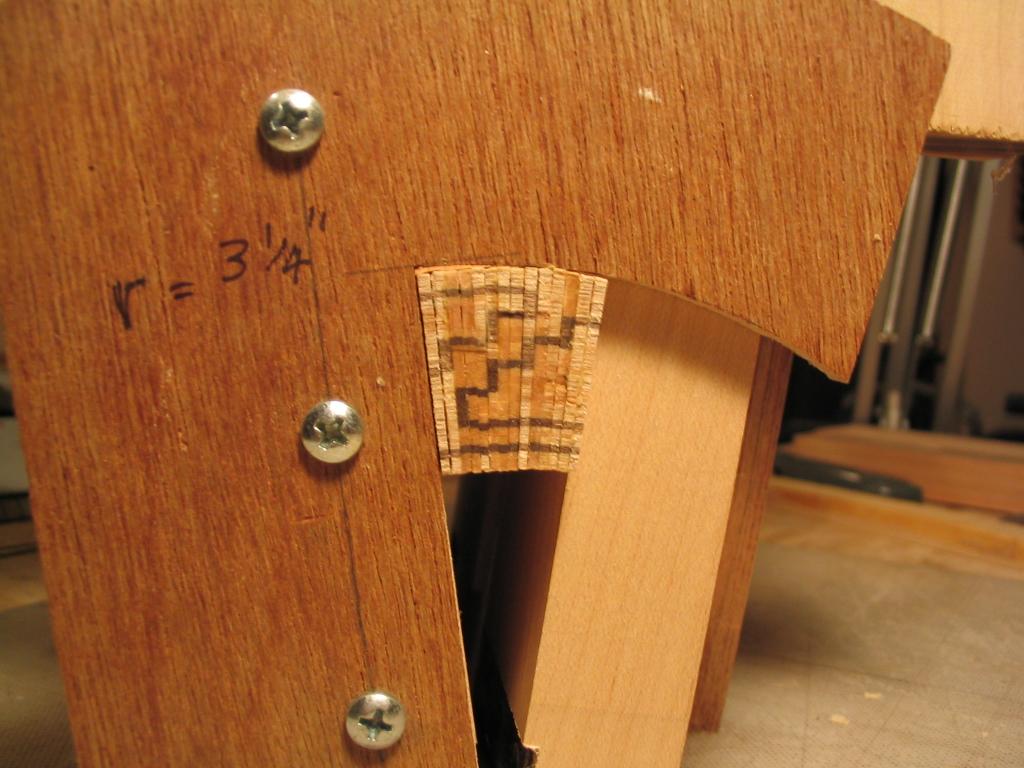
A column is now sliced off of the edge of each column log. The thickness of the slices determines the resulting width of the tile log.
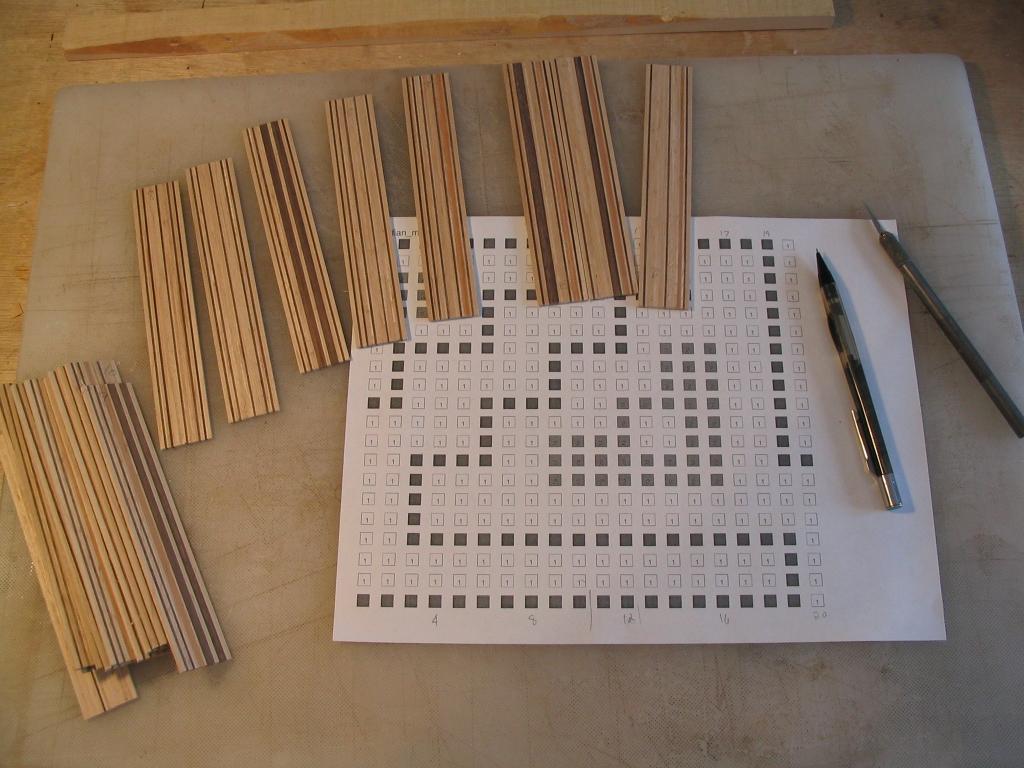
After sawing, the columns can be placed together to see the tile pattern in the end view.
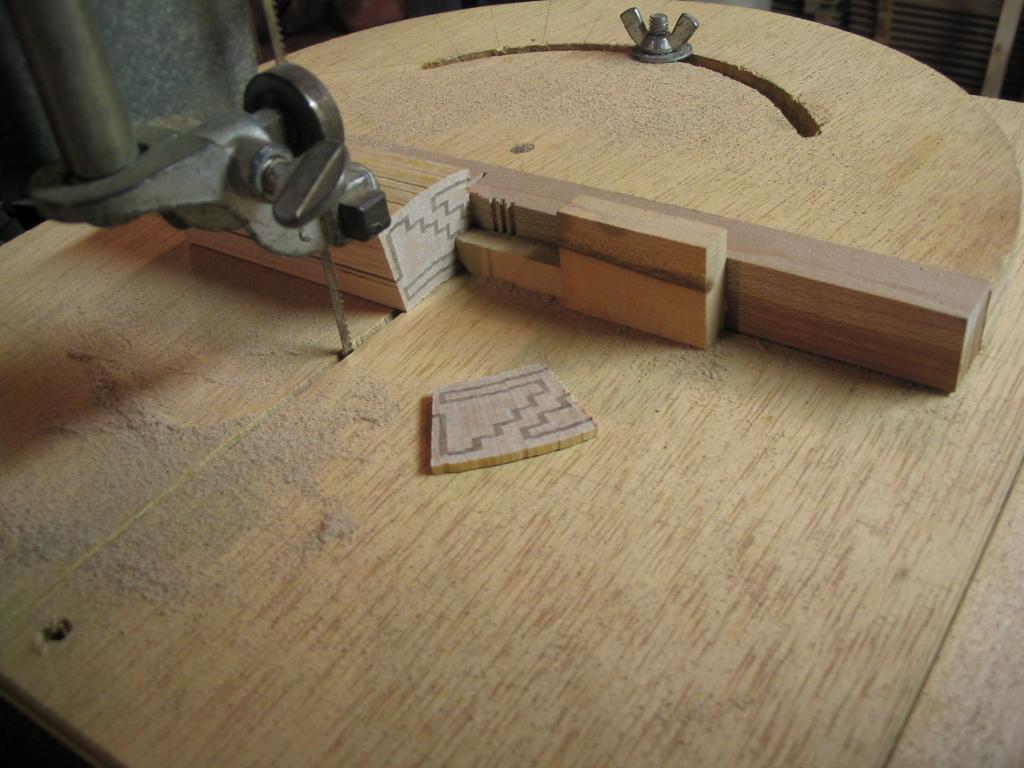
Before being glued together, however, the column slabs have to be tapered, so the resulting tile log and tiles will be tapered and will form a circle when glued together to form the rosette. The columns are tapered by placing them in a carriage that’s tapered side-to-side and run through the thickness sander. The columns must be tapered at exactly the right angle so that the tiles sliced from the tile log will have the correct angle to form a circle of the desired radius. However, the angle that must be used depends on the final thickness of the columns. (More on this later.)
In the photograph, the carriage has a side-to-side taper of .020″ per inch; this isn’t detectable in the photo.
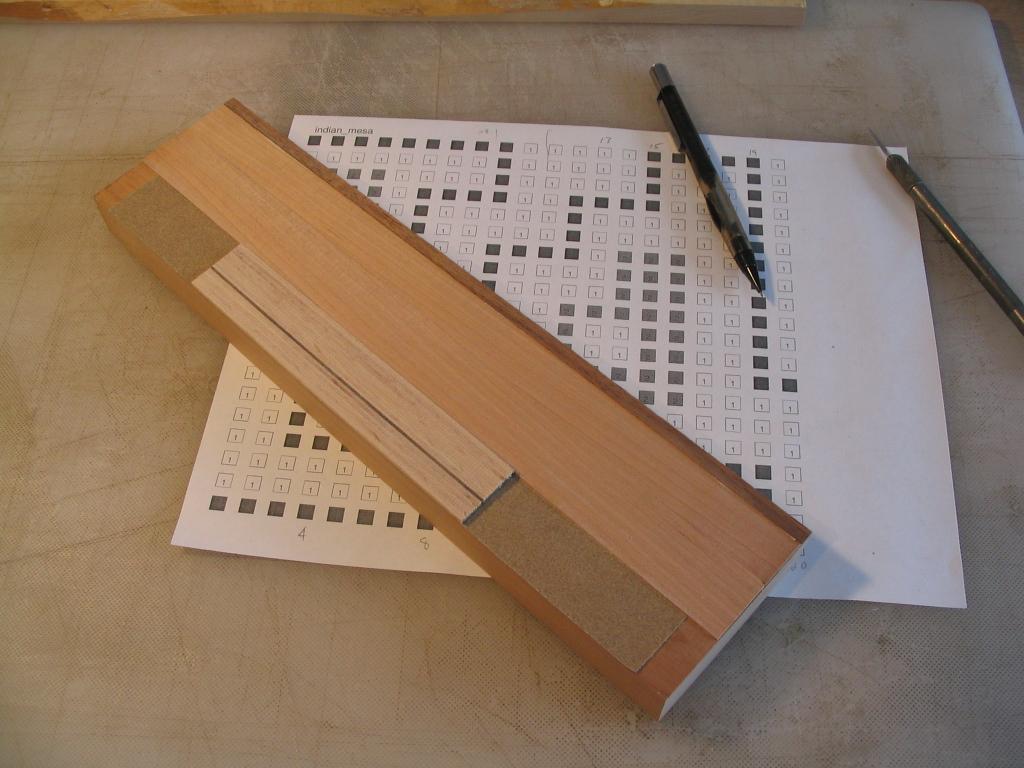
The carriage with the column slab on top is then run through the thickness sander. Note the sandpaper glued to the face of the carriage; this keeps the slab from slipping when it’s run through the thickness sander.

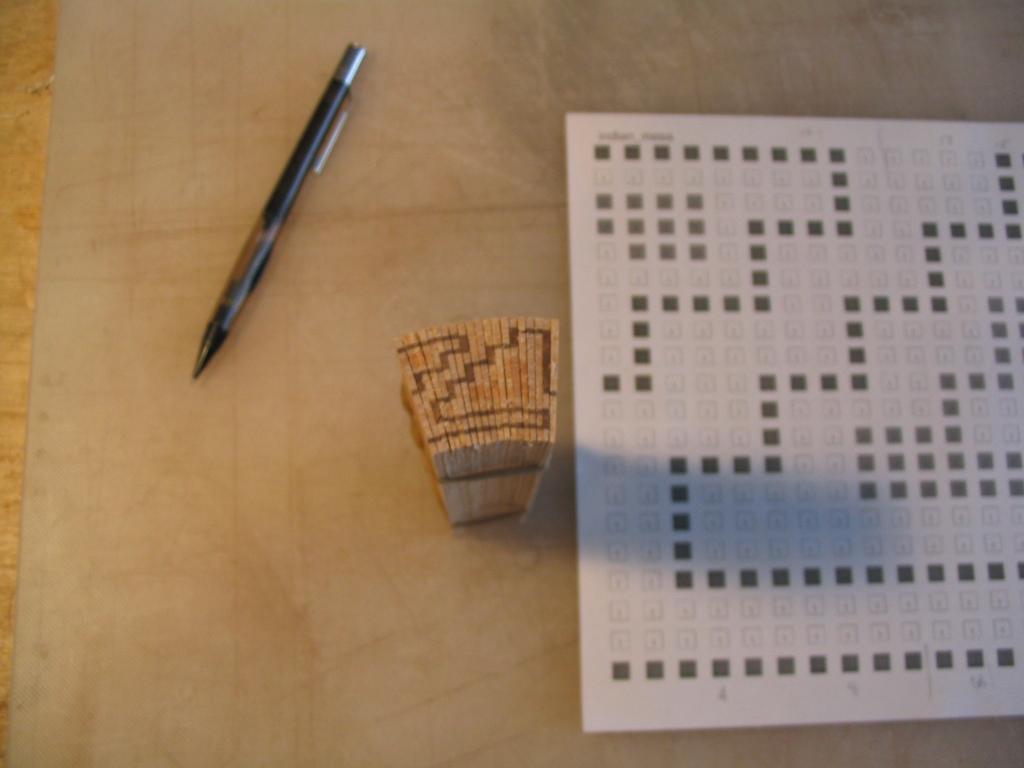
After tapering, the column slabs should form a tapered column log.
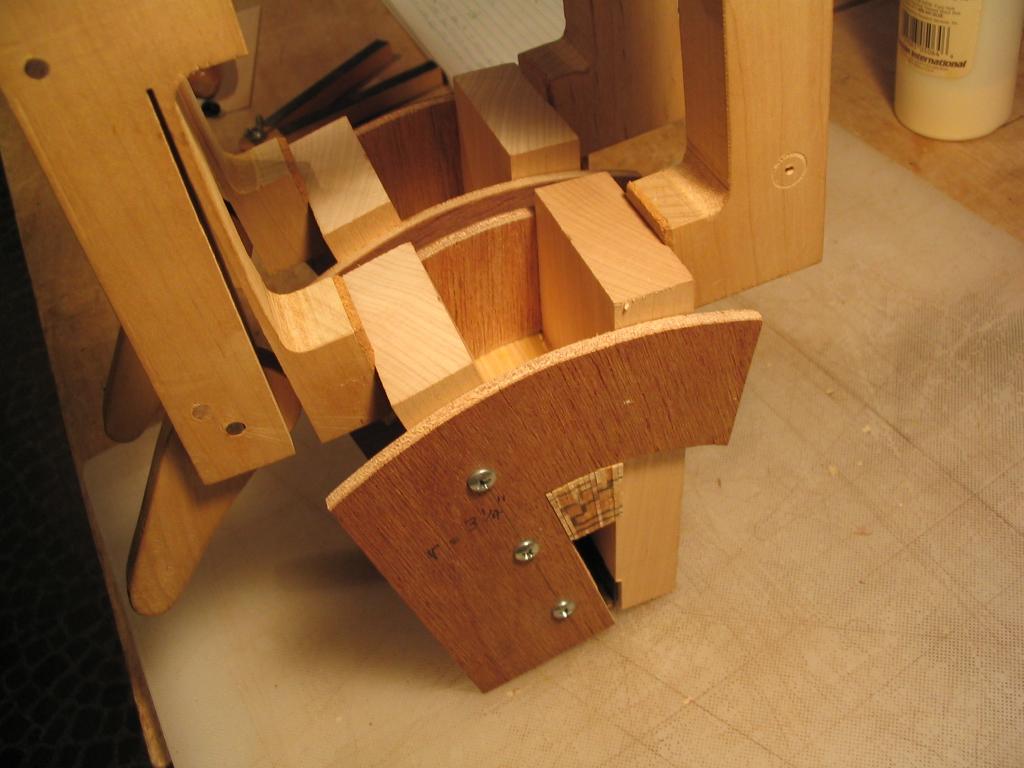
The column slabs can now be glued up to form the tile log. To make sure they stay aligned, the column slabs should be glued together one at a time. One complication is that since the column slabs are tapered, they’re difficult to clamp. A handy jig consists of two clamping cauls attached at one end to a hinge. These will apply clamping pressure evenly to the tapered tile log as successive column slabs are added. To keep the slabs from being squeezed out of the caul, plywood “stops” are attached that hold them at the correct radius in the jig.
When all of the column slabs have been glued on, tiles can be sliced off the end of the tile log. I use a carriage on the bandsaw with a very thin blade. I generally slice the tiles to about .070″ thickness.
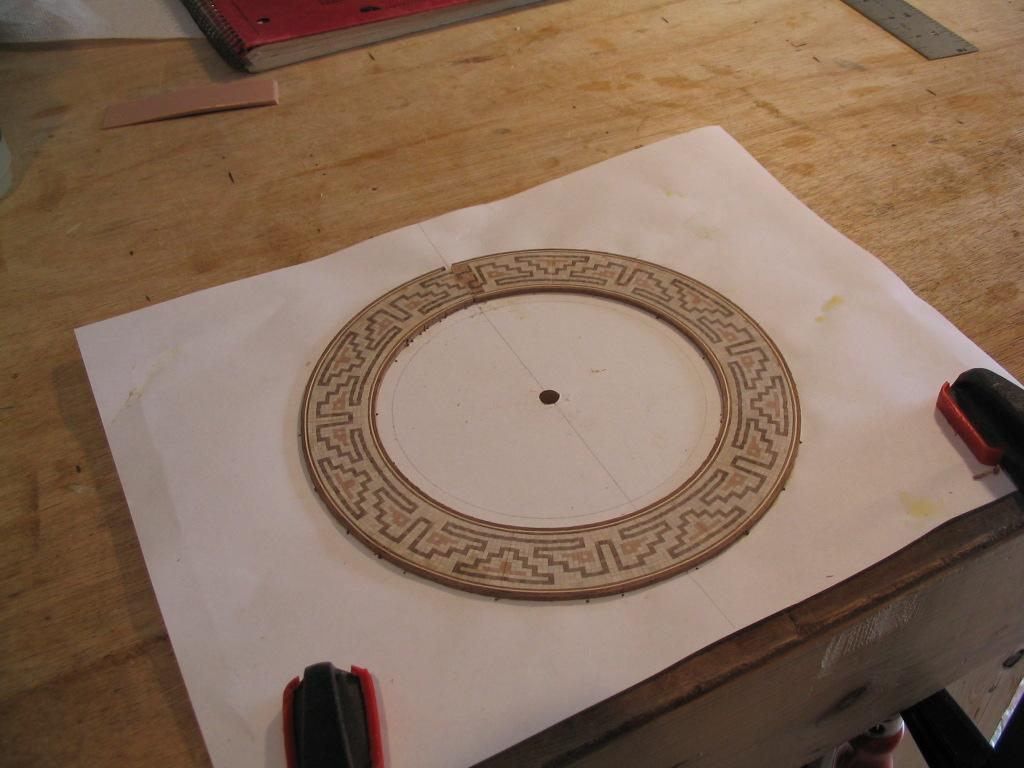
The cut tiles can now be glued into a circular rosette. A circle is traced onto a piece of paper that is used to assure that the tiles form a circle of the correct radius as they are glued together, rather than a spiral. I generally shoot for the inner radius of the rosette being 1/8″ to 1/4″ greater than the radius of the soundhole, after all the banding is glued onto the mosaic rosette. Each tile has its angle adjusted slightly as needed with a sanding block to make sure the design follows a perfect circle. The rosette tiles are glued edge-to-edge with Titebond, and when they’re pressed together the glue secures the tiles to the paper. (Note that the photograph below is from a different rosette than the one the tiles above are for.) There will likely be a need to use a partial tile to fill the last gap to close the circle. Since this part of the rosette will be covered by the fingerboard, the lack of pattern match where the partial tile joins the first tile won’t be visible.
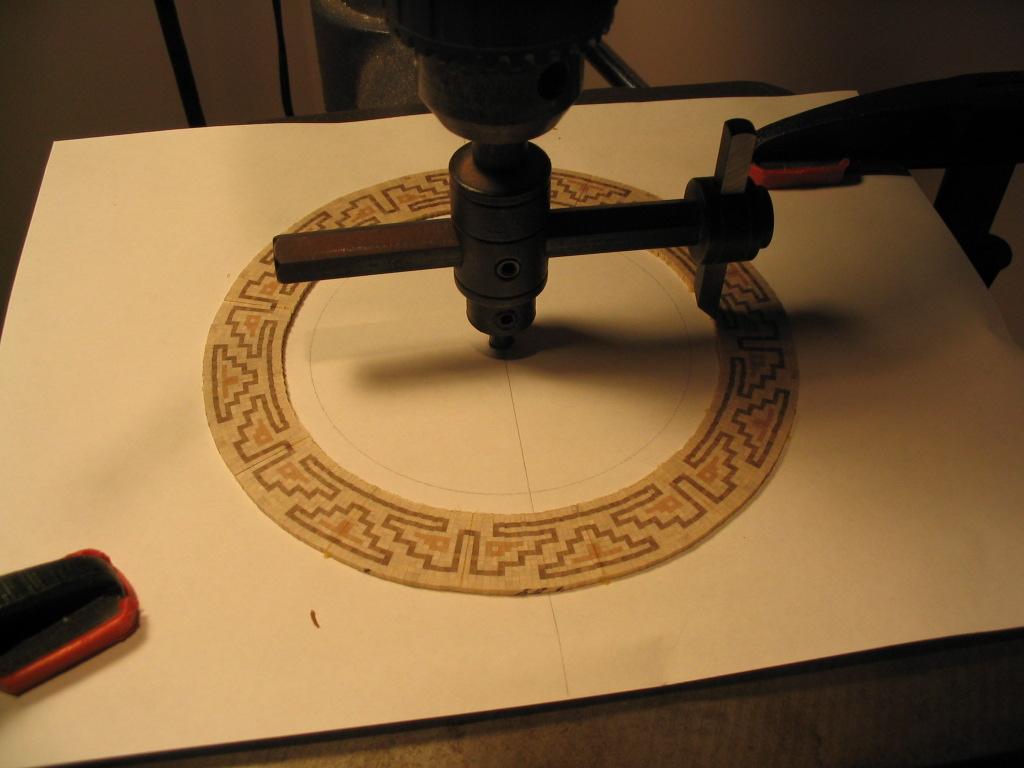
When the rosette is completed, the paper that the rosette is attached to is glued to a workboard of 1/4″ plywood. A 1/4″ hole is drilled at the position of the center of the rosette circle, to be used to guide a flycutter to trim the inner and outer radii of the rosette. The photo below shows the rosette workboard clamped to the drill press table, with the flycutter set to trim the inner radius. Significant protective gear is needed when using a flycutter, as it has significant rotating mass. A heavy drill press is an absolute must to use a flycutter. It’s possible (and significantly safer) to trim the inner and outer edges with a compass and router or knife blade.
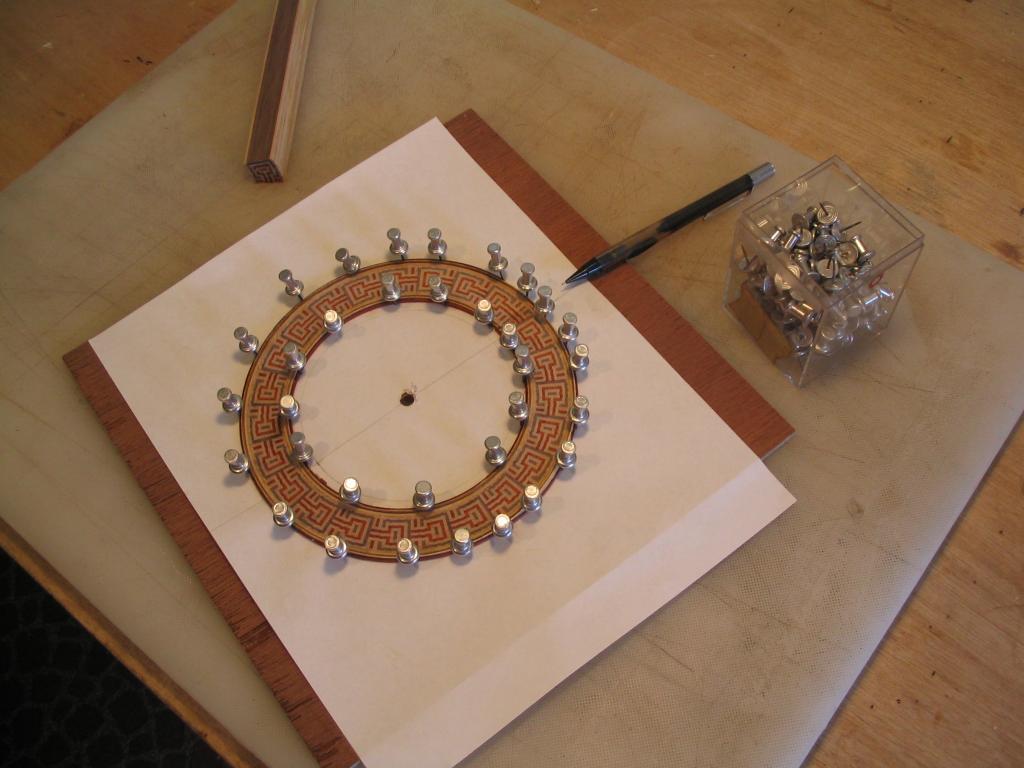
Banding is now glued to the inner and outer edges of the mosaic rosette. I generally use several alternating dark and light veneer strips, with a final thicker strip on the inside and outside. Push pins are used to secure the banding strips. The ends of the banding strips are positioned at the partial tile that closed the rosette; since this will be under the fingerboard, the ends of the banding strips don’t need to meet exactly.
When the banding glue has dried, the banding can be planed so it is flush with the top surface of the rosette.
Previous: Top and back plate gluing |
Next: Inlaying the rosette |