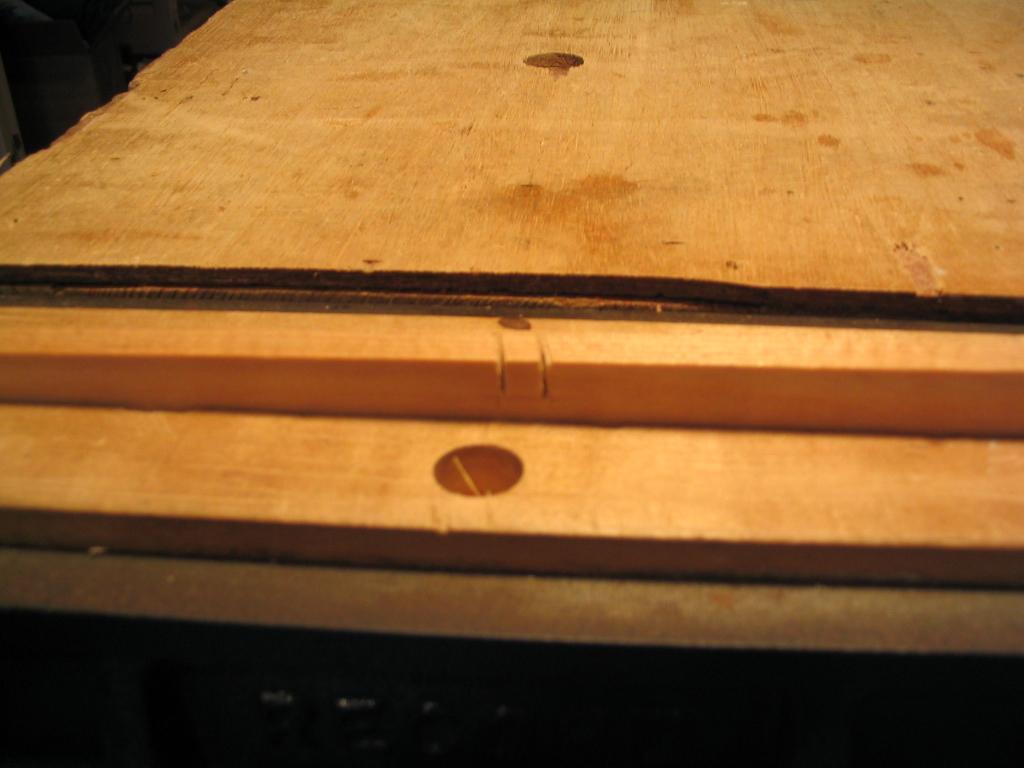
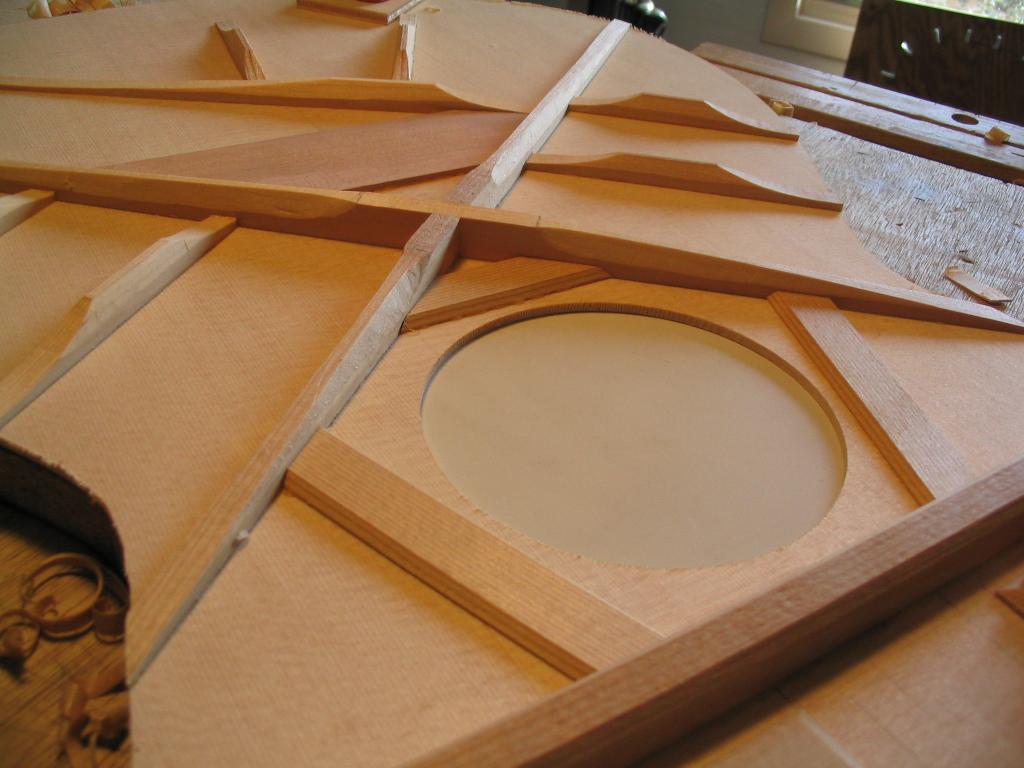
The top of an acoustic guitar has braces glued on the underside, both to give the top extra strength – the “X” brace and upper-bout struts – and to improve the tone of the resulting instrument. The photo below shows the underside of the top with the position of the X brace and upper bout cross brace lightly marked in pencil.
The design of the bracing pattern is unique to each style of guitar, and different for different builders. There’s both physic and lore at play in the selection of the bracing design. The traditional bracing design for a steel-string acoustic guitar is based on a central “X” brace that provides the main structural stability. Cross braces are used at the top of the body to help support the fretboard, smaller wing braces run from the X brace to the sides to help provide structural support, and several “tone” braces extend into the lower bout of the guitar to influence the tone. These last braces are the subject of much discussion. Many different arrangements are in use, and their precise effect on the tone is pretty much a matter of speculation. (One major producer of very well-known and widely available high-end guitars once said at a guitar makers’ conference that he felt you could throw these tone braces on blindfolded and likely couldn’t tell the difference in sound in the finished instrument.)
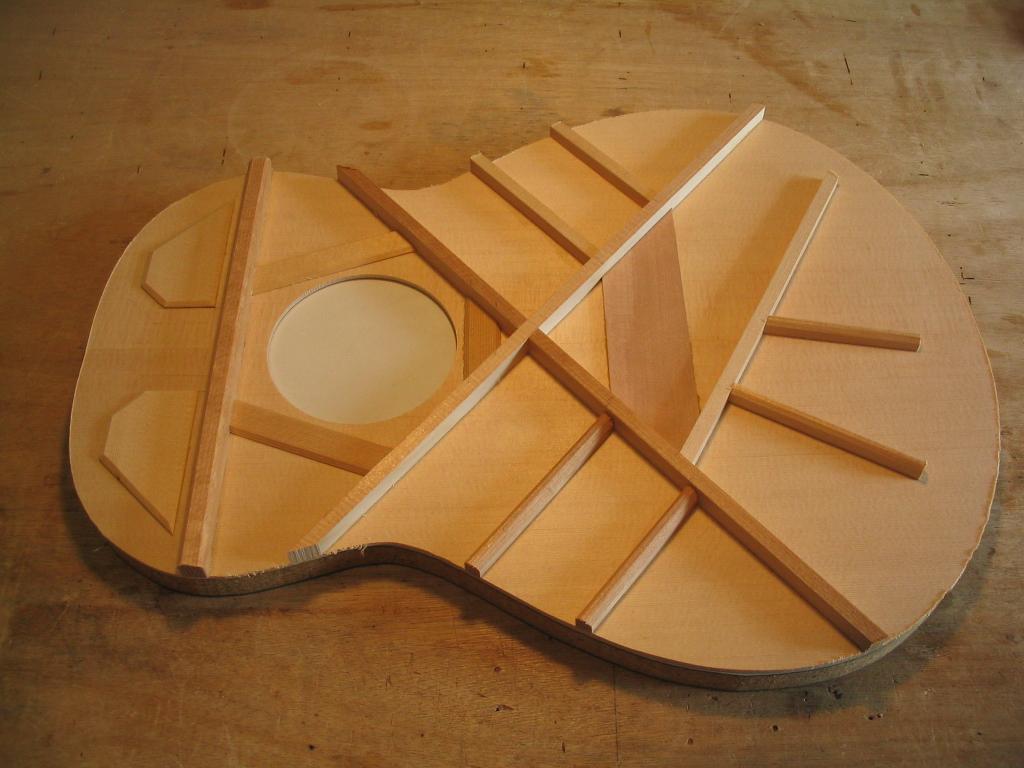
The diagram below shows the bracing on a typical guitar top.

Probably one of the more important features for both strength and tone is the angle of the X brace. The main vibrational area of the top plate is the region in the lower bout below the X brace, where the tone braces and bridge plate are located. By making the angle of the X brace wider, you increase this vibrational area. But this wider X angle also makes the X braces less longitudinal, meaning they can less help support the top against the longitudinal pull of the strings. I generally use about a 100 degree angle for the X brace angle, opening up the vibrational area a bit more than a right (90 degree) angle would but still providing good structural reinforcement.
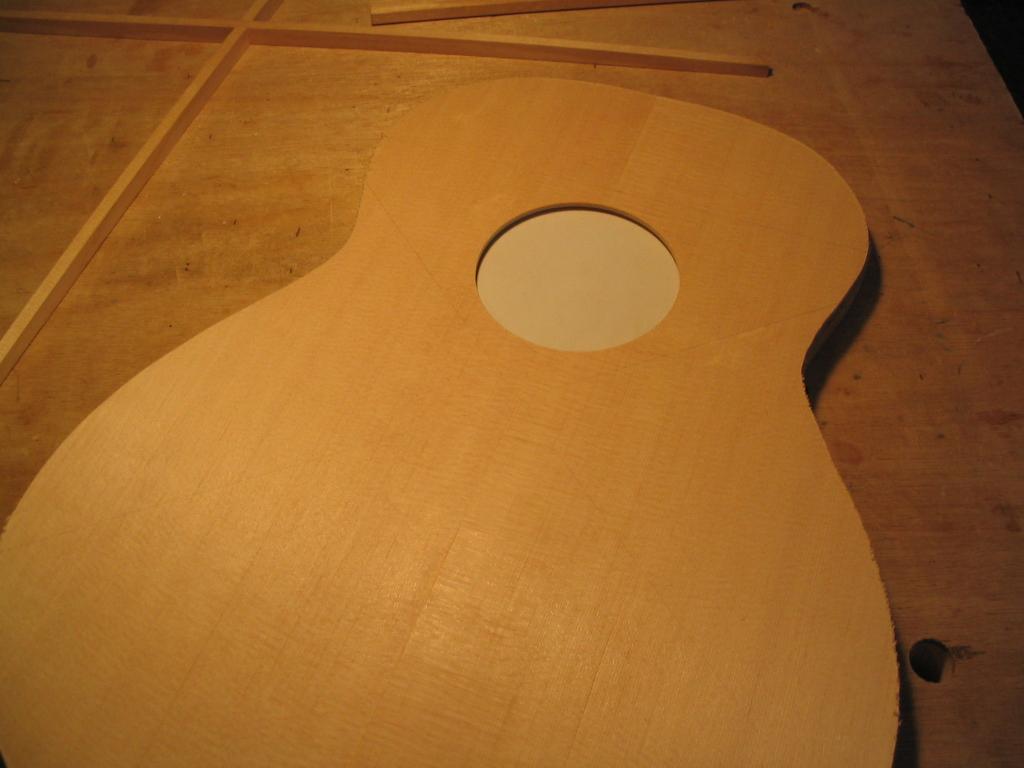
Similarly, the location of the X brace’s center on the top is important in determining the vibrational area. I usually locate the top edge of the X 1-1/8″ to 1-1/4″ below the bottom edge of the soundhole.
Another important factor is the dimensions of the braces, their height and width. I’ve used a number of different bracing dimensions over the years, Currently, I use 9/16″ high by 5/16″ wide for the X braces, 3/8″ high by 5/16″ wide for the tone and diagonal braces, and 1/2″ wide by 1/2″ high for the cross brace above the soundhole. In general, making a brace wider or taller will make it stiffer, but the height has much more impact on stiffness than the width (stiffness increases linearly with change in width, but cubically with change in height). Thus for a larger body style that might need more brace stiffness for support, it’s more effective to increase the brace height than its width. An article discussing this effect and how to estimate changes in brace strength (among other quantities) can be found here.
The wider areas seem at the top of the bracing diagram, and beside the soundhole, are spruce reinforcement plates about 1/8″ thick, made from leftover material from the top. The bridge plate is located under the bridge, and helps reinforce the top from the tremendous force that the bridge places on the top. This is generally made of very hard and stiff material like maple or rosewood; I typically use dogwood at a thickness of about .090″.
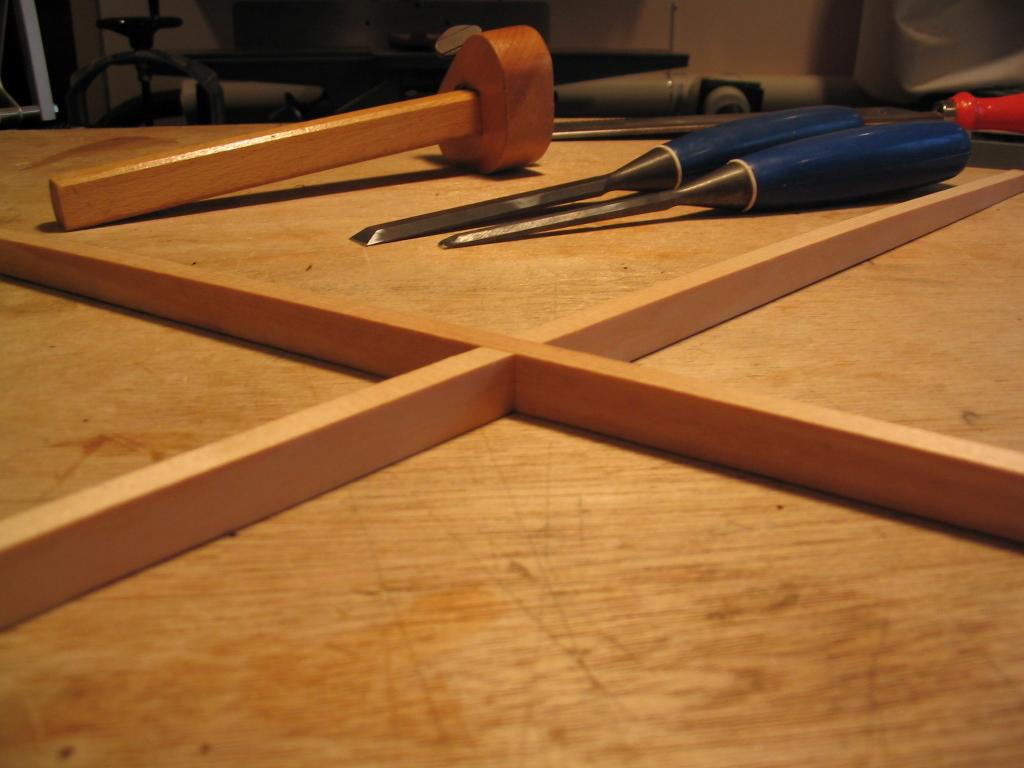
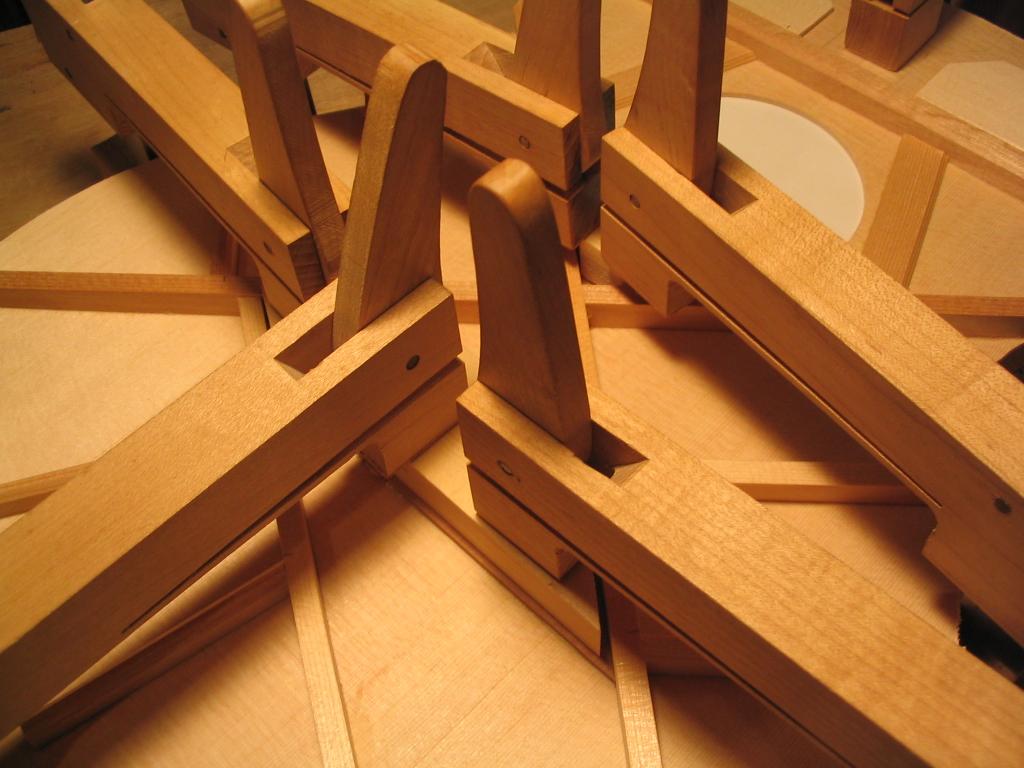
The X brace legs cross, and so must have a lap joint cut before gluing. The joint is marked using an angle gauge since the braces don’t necessarily meet at a right angle, depending on the bracing design. The edges of the slot are then cut in each leg with a dovetail saw, the center is chopped out, and the sides are pared with a chisel to get a tight fit. (If the sawcut is good, paring may be unnecessary, but it’s important to get a tight joint.)
The photo below shows the completed X brace, with joints cut. The legs are glued together at the same time that the brace is glued to the top. Notice how the top surface (which will be glued down to the top) is arched.
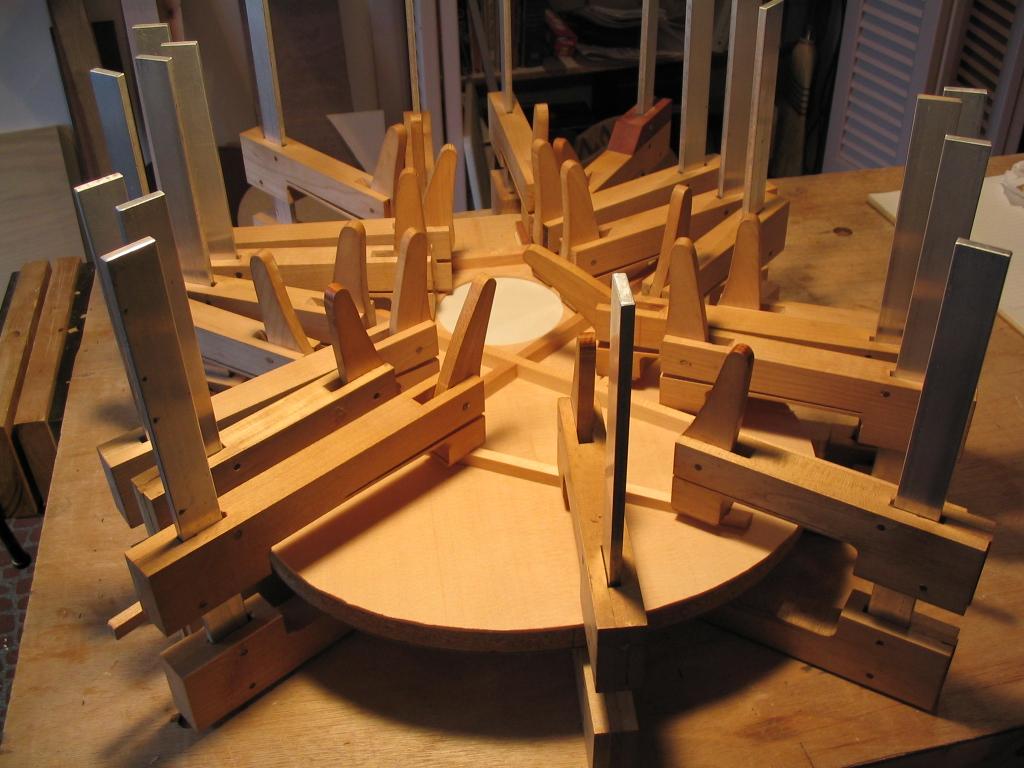
In the image below the X brace is being glued to the top. Glue has been applied to the lap joint faces as well as the brace surfaces. The top is placed on an arched workboard whose arching matches that of the braces. An article on how to make such an arched workboard can be found here.

The photo below shows additional braces being glued to the top.
Below, the bridge plate is being glued (this one is .100″, made of dogwood). Note the caul on top of the plate; the bottom surface of this is arched to match the curvature of the arched workboard.
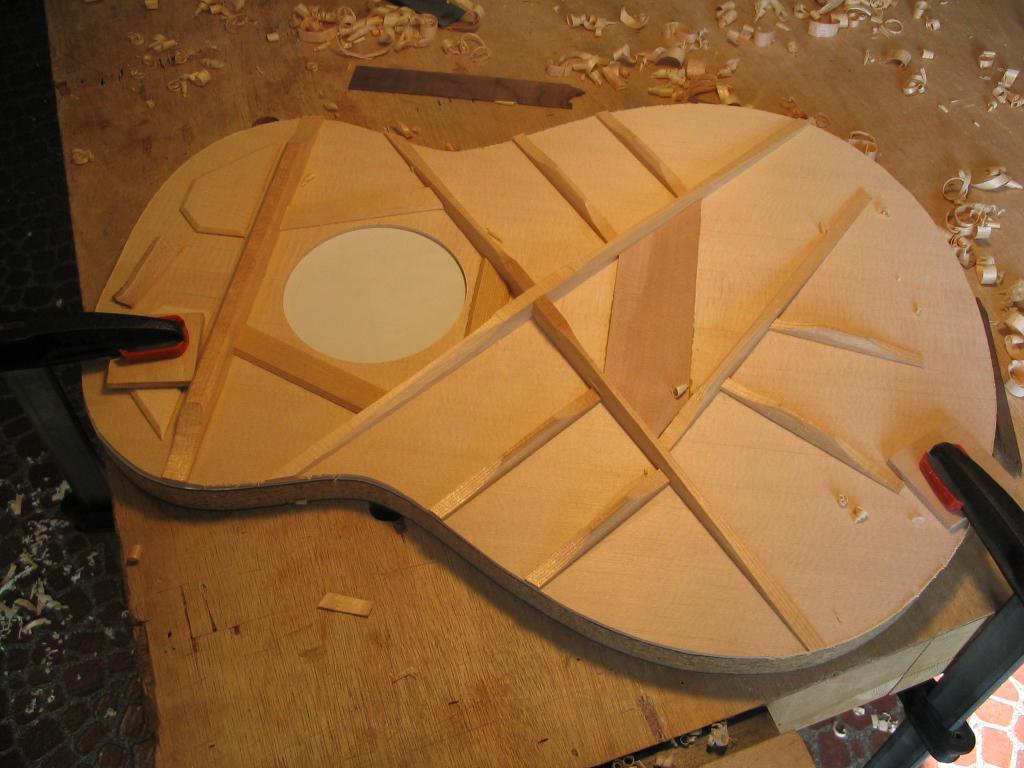
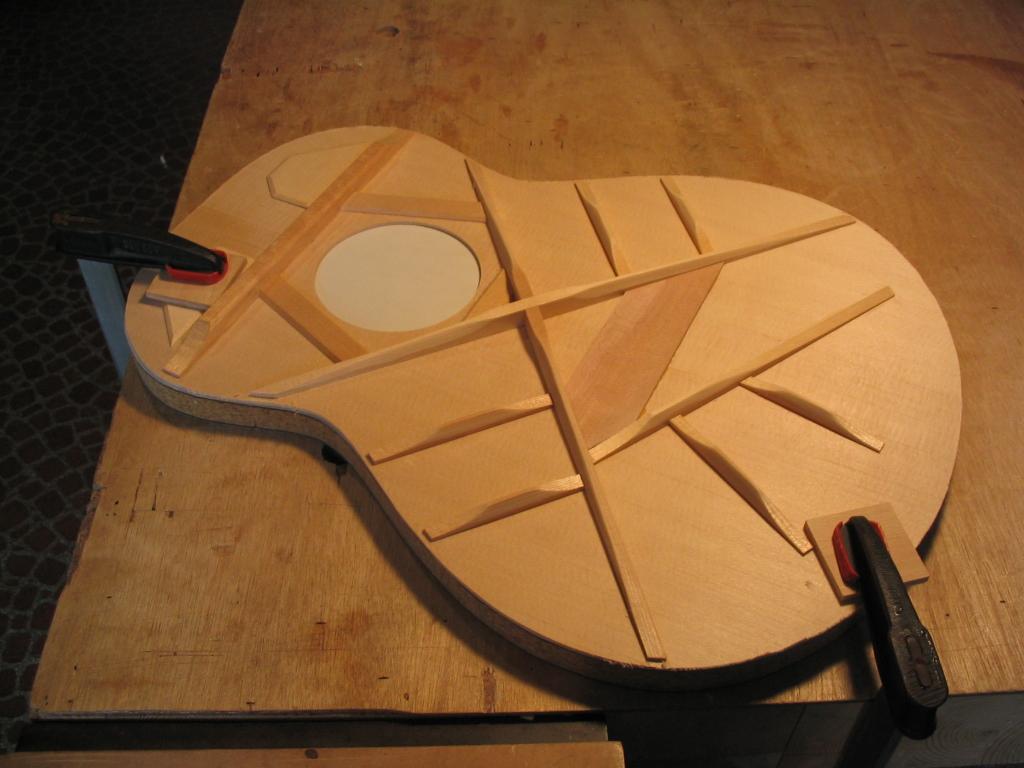
The top with all braces glued, but unshaped, is shown below.
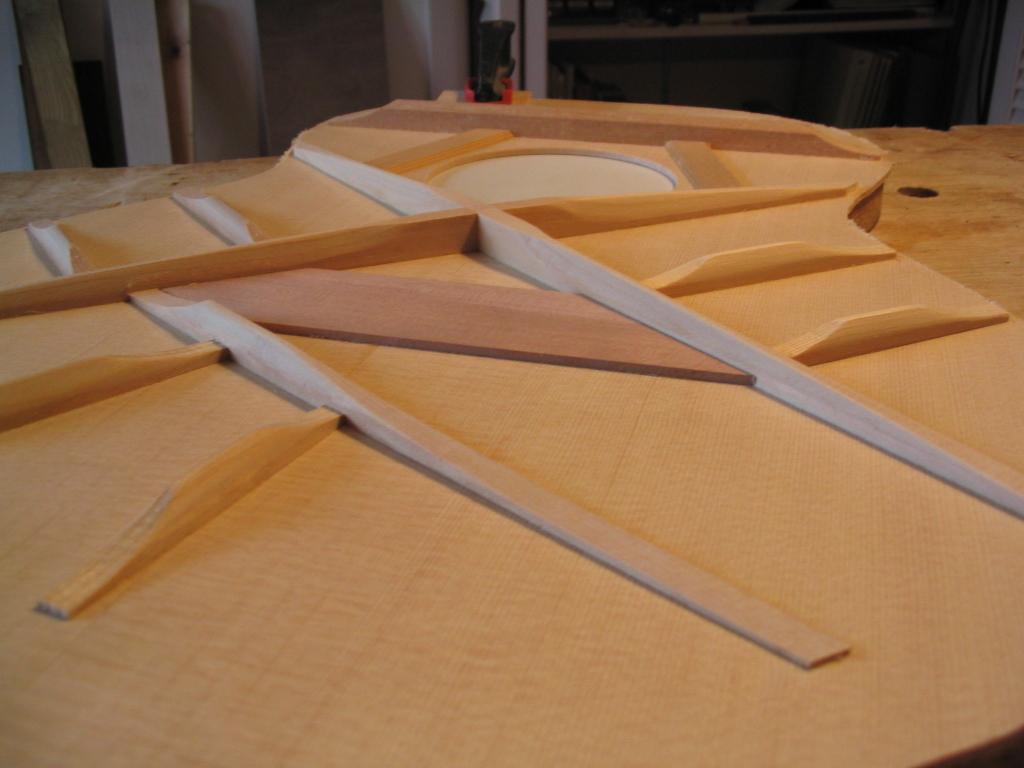
The next few photos show the braces after rough shaping with a sharp chisel. Note the tapering on the braces; they’re tapered to a thickness of approximately .090″ at the ends, and are also tapered bottom to top.
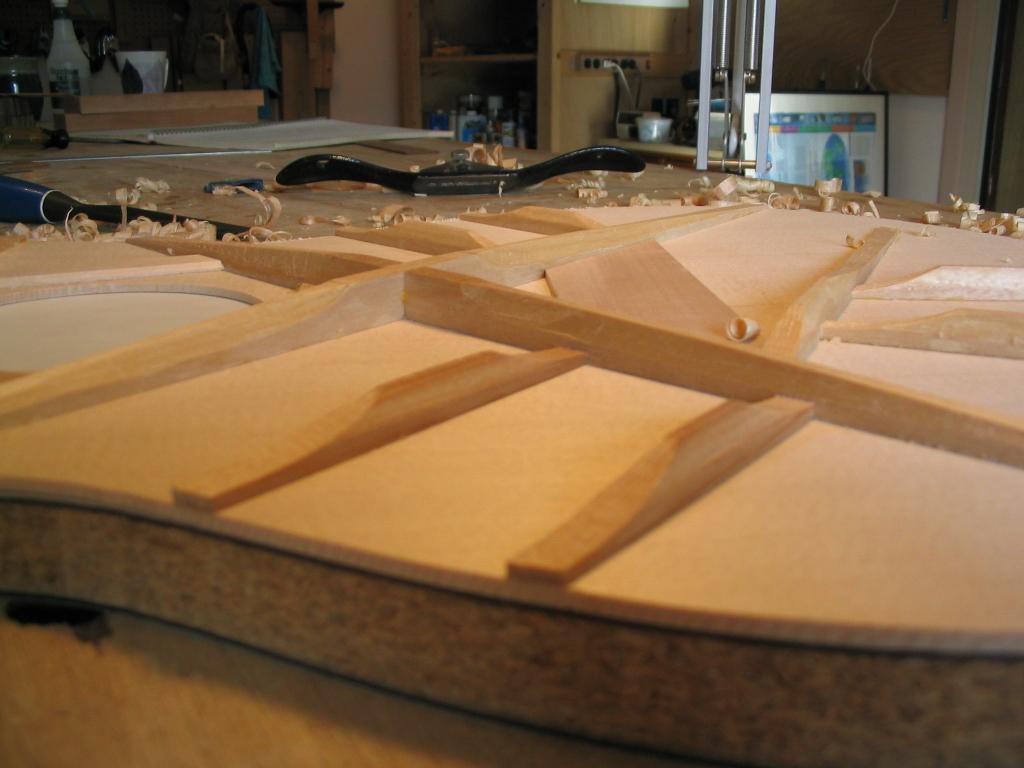
After rough shaping, the braces are sanded to smooth the surfaces. The result is shown in the photos below. Note that the ends of the braces have been trimmed where they meet the periphery; they’re trimmed to within the thickness of the sides from the edge.
Previous: Brace arching |
Next: Bending and joining the sides |